Teenitor Nail Charms Nail Art Kit with Review nail designs Buying Guide – Oemiu
Teenitor Nail Charms Nail Art Kit: Unleash Your Inner Nail Artist
The world of nail art has exploded in recent years, transforming from a simple manicure into a form of self-expression, creativity, and even high art. For aspiring nail artists and seasoned professionals alike, having the right tools and materials is paramount. The Teenitor Nail Charms Nail Art Kit offers a comprehensive solution, packed with a dazzling array of decorations and tools designed to elevate your nail game. But with so many options available, how do you know if this kit is the right choice for you? This in-depth guide will explore every facet of the Teenitor kit, providing a detailed review, exploring nail design ideas, and offering advice on how to get the most out of your purchase. Whether you’re dreaming of elaborate 3D butterfly nail designs or prefer the understated elegance of minimalist art, understanding the kit’s capabilities is the first step towards achieving your nail art goals.
Unboxing the Teenitor Nail Charms Kit: What’s Inside?
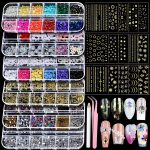
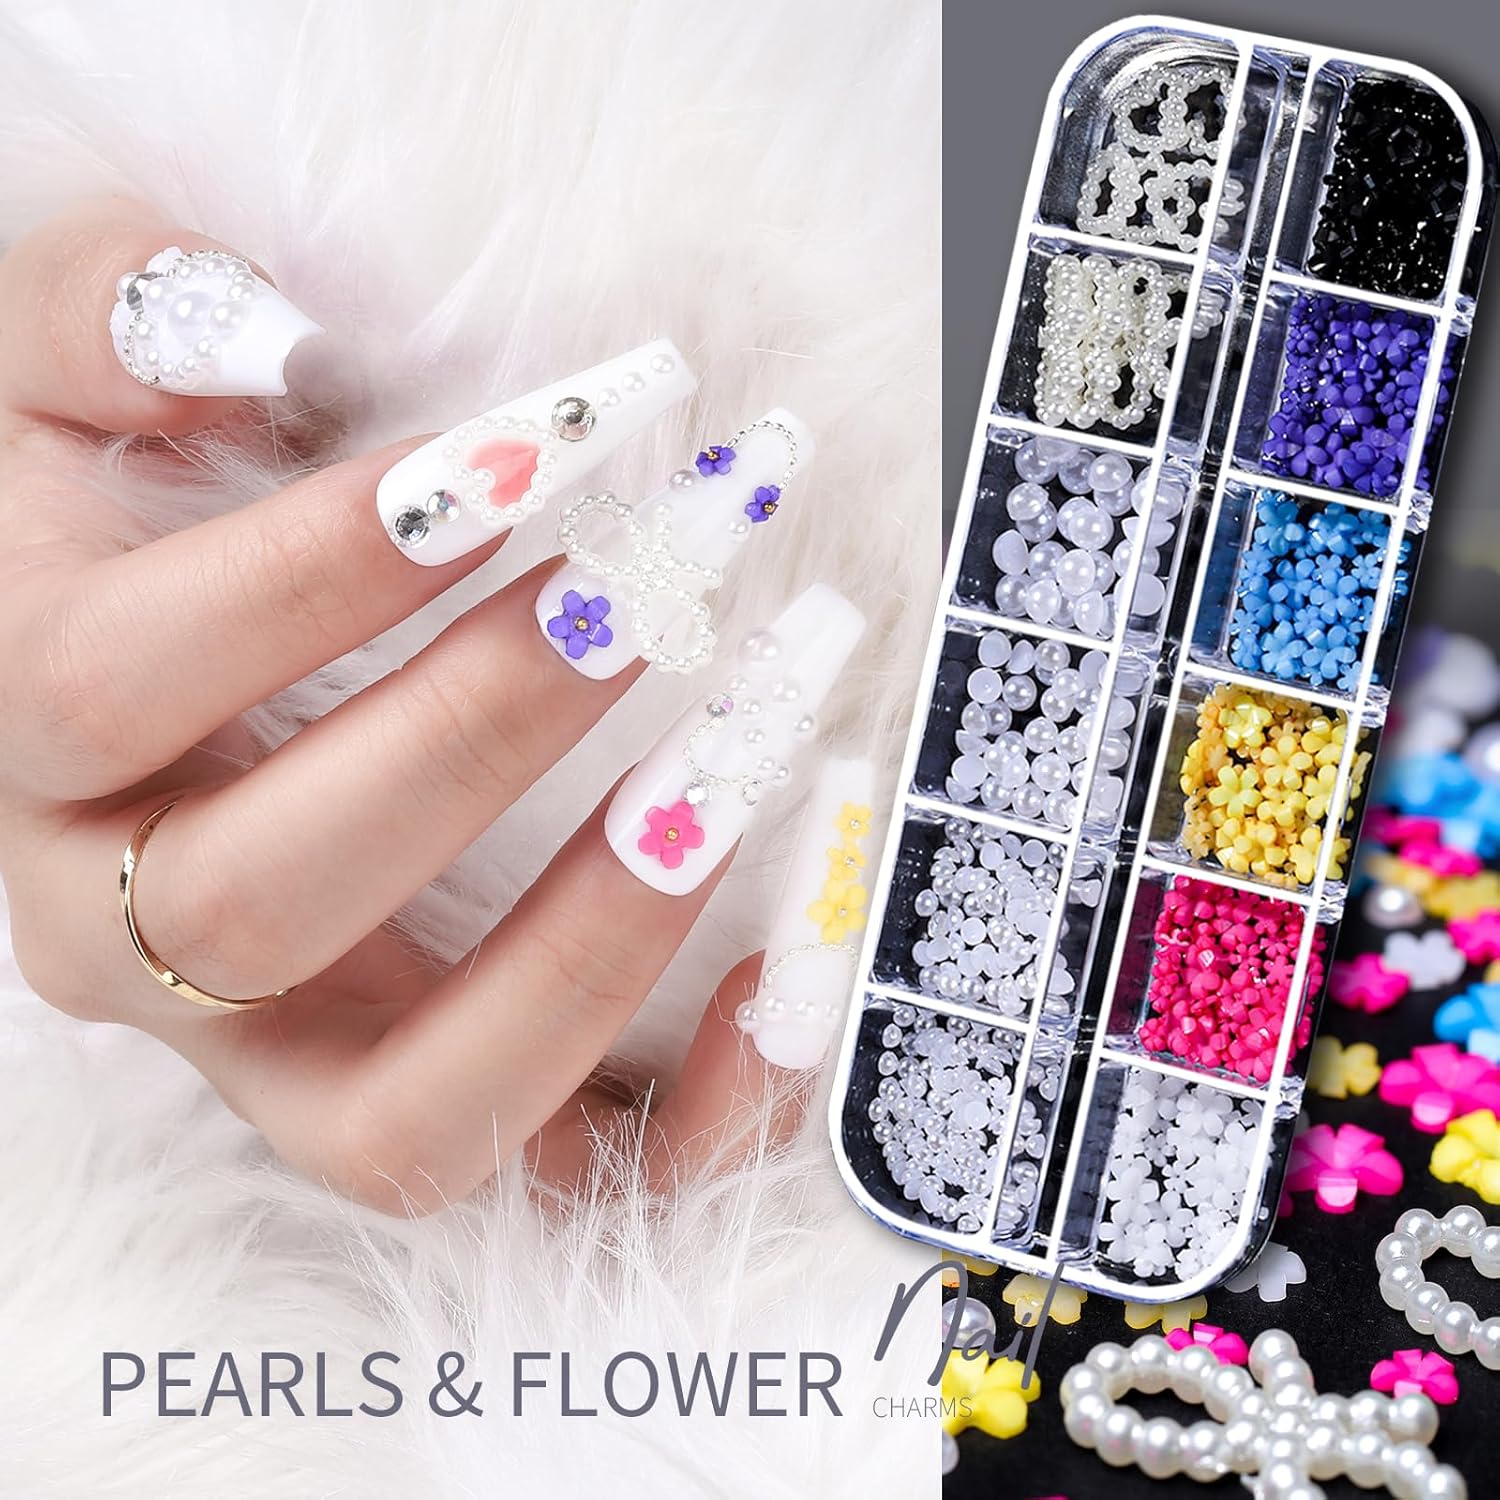
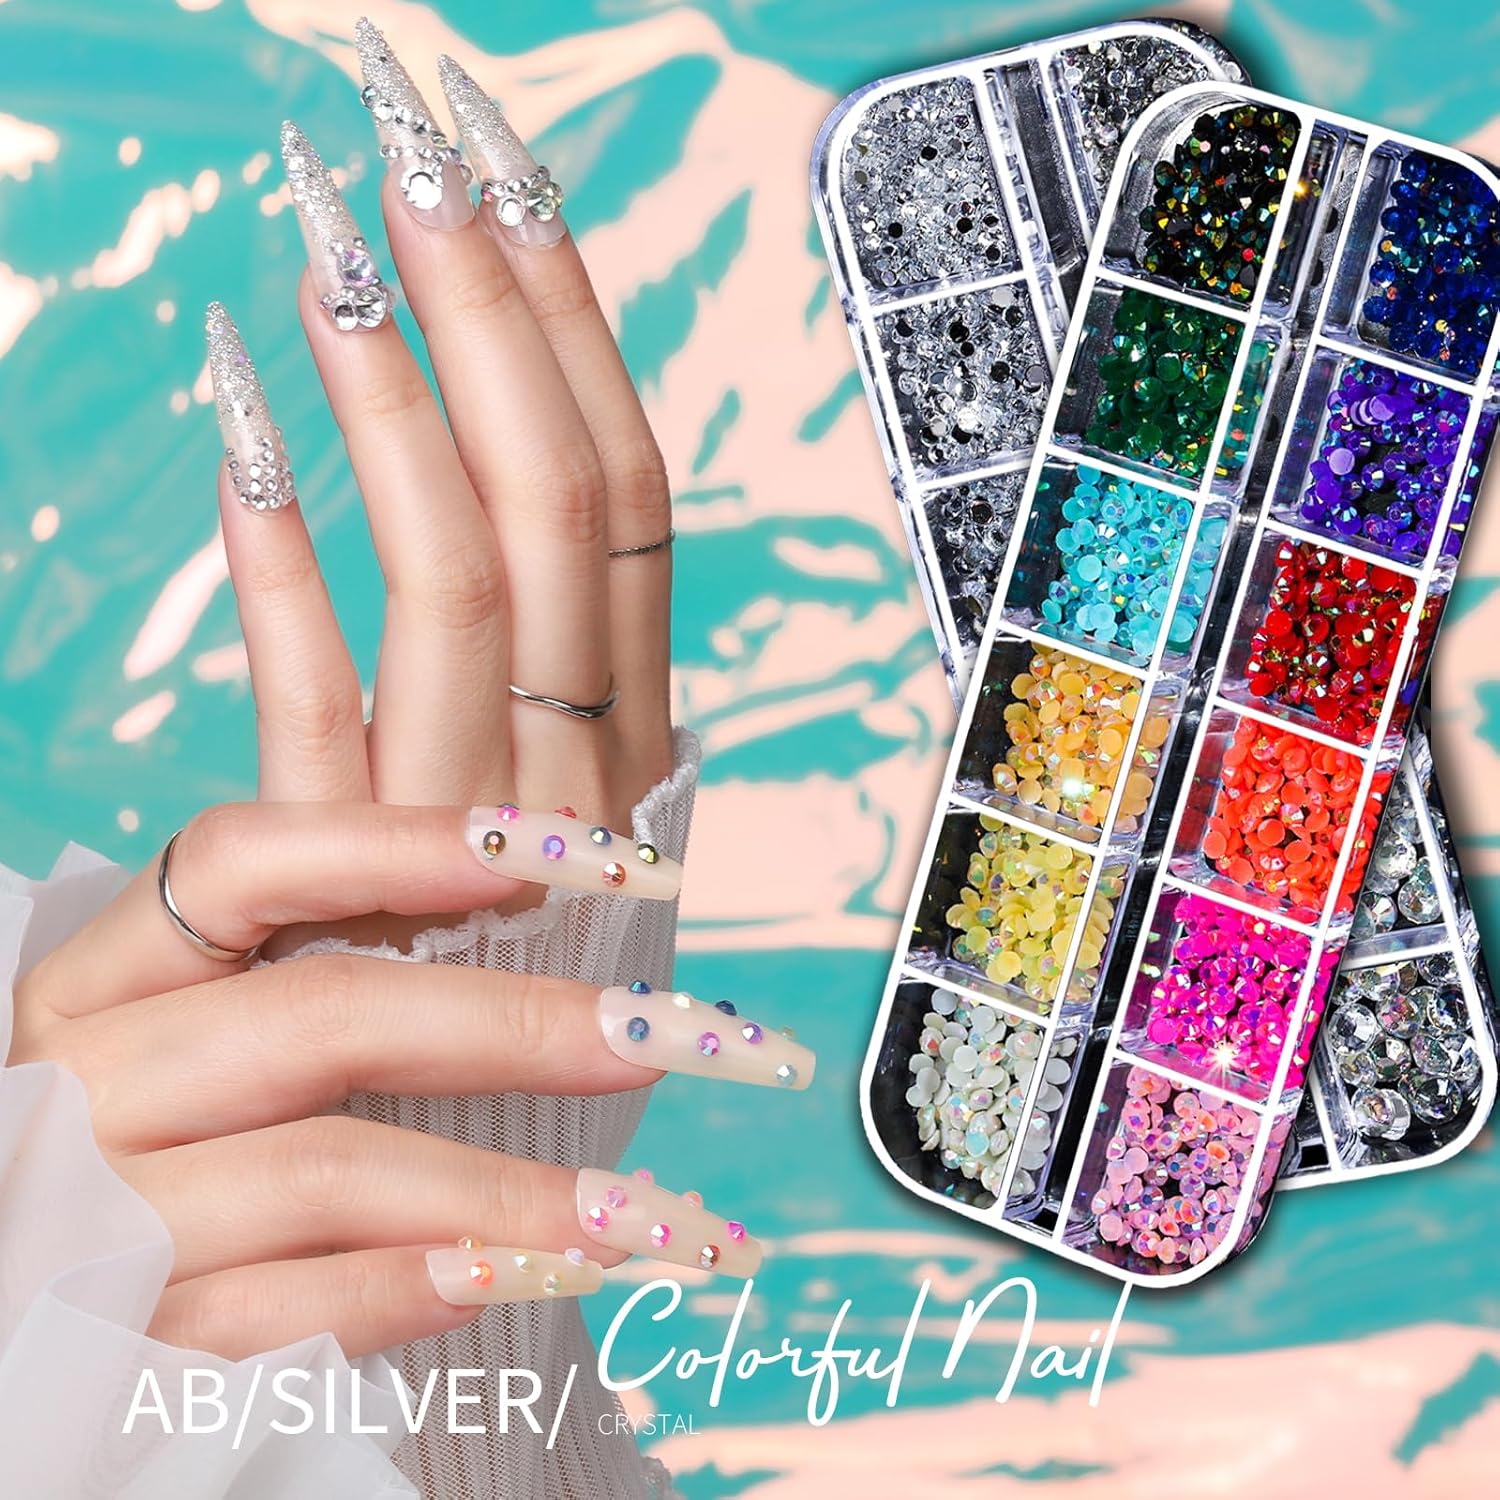
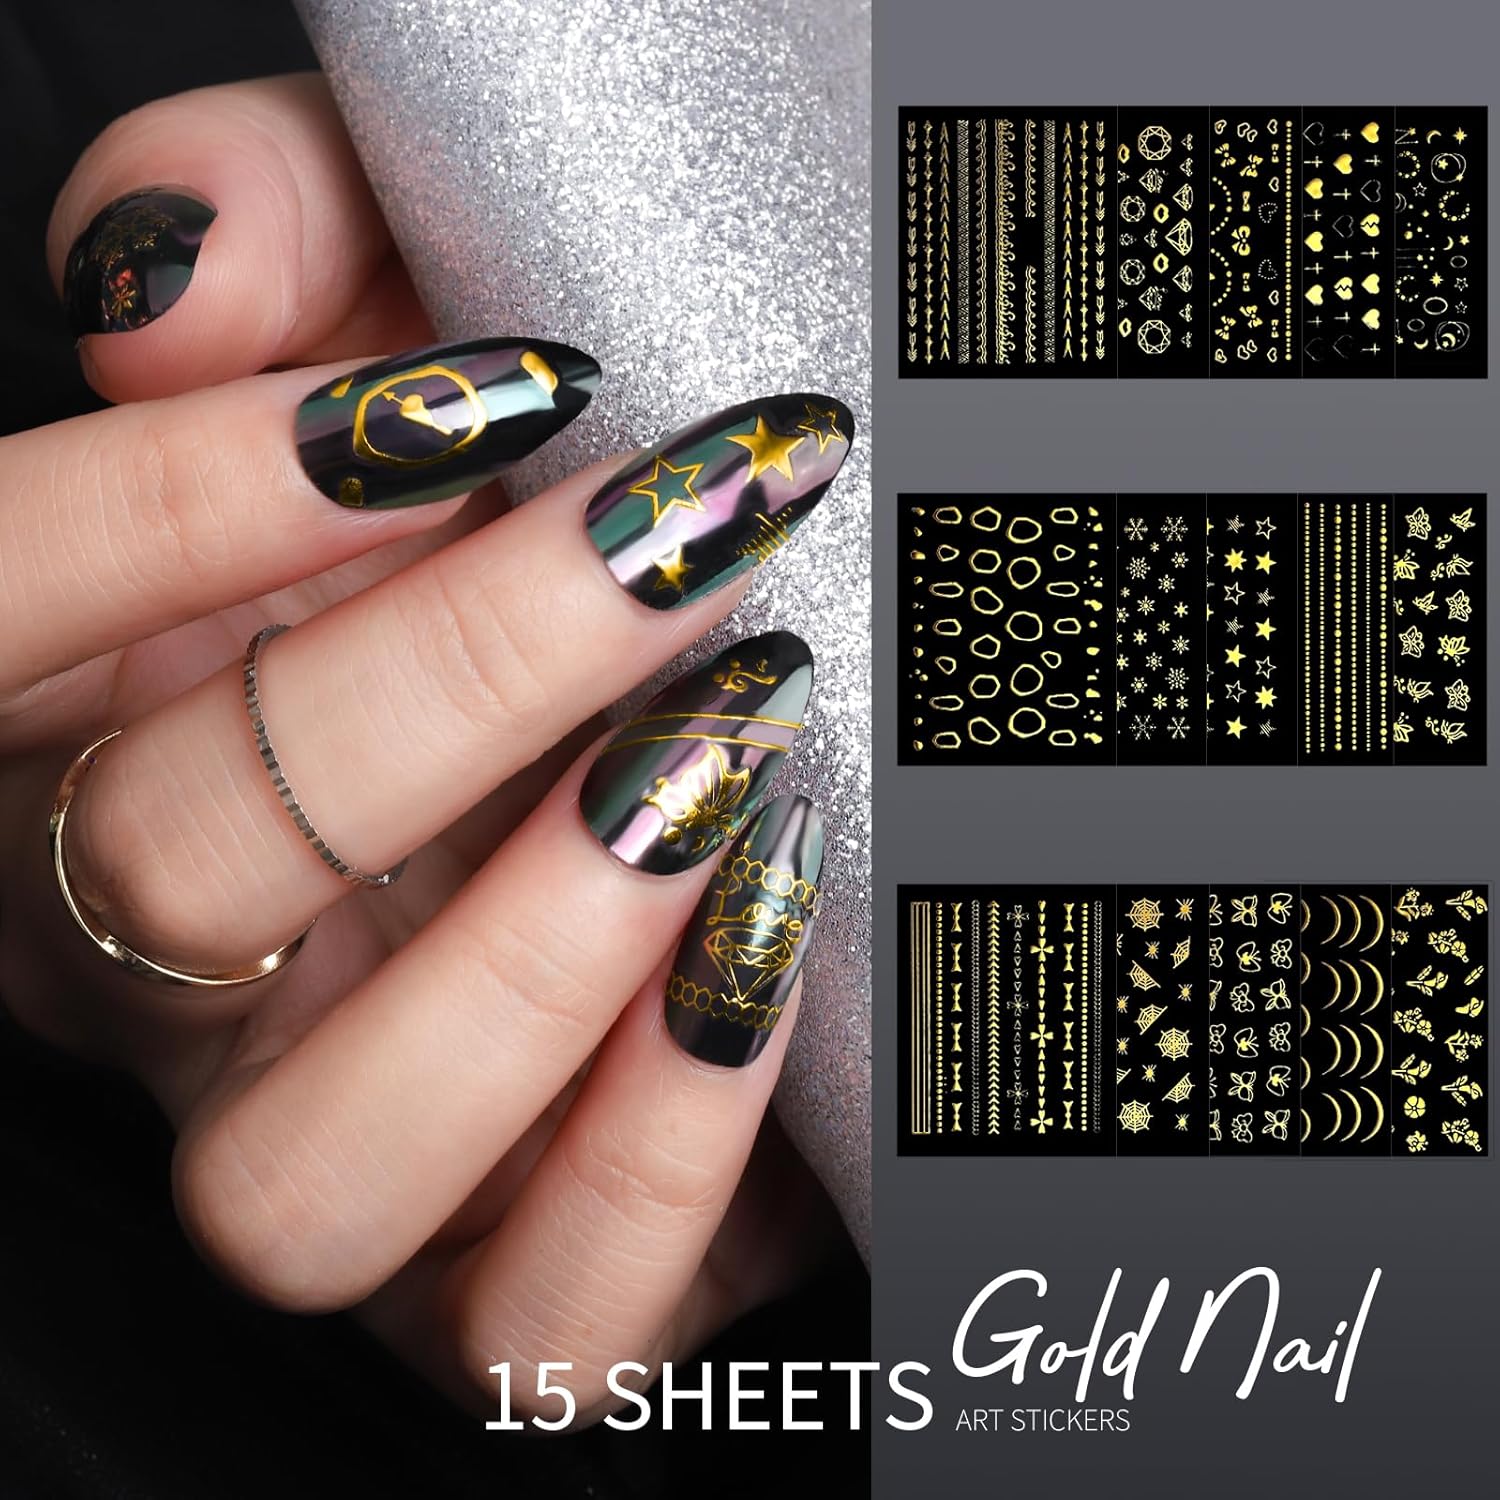
The initial impression of any product often hinges on the unboxing experience. The Teenitor Nail Charms Kit arrives meticulously packaged, ensuring that all the components are neatly organized and protected during transit. But beyond the aesthetics, what exactly does this kit contain? The answer is quite a lot! You’ll find a diverse collection of nail charms, ranging from classic rhinestones and glitter to more unique embellishments like studs, pearls, and even tiny metal accents. The sheer variety allows for endless creativity, catering to a wide range of nail art styles and preferences. In addition to the charms themselves, the kit typically includes essential tools for application, such as tweezers, dotting tools, and sometimes even small brushes for precise placement. The inclusion of these tools is a significant advantage, especially for beginners who might not already have a comprehensive nail art toolkit. Furthermore, some versions of the kit come with a storage case or organizer, which is invaluable for keeping all the tiny components neatly separated and easily accessible. The lack of a quality base and top coat is a missed opportunity. Buying these items separately can add to the overall cost. Let’s take a closer look at the typical contents:
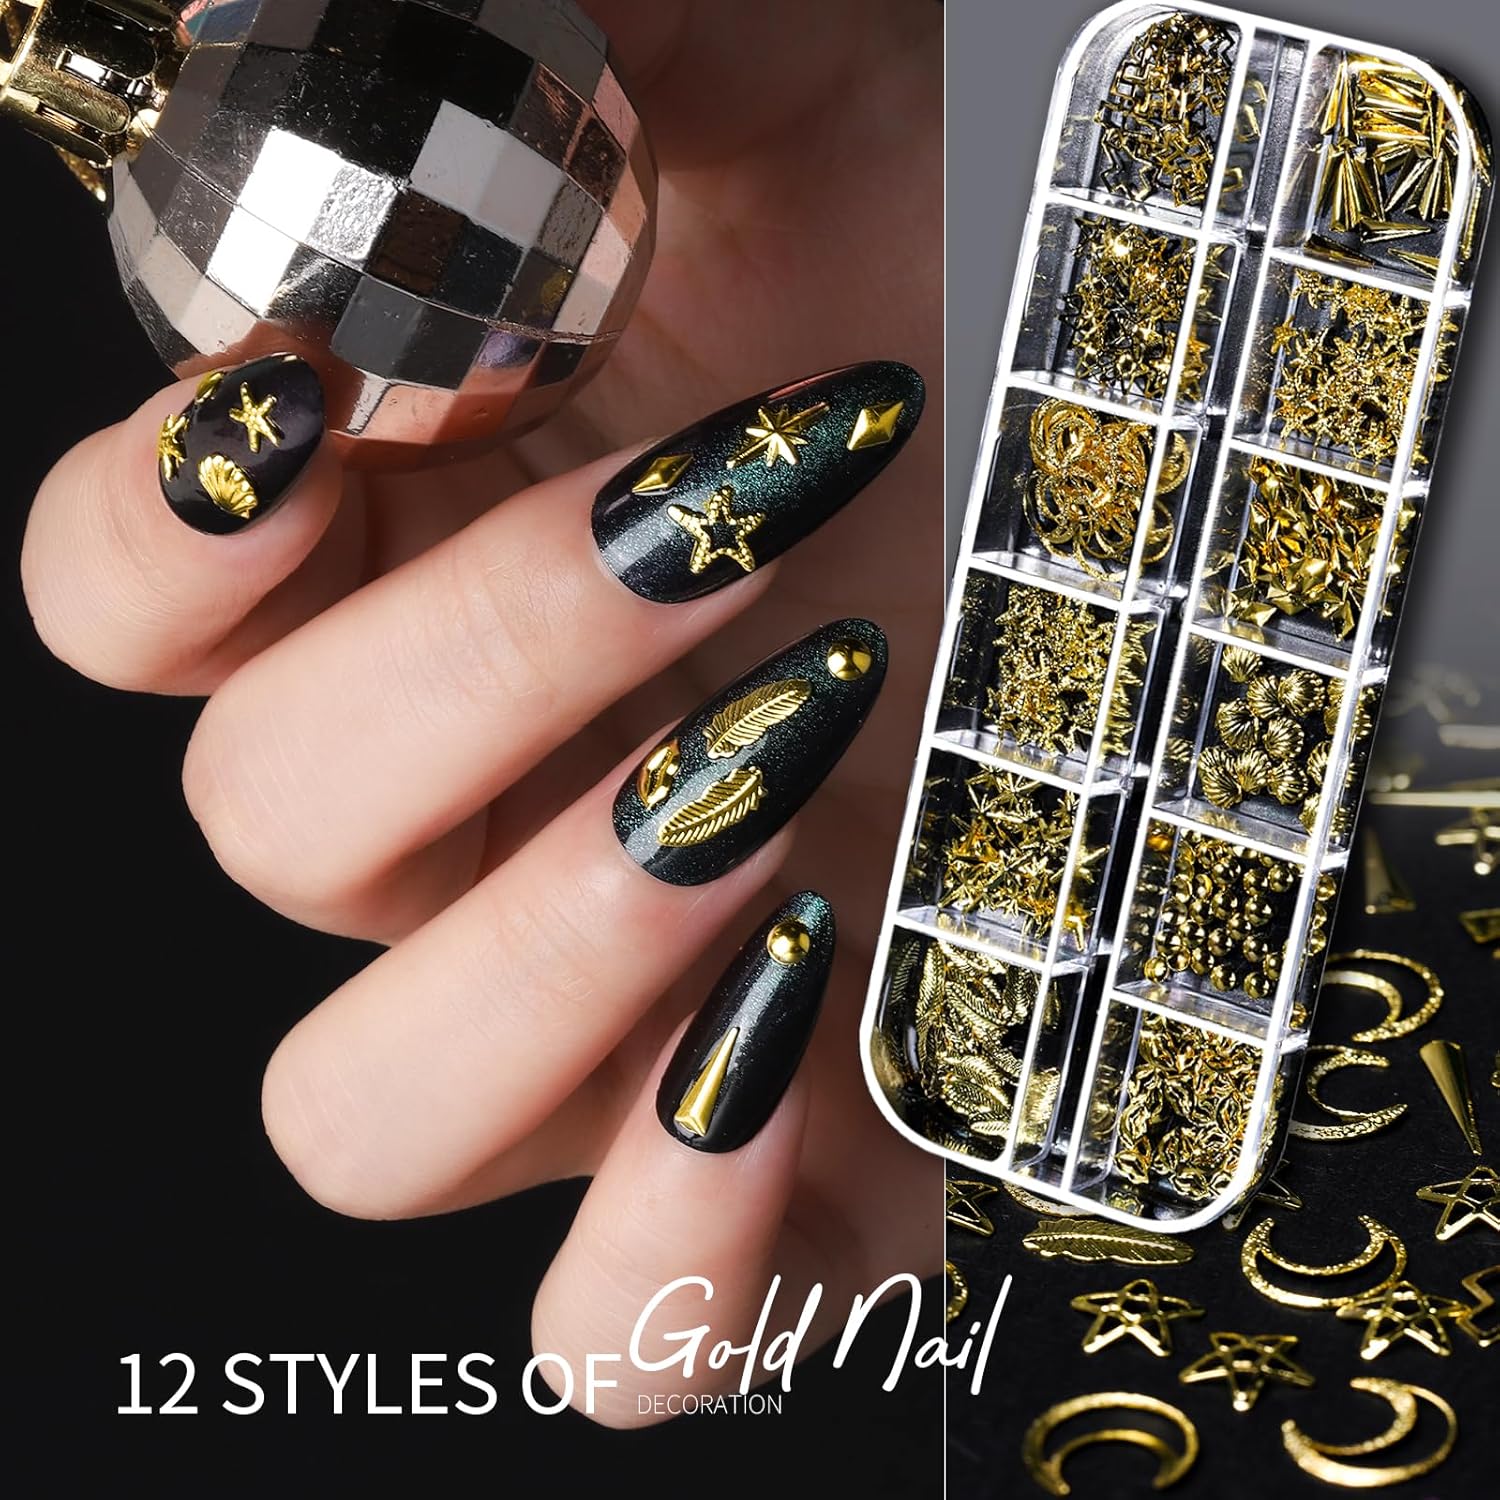
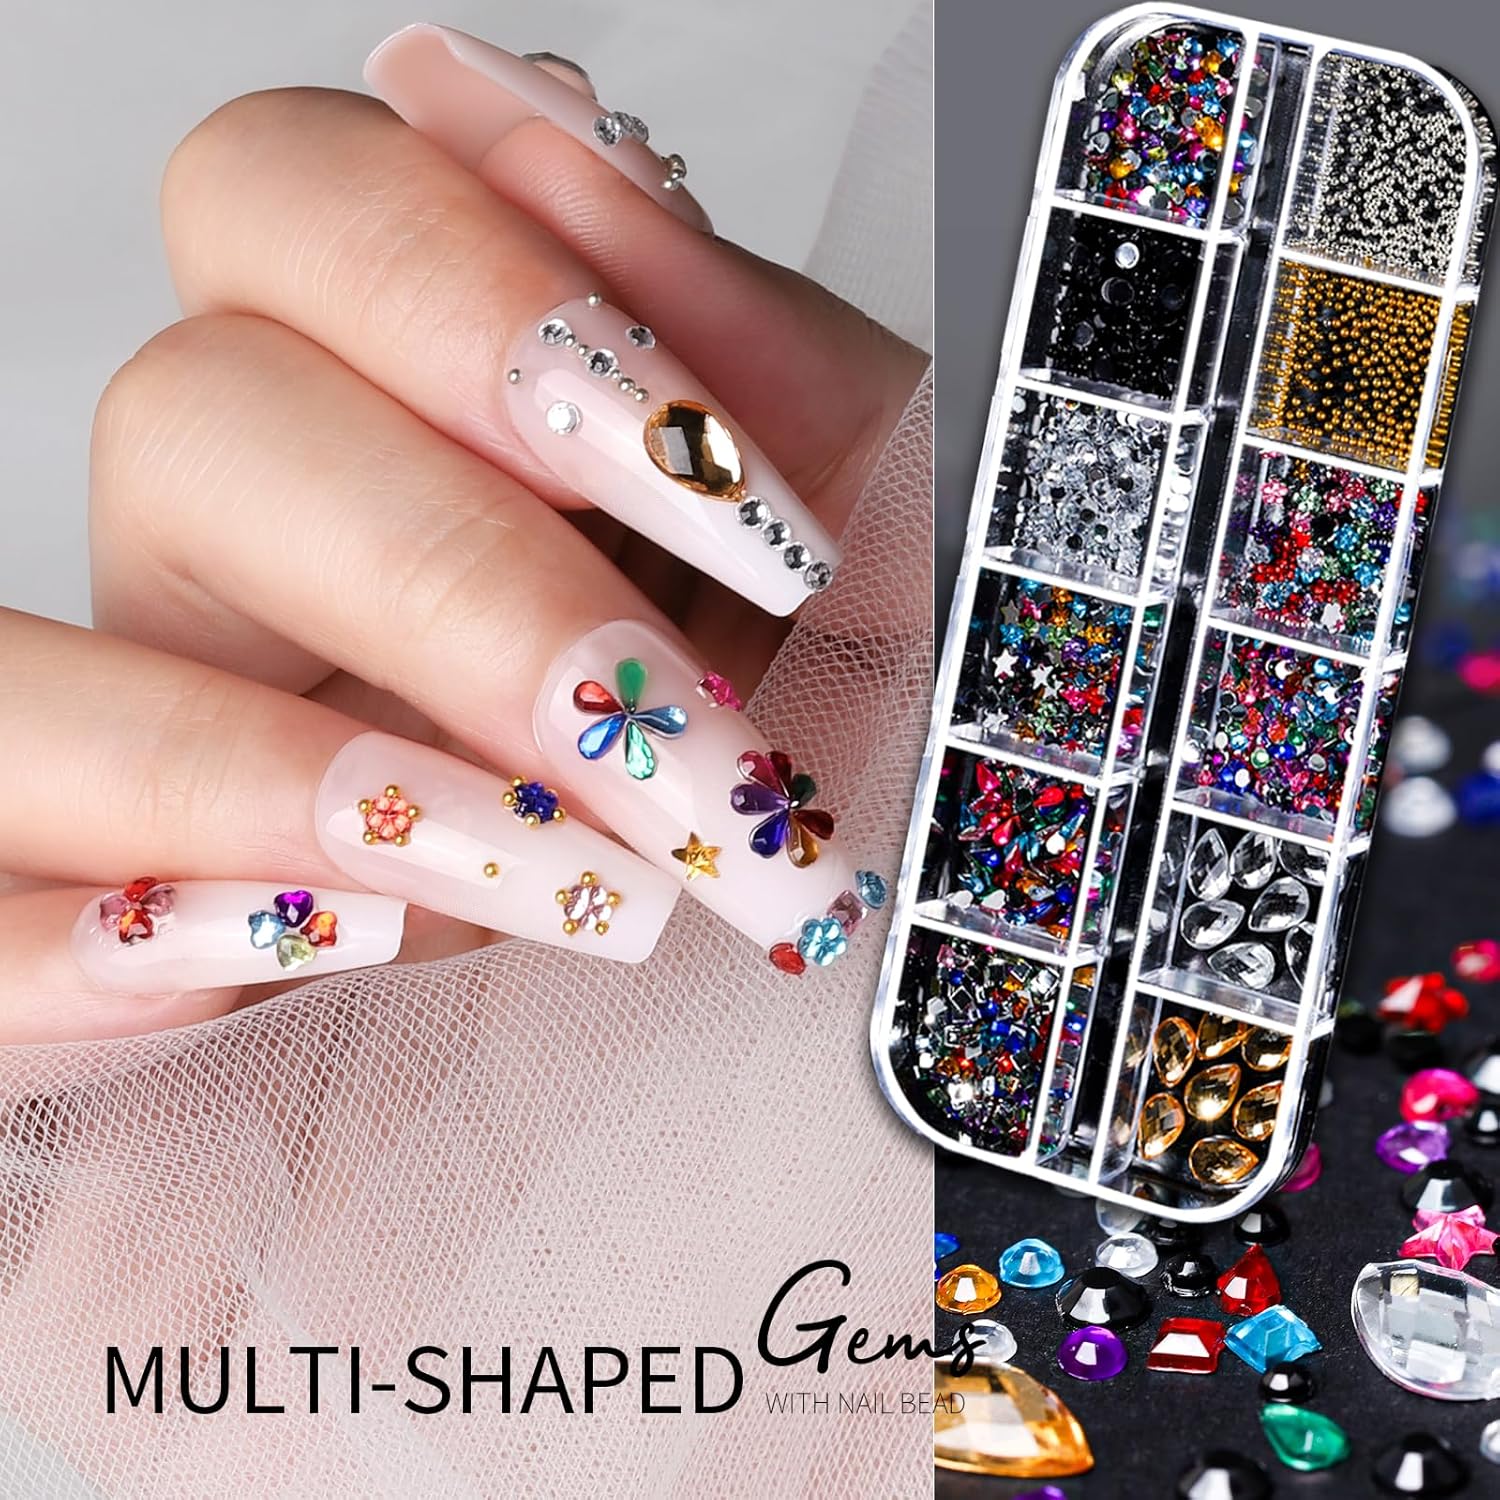
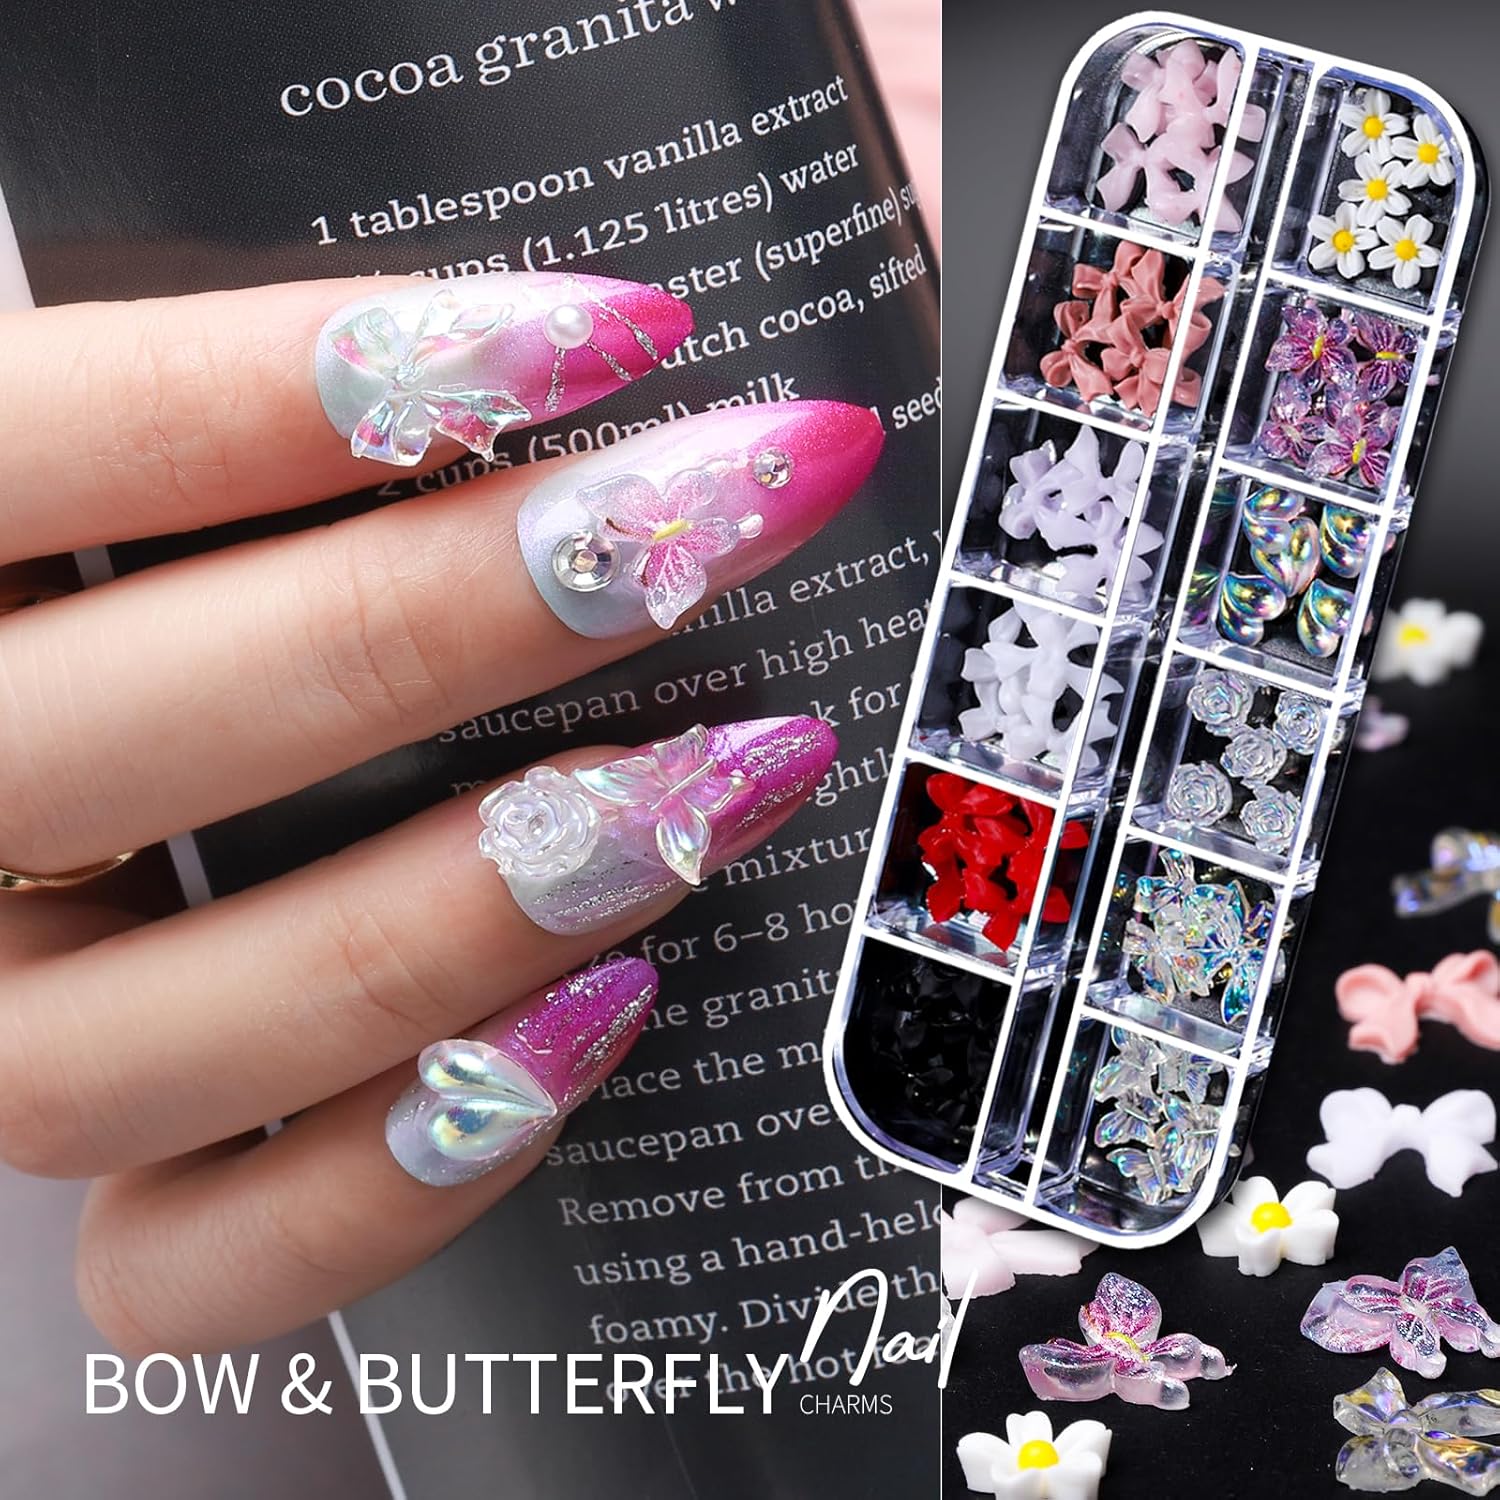
- Assorted Nail Charms: Rhinestones, glitter, pearls, studs, metal accents, and more. Sizes and shapes vary widely.
- Application Tools: Tweezers, dotting tools, small brushes (depending on the specific kit).
- Storage Container: A case or organizer to keep the charms and tools neatly stored. (May not be included in all kits).
- Color Variety: A range of colors to suit any style.
The abundance of options within the Teenitor kit is a double-edged sword. On one hand, it provides incredible creative freedom, allowing you to experiment with different textures, colors, and designs. On the other hand, the sheer volume of components can be overwhelming, especially for beginners. Taking the time to organize the charms and familiarize yourself with the tools is crucial for maximizing the kit’s potential. Consider investing in additional storage containers or organizers if the included one isn’t sufficient for your needs. Think about creating a mood board or Pinterest board of colorful nail art designs that you’d like to try. This can help you focus your creative energy and make the most of the kit’s diverse components.
| Feature | Description |
|---|---|
| Charm Variety | Extensive range of rhinestones, glitter, pearls, studs, metal accents, and more. |
| Application Tools | Includes tweezers, dotting tools, and small brushes (depending on the kit). |
| Storage | Some kits include a storage case or organizer for easy access and organization. |
| Target Audience | Suitable for beginners and experienced nail artists alike. |
Exploring Nail Art Design Possibilities with the Teenitor Kit
The real magic of the Teenitor Nail Charms Kit lies in its ability to unlock a world of creative nail art possibilities. With such a diverse range of charms and tools at your disposal, the only limit is your imagination. From simple and elegant designs to elaborate and eye-catching creations, the kit can cater to virtually any style. For beginners, starting with basic designs is recommended. Experiment with placing rhinestones along the cuticle line, creating simple glitter gradients, or using dotting tools to create polka dots or floral patterns. As you gain confidence and skill, you can gradually move on to more complex designs. Consider incorporating multiple types of charms into a single design, creating textured and multi-dimensional effects. For example, you could combine rhinestones, pearls, and metal accents to create a glamorous and opulent look. The kit is also ideal for creating themed nail art. Whether you’re celebrating a holiday, attending a special event, or simply expressing your personal interests, the Teenitor kit provides the tools and materials to bring your vision to life. Imagine creating spooky Halloween-themed nails with tiny skull charms or festive Christmas nails with miniature snowflakes and candy canes. For an everyday look, consider some simple red and white nail designs using glitter and rhinestones. The possibilities are endless!
Advanced nail artists can truly push the boundaries of creativity with the Teenitor kit. The intricate charms and precise application tools allow for the creation of highly detailed and sophisticated designs. Consider experimenting with negative space nail art, incorporating geometric patterns, or creating intricate floral arrangements. The kit can also be used to create 3D nail art, adding dimension and visual interest to your manicures. Remember to use a strong nail glue or gel to secure the charms in place and prevent them from falling off. Practice makes perfect! Don’t be discouraged if your first few attempts aren’t exactly what you envisioned. Keep experimenting with different techniques, colors, and designs until you find your own unique style. Furthermore, the kit is a great way to explore different nail art trends. Whether it’s the resurgence of holographic nails, the popularity of minimalist designs, or the ongoing fascination with gemstone embellishments, the Teenitor kit provides the materials to stay on top of the latest trends. Take inspiration from social media, fashion magazines, and online tutorials, and use the kit to recreate your favorite looks.
A Step-by-Step Guide to Using the Teenitor Nail Charms Kit
While the Teenitor Nail Charms Kit offers endless creative possibilities, using it effectively requires a bit of know-how. Here’s a step-by-step guide to help you get started:
- Prepare Your Nails: Start by cleaning your nails thoroughly. Remove any existing polish and trim and file your nails to your desired shape. Gently push back your cuticles and buff the surface of your nails to create a smooth base.
- Apply Base Coat: Apply a thin layer of base coat to protect your natural nails and provide a smooth surface for the polish. Allow the base coat to dry completely.
- Apply Nail Polish: Apply one or two coats of your desired nail polish color. Allow each coat to dry completely before applying the next.
- Plan Your Design: Before you start applying the charms, take some time to plan your design. Consider the placement of the charms, the colors you’ll be using, and the overall aesthetic you’re trying to achieve.
- Apply Nail Glue or Gel: Apply a small amount of nail glue or gel to the area where you want to place the charm. Use a dotting tool or toothpick to apply the glue precisely.
- Place the Charm: Use tweezers to carefully pick up the charm and place it onto the glue or gel. Gently press down on the charm to secure it in place.
- Repeat as Needed: Repeat steps 5 and 6 for each charm you want to apply. Be sure to allow the glue or gel to dry completely before moving on to the next step.
- Apply Top Coat: Once all the charms are in place, apply a generous layer of top coat to seal them in and protect your design. Allow the top coat to dry completely. Consider using a thicker top coat specifically designed for sealing in nail art.
- Clean Up: Use a cotton swab dipped in nail polish remover to clean up any excess glue or polish around the edges of your nails.
Remember to use high-quality nail glue or gel to ensure that the charms stay in place for as long as possible. Avoid using super glue, as it can damage your natural nails. When removing the charms, soak your nails in acetone for several minutes to loosen the glue. Gently pry the charms off with a toothpick or orange stick. Avoid pulling or forcing the charms off, as this can also damage your nails. With practice and patience, you’ll be creating stunning gel nail art designs with charms in no time. Furthermore, explore different techniques for applying the charms. For example, you can use a dotting tool to create a gradient effect with rhinestones or a small brush to create intricate patterns with glitter. The key is to experiment and find what works best for you.
Pros and Cons: A Balanced Perspective on the Teenitor Kit
Like any product, the Teenitor Nail Charms Kit has both its strengths and weaknesses. Before making a purchase, it’s important to weigh the pros and cons to determine if it’s the right choice for you. Here’s a balanced perspective:
Pros:
- Wide Variety of Charms: The kit offers an extensive range of charms, catering to a wide range of nail art styles and preferences.
- Inclusion of Application Tools: The kit typically includes essential tools for application, such as tweezers and dotting tools, which is especially helpful for beginners.
- Affordable Price: The Teenitor Nail Charms Kit is generally very affordable, making it an accessible option for budget-conscious nail art enthusiasts.
- Creative Freedom: The kit allows for endless creativity, enabling you to experiment with different textures, colors, and designs.
- Suitable for Beginners and Experts: The kit can be used by both beginners and experienced nail artists, making it a versatile option for all skill levels.
Cons:
- Charm Quality: The quality of the charms can vary, with some being more durable and long-lasting than others.
- Storage Limitations: The included storage container (if any) may not be sufficient for organizing all the charms and tools.
- Missing Essential Products: The kit does not usually include base and top coat.
- Potential for Overwhelm: The sheer volume of components can be overwhelming, especially for beginners.
- Tool Quality: The quality of the included tools can also vary, with some being less precise or durable than others.
Overall, the Teenitor Nail Charms Kit offers excellent value for its price. The wide variety of charms and the inclusion of application tools make it a great option for anyone looking to explore the world of nail art. However, it’s important to be aware of the potential drawbacks, such as the varying quality of the charms and tools, and the potential for overwhelm. Consider your individual needs and preferences before making a purchase. If you’re a beginner, start with a smaller kit or focus on mastering basic techniques before diving into more complex designs. If you’re an experienced nail artist, you may want to supplement the kit with higher-quality charms and tools. A major element to consider is how to make cute short nail art designs using the charms, as not all nail art supplies are suitable for shorter nails. If you plan to use the Teenitor kit for short nails, prioritize smaller charms and minimalistic designs.
| Aspect | Pros | Cons |
|---|---|---|
| Variety | Extensive range of charms for diverse designs. | Can be overwhelming, especially for beginners. |
| Tools | Includes essential application tools. | Tool quality may vary. |
| Price | Affordable and accessible for budget-conscious users. | Charm quality can vary. |
| Skill Level | Suitable for beginners and experienced artists. | Requires organization and practice. |
Buying Guide: Choosing the Right Teenitor Nail Charms Kit
The Teenitor brand offers a range of nail charms kits, each with its own unique features and contents. Choosing the right kit can be overwhelming, especially if you’re new to nail art. Here are some factors to consider when making your purchase:
- Charm Variety: Consider the types of charms you’re most interested in. Some kits focus on rhinestones and glitter, while others include a wider variety of embellishments like pearls, studs, and metal accents. Choose a kit that aligns with your personal style and design preferences.
- Kit Size: Teenitor kits come in various sizes, ranging from small starter kits to large mega-packs. Consider your skill level and how often you plan to use the kit. If you’re a beginner, a smaller kit might be a better option, as it will be less overwhelming. If you’re an experienced nail artist, a larger kit will provide you with more creative options.
- Included Tools: Check which tools are included in the kit. At a minimum, you’ll need tweezers and a dotting tool. Some kits also include small brushes for precise application. If you don’t already have these tools, choose a kit that includes them.
- Storage: Consider whether the kit includes a storage container or organizer. A storage container is essential for keeping the charms and tools neatly separated and easily accessible. If the kit doesn’t include a storage container, you may want to purchase one separately.
- Read Reviews: Before making a purchase, take the time to read reviews from other customers. This will give you valuable insights into the quality of the charms, the durability of the tools, and the overall satisfaction of other users.
- Price: Teenitor Nail Charms Kits range in price depending on the size and contents of the kit. Set a budget and choose a kit that fits within your price range. Keep in mind that you can always supplement the kit with additional charms and tools later on.
By considering these factors, you can choose the right Teenitor Nail Charms Kit for your needs and preferences. Remember to prioritize quality over quantity, and don’t be afraid to experiment with different designs and techniques. The key is to have fun and express your creativity! And remember, achieving professional looking results takes time and patience. Don’t get discouraged if your first few attempts aren’t perfect. Keep practicing, and you’ll be creating stunning nail art in no time. Also, consider online tutorials and classes to improve your skills. YouTube is a great resource for free nail art tutorials. In addition, before applying anything to your actual nails, you might want to practice on a nail swatch or a piece of paper. This will allow you to test out different designs and techniques without wasting any precious charms or nail polish. This is especially helpful when learning how to achieve ombre nail designs with glitter using the kit. By following these tips, you’ll be well on your way to becoming a nail art master!
Frequently Asked Questions
What kind of glue should I use to apply the nail charms?
Choosing the right adhesive is crucial for ensuring your nail charms stay put and your manicure looks its best. There are a few different types of glue that are suitable for applying nail charms, each with its own pros and cons. The most common option is nail glue, which is specifically formulated for adhering artificial nails and decorations. Look for nail glues that are labeled as being “strong hold” or “professional grade” for the best results. Another option is gel adhesive, which requires curing under a UV or LED lamp. Gel adhesive provides a very strong and long-lasting bond, making it ideal for larger or heavier charms. However, it does require additional equipment and can be more time-consuming to apply. A small dab of clear acrylic powder mixed with monomer (acrylic liquid) can also work in a pinch, providing excellent adherence but might require some getting used to. Regardless of which type of glue you choose, always follow the manufacturer’s instructions carefully and avoid getting glue on your skin.
How do I remove nail charms without damaging my nails?
Removing nail charms safely and effectively is essential to prevent damage to your natural nails. The most common method involves soaking your nails in acetone. Start by filing off as much of the top coat and nail polish as possible. Then, soak a cotton ball in acetone and place it directly on top of the nail charm. Wrap the cotton ball and nail in aluminum foil to keep the acetone from evaporating. Allow the acetone to soak for at least 10-15 minutes. After soaking, the nail charm should be loosened and easy to gently pry off with a wooden stick or cuticle pusher. Avoid pulling or forcing the charm off, as this can damage your nails. If the charm is still stubborn, repeat the soaking process for a few more minutes. Once the charm is removed, gently buff your nails to remove any remaining glue residue. Apply a nourishing nail oil or cuticle cream to rehydrate your nails and prevent them from becoming dry and brittle.
Are the nail charms in the Teenitor kit safe to use?
Generally, the nail charms included in Teenitor Nail Charms kits are considered safe for external use on nails. However, it’s essential to be mindful of potential allergies or sensitivities to certain materials. Some charms may contain metals like nickel, which can cause allergic reactions in sensitive individuals. Before applying a large number of charms, test a single charm on a small area of your skin to check for any adverse reactions. Additionally, ensure that the charms are securely attached to your nails to prevent them from falling off and potentially being ingested by children or pets. Always supervise children when using nail charms and store the kit out of their reach. It is also highly recommended to purchase your kits from a reputable seller that has a history of selling legitimate and quality-tested nail charms. Lastly, avoid using charms with sharp edges or points that could potentially scratch or injure your skin.
How can I prevent the nail charms from falling off?
Ensuring the longevity of your nail art requires careful application and proper aftercare. Start by thoroughly cleaning and preparing your nails, removing any oils or debris that could interfere with adhesion. Use a high-quality nail glue or gel specifically designed for nail art. Apply a small amount of glue to the back of the charm and carefully place it onto your nail. Press down gently to secure it in place and allow the glue to dry completely. Avoid getting the glue on your skin, as this can cause irritation. Apply a generous layer of top coat over the charm to seal it in and protect it from wear and tear. Choose a top coat that is specifically designed for nail art, as these tend to be thicker and more durable. Reapply the top coat every few days to maintain the integrity of your design. Avoid exposing your nails to harsh chemicals or excessive water, as this can weaken the bond between the charm and your nail. When washing dishes or doing other chores, wear gloves to protect your manicure.
Can I use the Teenitor kit with gel polish?
Yes, the Teenitor Nail Charms Kit is perfectly compatible with gel polish. In fact, using gel polish can often provide a stronger and more durable base for your nail art. After applying and curing your base coat and color coats of gel polish, apply a thin layer of gel top coat, but do not cure it yet. This uncured top coat will act as the adhesive for your nail charms. Carefully place the charms onto the uncured top coat, using tweezers or a dotting tool for precise placement. Once you are satisfied with the placement of the charms, cure your nails under a UV or LED lamp for the recommended time. After curing, apply another layer of gel top coat to seal in the charms and protect your design. Cure again under the lamp. Ensure that you are using a high-quality gel top coat that is specifically designed for sealing in nail art. This will help to prevent the charms from lifting or falling off. Remember to clean the tacky layer off each nail with alcohol after the final cure, leaving behind a polished, charm-laden gel design.
Is the Teenitor kit suitable for beginners?
The Teenitor Nail Charms Kit is generally considered suitable for beginners, but it’s important to approach it with realistic expectations. The sheer variety of charms can be overwhelming at first, so it’s best to start with simple designs and gradually work your way up to more complex creations. The kit often includes basic application tools like tweezers and dotting tools, which are essential for beginners. However, the quality of these tools may not be the highest, so you may want to consider investing in higher-quality tools as you progress. It’s also important to note that the kit typically doesn’t include essential products like base coat, top coat, and nail glue, so you’ll need to purchase these separately. To help beginners learn the basics of nail art, consider watching online tutorials or taking a beginner-friendly nail art class. Start with simple designs like polka dots, stripes, or basic rhinestone accents. With practice and patience, you’ll be able to create beautiful and unique nail art designs using the Teenitor kit, even as a beginner.
How do I clean and store the nail charms?
Properly cleaning and storing your nail charms is essential for maintaining their quality and extending their lifespan. To clean the charms, gently wipe them with a soft, dry cloth. Avoid using harsh chemicals or abrasive cleaners, as these can damage the surface of the charms. For charms that are particularly dirty or have stubborn residue, you can use a mild soap and water solution. Dip a soft cloth into the soapy water and gently wipe the charms. Rinse the charms with clean water and dry them thoroughly before storing them. To store the charms, use a storage container with individual compartments. This will help to keep the charms organized and prevent them from scratching or damaging each other. Avoid storing the charms in direct sunlight or in a humid environment, as this can cause them to fade or tarnish. Keep the storage container in a cool, dry place. Regularly inspect the charms for any signs of damage or wear and tear. Replace any charms that are damaged or no longer usable. With proper cleaning and storage, your nail charms will last for years to come.

Price: $11.99 - $8.99
(as of Sep 07, 2025 04:33:54 UTC – Details)


