Press on Nails Medium Long Rhinestone Review pink nails Buying Guide – Oemiu
Press On Nails Medium Long Rhinestone Review Pink Nails Buying Guide
Let’s face it: perfectly manicured nails are a statement. They speak of attention to detail, a touch of glamour, and an overall polished aesthetic. But the reality is, salon visits are time-consuming and expensive, and the constant exposure to chemicals can take a toll on our natural nails. That’s where press-on nails come in – a convenient, cost-effective, and ever-improving alternative. And within the vast landscape of press-on nails, the “medium long rhinestone review pink nails” segment is a particular hot spot. These nails offer a sweet spot between practicality and undeniable elegance, with the rhinestones adding a touch of sparkle perfect for everyday wear or a special occasion. This guide will delve deep into the world of medium-long, rhinestone-adorned pink press-on nails, exploring everything from materials and application to design trends and maintenance, helping you make the perfect purchase and rock your new manicure with confidence. We’ll even touch on how to find the right shade of pink to complement your skin tone and the best adhesives to ensure your nails stay put through thick and thin.
Unveiling the Allure of Pink Rhinestone Press-On Nails
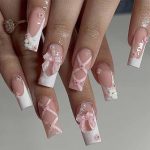
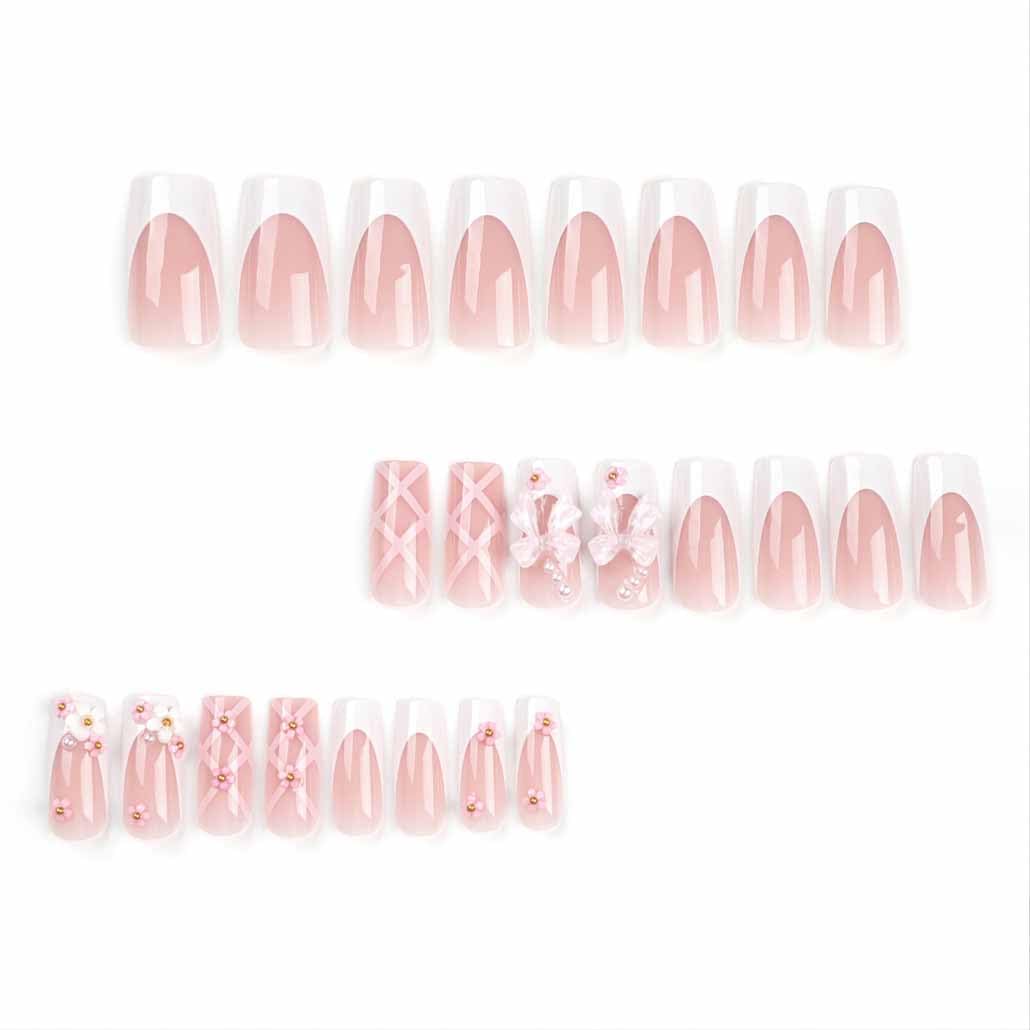
Pink nails have always been a classic choice, radiating femininity, sweetness, and a touch of playfulness. The addition of rhinestones elevates the pink base, turning a simple manicure into a dazzling accessory. But why the popularity of *medium long pink nails* specifically? The length offers a balance – long enough to create an elegant silhouette on the fingers, yet not so long as to hinder daily activities. Think typing, cooking, or even just buttoning your coat. This practicality is key to the success of this style. Medium-long nails offer more surface area for elaborate designs, allowing for intricate rhinestone patterns and creative color combinations. You can find everything from subtle scattered rhinestones for a delicate shimmer to bold, statement-making clusters that demand attention.
The color pink itself is incredibly versatile, ranging from delicate pastels to vibrant fuchsias. This means there’s a shade of pink to suit every skin tone and personal style. A pale blush pink might be perfect for a sophisticated, understated look, while a hot pink will inject a dose of fun and energy into your outfit. When choosing *press on pink nails* consider the undertones of your skin. If you have cool undertones, shades of pink with blue hues, like bubblegum pink or rose pink, will complement you best. If you have warm undertones, peachier or coral pinks will be more flattering. And for those with neutral undertones, the world is your oyster! You can experiment with a wide range of pinks and find what makes you feel most confident.
The appeal also lies in the sheer convenience of press-on nails. No more scheduling salon appointments, waiting for hours, or worrying about smudging your polish. Press-on nails offer an instant manicure in minutes, allowing you to switch up your style as often as you like. They are a fantastic option for special events, photoshoots, or simply when you want to add a little something extra to your everyday look. And with the increasing quality and durability of press-on nails, you can enjoy a flawless manicure that lasts for days, if not weeks, with proper care. The versatility, convenience, and inherent beauty of pink rhinestone press-on nails make them a winning choice for anyone seeking a quick and stylish nail transformation.
Deciphering Materials, Adhesives, and Shapes: A Buyer’s Guide
Navigating the world of press-on nails can be overwhelming, with countless brands, materials, adhesives, and shapes to choose from. Understanding these key factors is crucial to making an informed purchase that will leave you satisfied with your *long pink press on nails*.
Firstly, let’s discuss the materials. Most press-on nails are made from either ABS plastic or acrylic. ABS plastic is generally more flexible and thinner, making it feel more comfortable and natural on the nail. However, it can be less durable and prone to bending or breaking. Acrylic nails, on the other hand, are thicker and more rigid, offering superior strength and durability. They are less likely to chip or crack, making them a better option for those who are hard on their hands. The best material for you will depend on your lifestyle and how long you want your manicure to last.
| Material | Pros | Cons |
|---|---|---|
| ABS Plastic | Flexible, comfortable, natural feel, often cheaper | Less durable, prone to bending/breaking |
| Acrylic | Strong, durable, resistant to chipping/cracking | Less flexible, can feel thicker, potentially more expensive |
Next, let’s talk about adhesives. The adhesive is arguably the most important factor in determining how long your press-on nails will last. There are two main types of adhesives: nail glue and adhesive tabs. Nail glue provides a stronger and more long-lasting hold, typically lasting up to two weeks or more with proper application and care. However, it can be damaging to your natural nails if not removed correctly. Adhesive tabs are less damaging and easier to remove, but they offer a weaker hold, usually lasting only a few days. They are a good option for short-term wear or for those with sensitive nails. When using nail glue, always follow the manufacturer’s instructions carefully to avoid damaging your natural nails. Consider using a nail strengthener or cuticle oil after removing your press-on nails to help restore moisture and promote healthy nail growth.
Finally, shape matters. The shape of your press-on nails can dramatically alter the overall look of your manicure. Popular shapes include:
* **Square:** A classic, clean shape that is easy to maintain.
* **Oval:** A soft, elegant shape that elongates the fingers.
* **Round:** A natural-looking shape that is ideal for those who prefer a more understated look.
* **Almond:** A tapered shape that is both stylish and sophisticated.
* **Stiletto:** A dramatic, pointed shape that is perfect for making a statement.
* **Coffin/Ballerina:** A tapered shape with a squared-off tip, resembling a coffin or ballerina slipper.
The best shape for you will depend on your personal preferences, the shape of your hands, and the occasion. For example, if you have short, wide fingers, an almond or oval shape can help to make them look longer and slimmer. Ultimately, experimentation is key to finding the perfect shape that complements your style and enhances your overall look.
The Rhinestone Factor: Design, Placement, and Quality
The allure of rhinestone press-on nails lies in their ability to add a touch of sparkle and glamour to any look. However, not all rhinestones are created equal. Understanding the different types of rhinestones, their placement, and the overall design aesthetics is crucial to choosing a set of press-on nails that truly shines.
There are primarily two types of rhinestones used in press-on nail designs: acrylic rhinestones and crystal rhinestones (such as Swarovski crystals). Acrylic rhinestones are more affordable and widely available. They offer a decent level of sparkle but tend to lack the brilliance and clarity of crystal rhinestones. Crystal rhinestones, on the other hand, are made from high-quality glass and cut with precision to maximize their light-reflecting properties. They are significantly more expensive but offer a much more dazzling and eye-catching sparkle. The quality of the rhinestones will directly impact the overall look of your manicure. Low-quality rhinestones may appear dull or cloudy, while high-quality rhinestones will catch the light beautifully and add a luxurious touch.
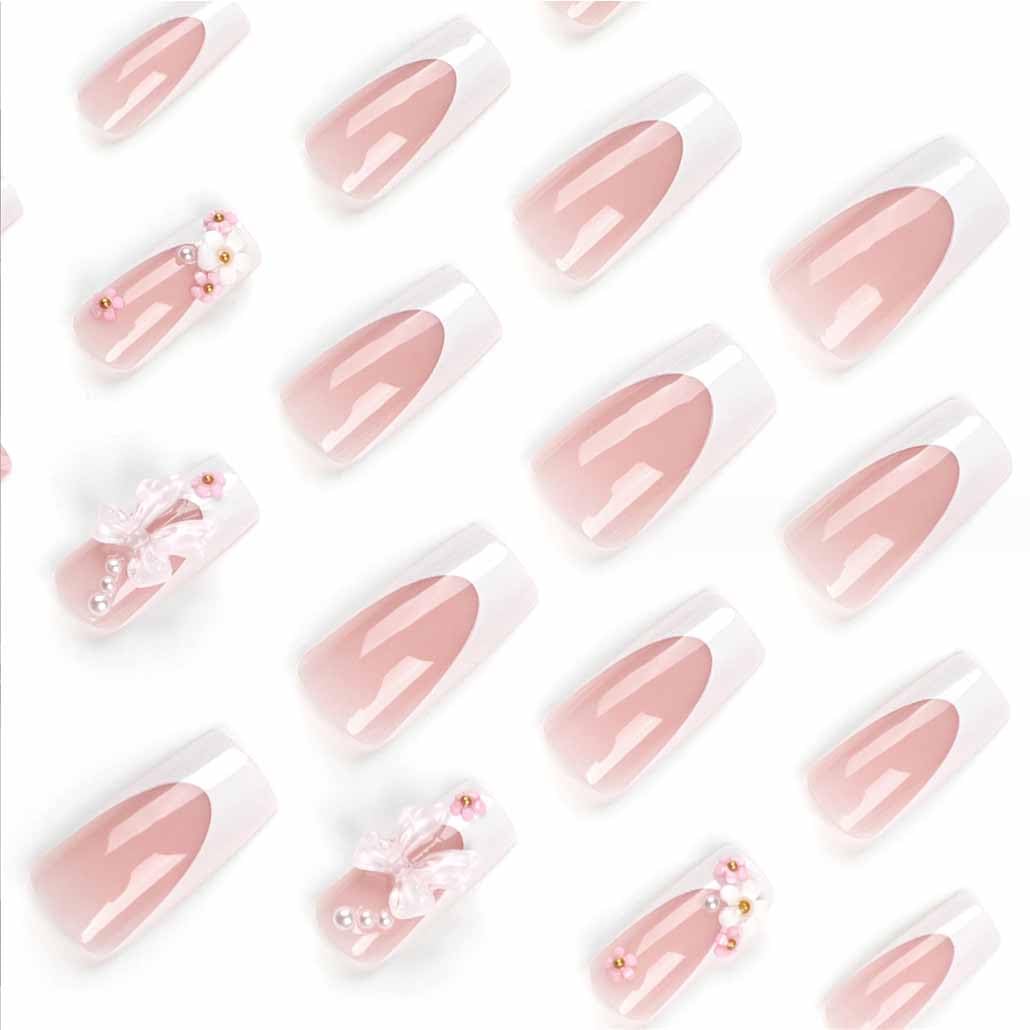
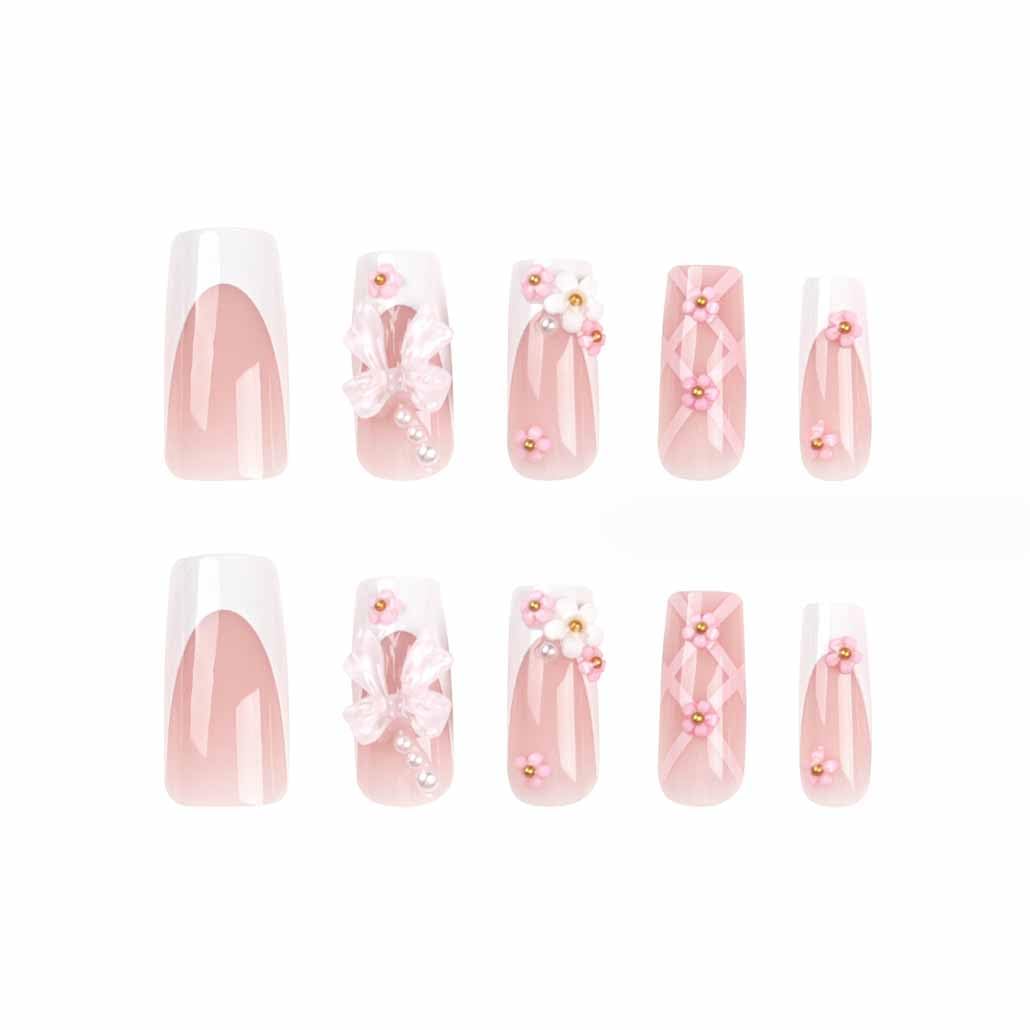
The placement of the rhinestones is also a crucial factor to consider. Some press-on nails feature a single, large rhinestone as a focal point, while others have a scattering of smaller rhinestones for a more subtle shimmer. Consider designs that complement the shape and length of the nail. For example, a vertical line of rhinestones can help to elongate the fingers, while a cluster of rhinestones at the base of the nail can draw attention to the cuticle area. Avoid designs that are overly cluttered or unbalanced, as they can look cheap and distracting.
The overall design aesthetic of the rhinestone placement should align with your personal style. If you prefer a more minimalist look, opt for press-on nails with a simple scattering of small, delicate rhinestones. If you’re looking to make a statement, choose designs with bold patterns, large rhinestones, or intricate arrangements. Keep in mind that less is often more when it comes to rhinestones. A well-placed scattering of high-quality rhinestones can be much more impactful than a dense cluster of low-quality ones.
Consider the longevity of the rhinestone application. Are the rhinestones securely glued on? Are they likely to fall off after a few days of wear? Reading customer reviews and paying attention to the brand’s reputation can help you assess the quality and durability of the rhinestone placement. You might even consider purchasing a small tube of nail glue separately to re-adhere any rhinestones that may come loose over time. Paying attention to these details will ensure that your *rhinestone pink nails* not only look stunning but also last for a reasonable amount of time.
Application, Maintenance, and Removal: Extending the Life of Your Pink Press-Ons
The lifespan of your medium-long rhinestone pink press-on nails depends heavily on proper application, maintenance, and gentle removal. Even the highest quality nails and adhesive won’t perform optimally if not handled correctly.
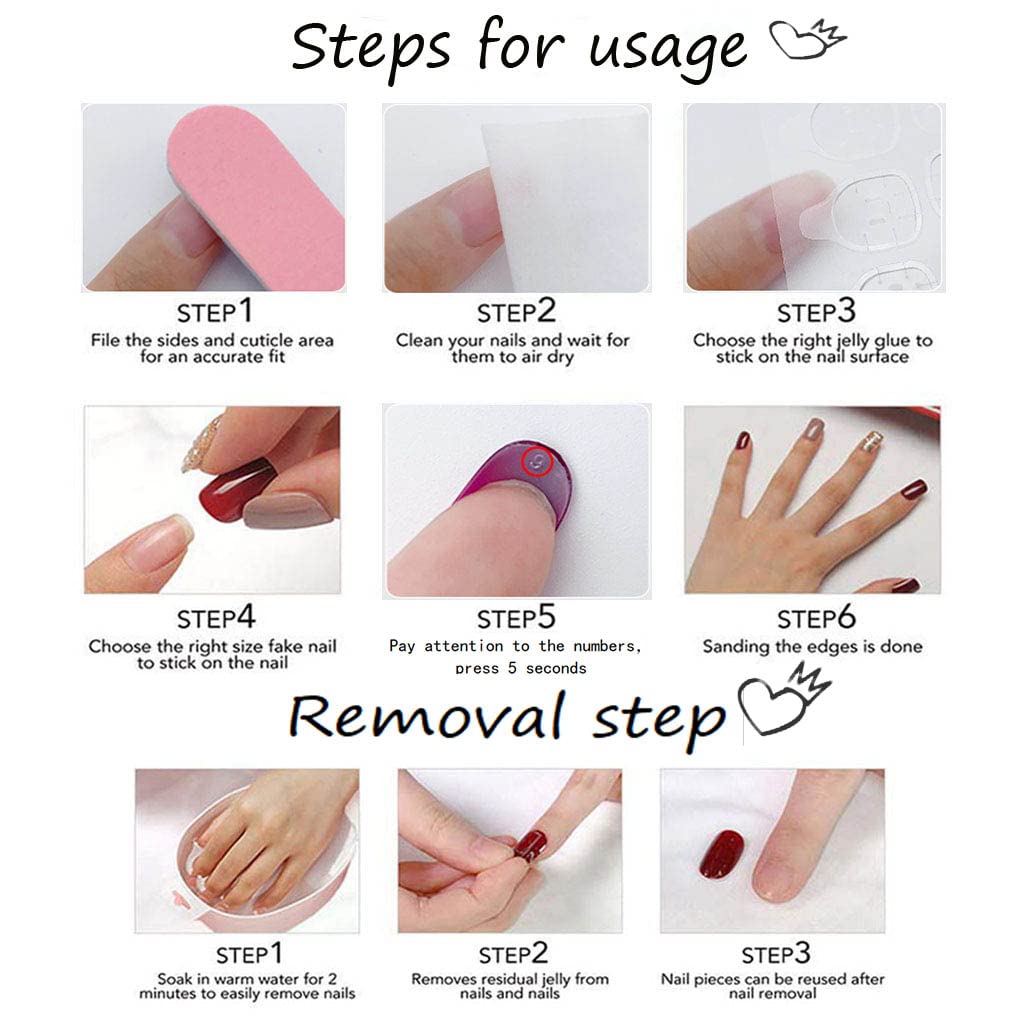
**Application is Key:**
1. **Prep Your Natural Nails:** This is the most crucial step. Start by gently pushing back your cuticles and removing any dead skin. Lightly buff the surface of your natural nails to create a slightly rough texture for the adhesive to grip onto. Cleanse your nails thoroughly with alcohol to remove any oils or residue. This ensures maximum adhesion.
2. **Sizing Matters:** Select the press-on nail that best fits each of your natural nails. If you’re between sizes, it’s always better to choose a slightly larger size and file it down to fit perfectly. A nail that’s too small will put stress on the adhesive and is more likely to pop off.
3. **Apply Adhesive Strategically:** Whether you’re using nail glue or adhesive tabs, apply the adhesive evenly to the entire surface of your natural nail. Avoid using too much glue, as it can seep out around the edges of the press-on nail and look messy.
4. **Press and Hold:** Press the press-on nail firmly onto your natural nail, starting at the cuticle and working your way down to the free edge. Hold it in place for at least 30 seconds to ensure a secure bond. Avoid getting your hands wet for at least an hour after application.
**Maintenance for Longevity:**
* **Avoid Harsh Chemicals:** Wear gloves when doing dishes, cleaning, or engaging in any activities that involve harsh chemicals. These chemicals can weaken the adhesive and dull the shine of your rhinestones.
* **Be Gentle:** Treat your press-on nails with care. Avoid picking, peeling, or biting them, as this can damage the nails and weaken the adhesive.
* **Re-Secure Loose Rhinestones:** If you notice any rhinestones coming loose, re-adhere them with a small dab of nail glue.
* **Hydrate Your Hands and Cuticles:** Regularly moisturize your hands and cuticles to prevent dryness and cracking, which can compromise the integrity of your manicure.
**Safe and Gentle Removal:**
* **Soak in Warm, Soapy Water:** The easiest and least damaging way to remove press-on nails is to soak your hands in warm, soapy water for 10-15 minutes. This will help to loosen the adhesive.
* **Use a Cuticle Pusher:** Gently use a cuticle pusher to lift the edges of the press-on nail. If it doesn’t come off easily, soak your hands for a few more minutes.
* **Avoid Forcing:** Never force the press-on nail off, as this can damage your natural nails. Be patient and gentle, and let the adhesive gradually dissolve.
* **Remove Adhesive Residue:** Once the press-on nails are removed, use a cotton ball soaked in acetone to gently remove any adhesive residue from your natural nails.
* **Hydrate and Repair:** After removing the adhesive, apply a generous amount of cuticle oil and hand cream to hydrate and repair your natural nails. Consider using a nail strengthener to help restore their strength and health.
By following these simple tips, you can significantly extend the life of your *pretty pink nails* and keep them looking flawless for longer. Proper application, mindful maintenance, and gentle removal are essential for maintaining the health of your natural nails and ensuring a positive press-on nail experience.
Frequently Asked Questions (FAQ)
How long will my press-on nails last?
Factors affecting longevity
The lifespan of your pink rhinestone press-on nails depends on several factors, including the quality of the nails and adhesive, the application technique, and your daily activities. Generally, with proper application and care, press-on nails can last anywhere from a few days to two weeks. Using a high-quality nail glue typically results in a longer-lasting hold compared to adhesive tabs, which are better suited for short-term wear. Your lifestyle also plays a significant role. If you’re constantly washing your hands, typing, or engaging in activities that put stress on your nails, they may not last as long. Taking precautions like wearing gloves when doing dishes and being gentle with your hands can significantly extend the lifespan of your manicure. Regular maintenance, such as re-adhering loose rhinestones and keeping your hands moisturized, will also contribute to their longevity. With careful attention and the right products, you can enjoy your beautiful *pink gel nails* for a considerable amount of time.
Are press-on nails damaging to natural nails?
Minimizing damage
Press-on nails themselves are not inherently damaging to natural nails. The potential for damage primarily comes from improper application and, more importantly, aggressive removal. Forcibly ripping off press-on nails can peel off layers of your natural nail, leading to thinning, weakening, and even breakage. Using harsh adhesives and excessive filing during the preparation process can also contribute to damage. To minimize any potential harm, it’s crucial to properly prepare your nails by gently buffing the surface and cleansing with alcohol. When applying the adhesive, use a moderate amount and avoid getting it on your skin. Most importantly, when it’s time to remove the press-on nails, be patient and gentle. Soaking your hands in warm, soapy water for an extended period will help to loosen the adhesive, making removal easier and less damaging. Always moisturize your nails and cuticles after removal to restore hydration and promote healthy nail growth. By following these precautions, you can enjoy the convenience and beauty of press-on nails without compromising the health of your natural nails.
How do I choose the right size press-on nails?
Finding the perfect fit
Choosing the right size press-on nails is essential for a comfortable and natural-looking manicure. Most press-on nail sets come with a variety of sizes, allowing you to find the perfect fit for each of your nails. Start by laying the press-on nails over your natural nails to determine which size best matches the width and shape. The press-on nail should cover the entire surface of your natural nail without overlapping onto your skin. If you’re between sizes, it’s generally better to choose a slightly larger size and file it down to fit perfectly. A nail that is too small will put stress on the adhesive and is more likely to pop off. When filing the press-on nail, be sure to file it evenly and gradually, checking the fit frequently. Pay attention to the cuticle area, ensuring that the press-on nail fits snugly against your cuticle without creating any gaps or discomfort. Taking the time to find the right sizes will ensure a secure and comfortable fit, resulting in a more natural-looking and long-lasting manicure.
Can I reuse press-on nails?
Maximizing reusability
Whether or not you can reuse press-on nails depends on the adhesive used and the condition of the nails after removal. If you use adhesive tabs, the press-on nails are generally easier to reuse, as there is less adhesive residue to remove. However, even with adhesive tabs, the nails may become slightly worn or damaged after removal. If you use nail glue, reusing press-on nails can be more challenging. You’ll need to carefully remove any remaining glue from the back of the nails without damaging them. This can be done using a cotton ball soaked in acetone, but be sure to avoid getting acetone on the rhinestone embellishments, as it can dull their shine. Once the glue is removed, you can reapply the press-on nails with fresh adhesive. Keep in mind that press-on nails may not look as pristine after being reused, especially if they have been filed or damaged during wear or removal. Inspect them carefully for any cracks, chips, or missing rhinestones before reapplying. Reusing press-on nails can be a cost-effective way to extend the life of your manicure, but it’s important to prioritize the health and appearance of your nails.
What are some tips for making press-on nails look more natural?
Achieving a seamless look
Making press-on nails look natural is all about attention to detail. Firstly, choose a shape and length that complements your hands and nail beds. Avoid overly long or dramatic shapes if you’re aiming for a natural look. Ensure that the press-on nails fit your natural nails perfectly, filing them down as needed to achieve a seamless fit. Pay close attention to the cuticle area, ensuring that the press-on nails fit snugly against your cuticles without any gaps or sharp edges. Use a thin layer of high-quality nail glue to avoid excessive thickness and bulging around the edges. When applying the press-on nails, press them firmly onto your natural nails, starting at the cuticle and working your way down to the free edge, to eliminate any air bubbles. After application, gently file the edges of the press-on nails to smooth them out and blend them with your natural nails. Consider adding a top coat of clear nail polish to seal the edges and add a natural-looking shine. With careful attention to detail, you can create a press-on nail manicure that looks as natural and polished as a salon-quality set.
How do I prevent my press-on nails from lifting or popping off?
Ensuring a secure hold
Preventing press-on nails from lifting or popping off requires a multi-faceted approach that focuses on proper preparation, adhesive selection, and application technique. Start by thoroughly cleaning and prepping your natural nails, gently buffing the surface to create a slightly rough texture for the adhesive to grip onto. Dehydrate your nails with alcohol to remove any oils or residue. Choose a high-quality nail glue or adhesive tabs that are specifically designed for press-on nails. Apply the adhesive evenly to the entire surface of your natural nail, avoiding excessive amounts that can seep out around the edges. When applying the press-on nail, press it firmly onto your natural nail, starting at the cuticle and working your way down to the free edge. Hold it in place for at least 30 seconds to ensure a secure bond. Avoid getting your hands wet for at least an hour after application. Avoid activities that put excessive stress on your nails, such as typing or cleaning without gloves. Regularly check your press-on nails for any signs of lifting and re-adhere them promptly if necessary.
Where can I buy high-quality pink rhinestone press-on nails?
Finding reliable vendors
Finding high-quality *light pink nails* with rhinestones requires some research and careful consideration of different vendors. Online marketplaces like Etsy and Seller offer a wide variety of press-on nails from independent sellers and established brands. Look for sellers with high ratings and positive reviews, paying attention to comments about the quality of the nails, the durability of the adhesive, and the accuracy of the product descriptions. Reputable beauty supply stores and drugstores also carry a selection of press-on nails, allowing you to inspect the quality and craftsmanship in person before making a purchase. Direct websites from established nail brands are another reliable source, often offering exclusive designs and guarantees of quality. When shopping for press-on nails, pay attention to the materials used, the type of adhesive included, and the overall design aesthetic. Consider the return policy and customer service offered by the vendor in case you are not satisfied with your purchase. By carefully researching your options and choosing a reputable vendor, you can ensure that you’re getting high-quality press-on nails that will last and look beautiful.


Price: $8.56
(as of Sep 07, 2025 05:56:59 UTC – Details)


