Morovan Professional Natural Nail Prep Review gel nail Buying Guide – Oemiu
Morovan Professional Natural Nail Prep Review & Gel Nail Buying Guide
Achieving a salon-quality manicure at home is no longer a distant dream. With the advancements in gel nail technology and the availability of professional-grade products, you can create stunning, long-lasting manicures in the comfort of your own space. One such product gaining popularity is the Morovan Professional Natural Nail Prep. This article provides an in-depth review of the Morovan Natural Nail Prep and serves as a comprehensive buying guide for gel nail products, helping you navigate the often overwhelming world of at-home gel manicures.
Understanding the Importance of Nail Prep for Long-Lasting Gel Manicures
Before diving into the specifics of the Morovan product, let’s emphasize the critical role of nail preparation in achieving a durable and flawless gel manicure. Think of it as preparing a canvas before painting; a smooth, clean, and properly treated surface is essential for the final artwork to shine. Neglecting this crucial step can lead to a host of problems, including lifting, chipping, peeling, and even damage to your natural nails. The goal of nail preparation is to create an ideal bonding surface for the gel polish, ensuring maximum adhesion and longevity. This involves removing any existing oils, debris, or cuticle residue that can interfere with the gel’s ability to adhere properly. A clean, slightly dehydrated nail plate provides the perfect foundation for a gel manicure that lasts for weeks, not days.
Many people underestimate the power of a good nail prep. They might focus on the colors, the designs, or the top coat, but skimping on the initial steps can undermine the entire process. Imagine spending hours meticulously applying layers of gel polish, only to have it start peeling off within a few days. This is a common frustration for those who overlook the importance of proper nail preparation. Furthermore, improper preparation can also lead to fungal infections or damage to the nail bed. So, investing in a quality nail prep product is an investment in the overall health and appearance of your nails. Remember, the key to a successful gel manicure lies not just in the application of the polish itself, but in the meticulous preparation that precedes it. The right prep product, like the Morovan Natural Nail Prep, can make all the difference between a manicure that chips and peels within days and one that stays flawless for weeks.
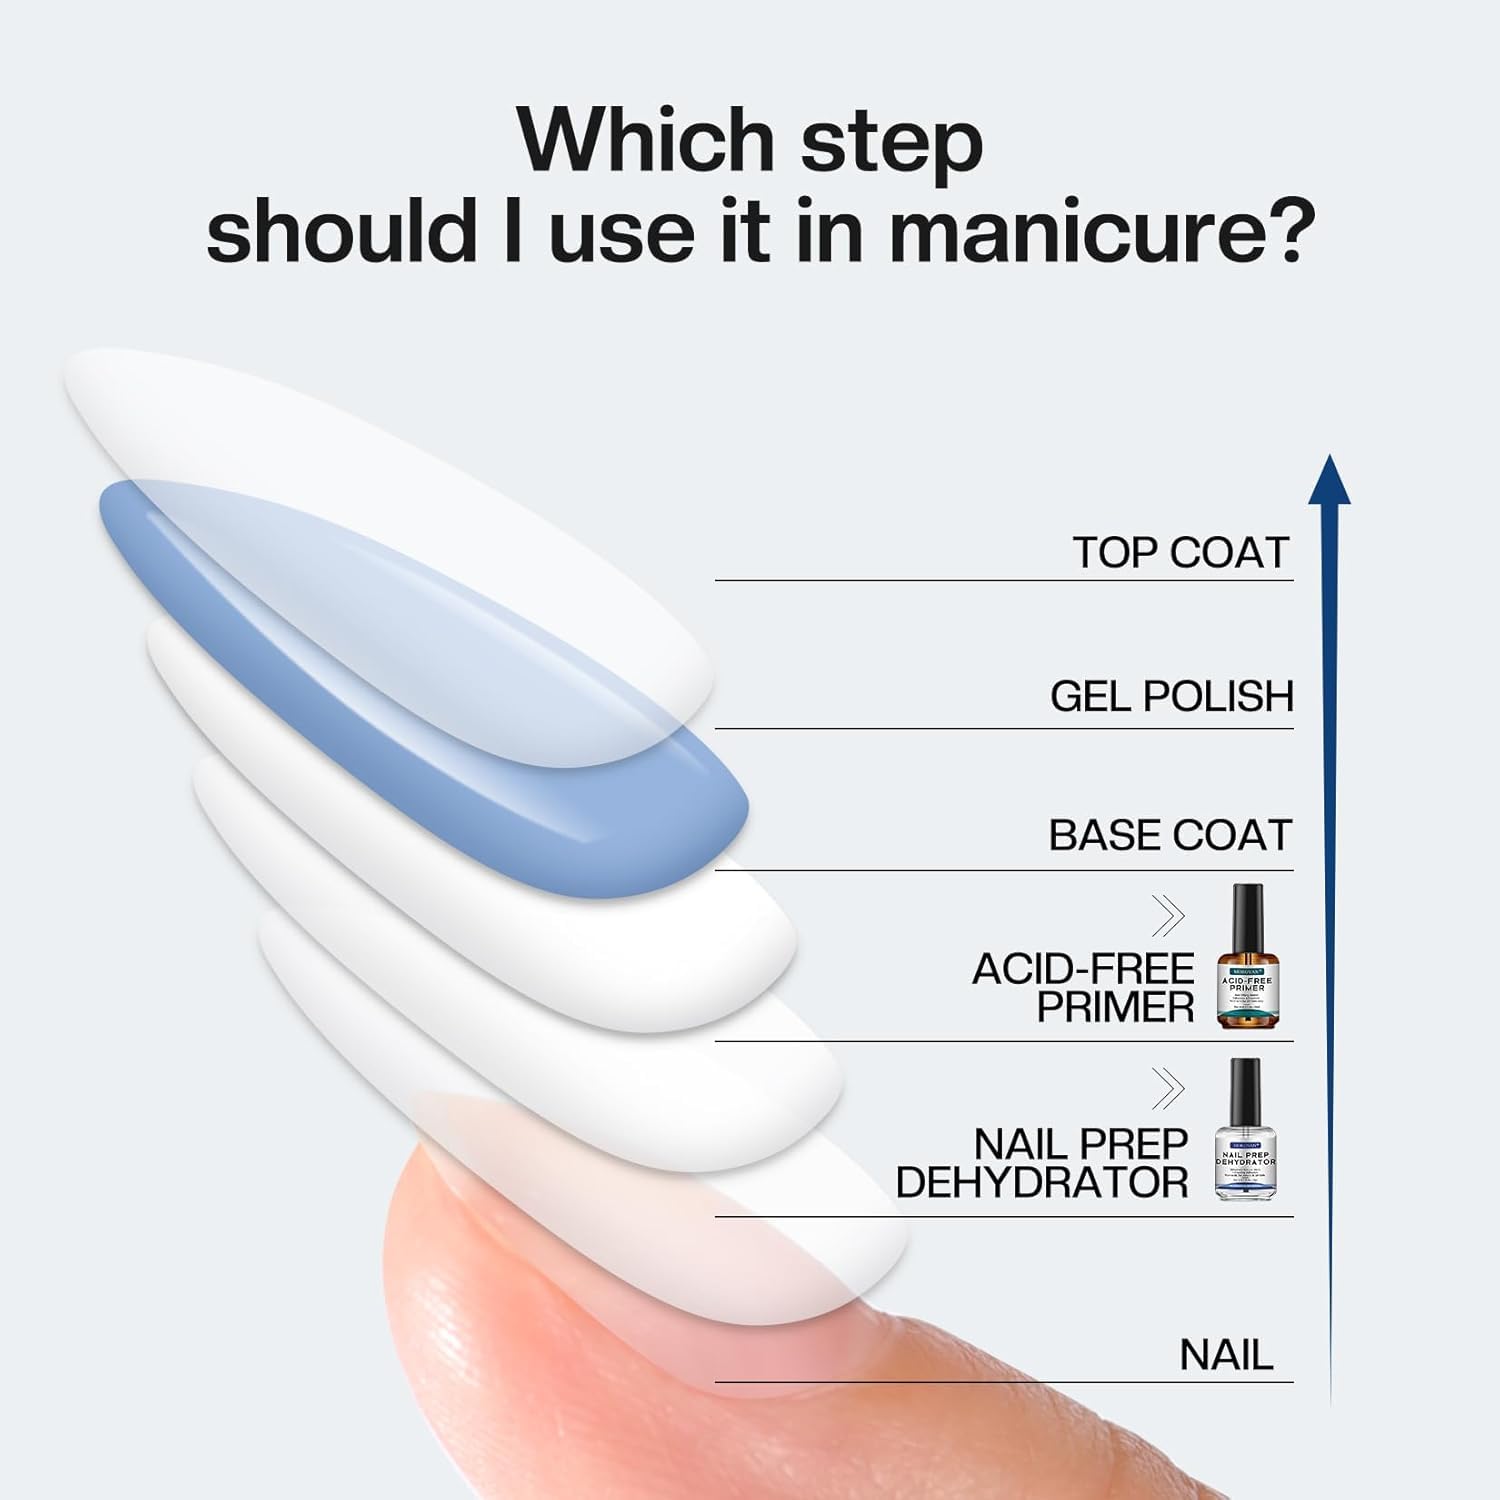
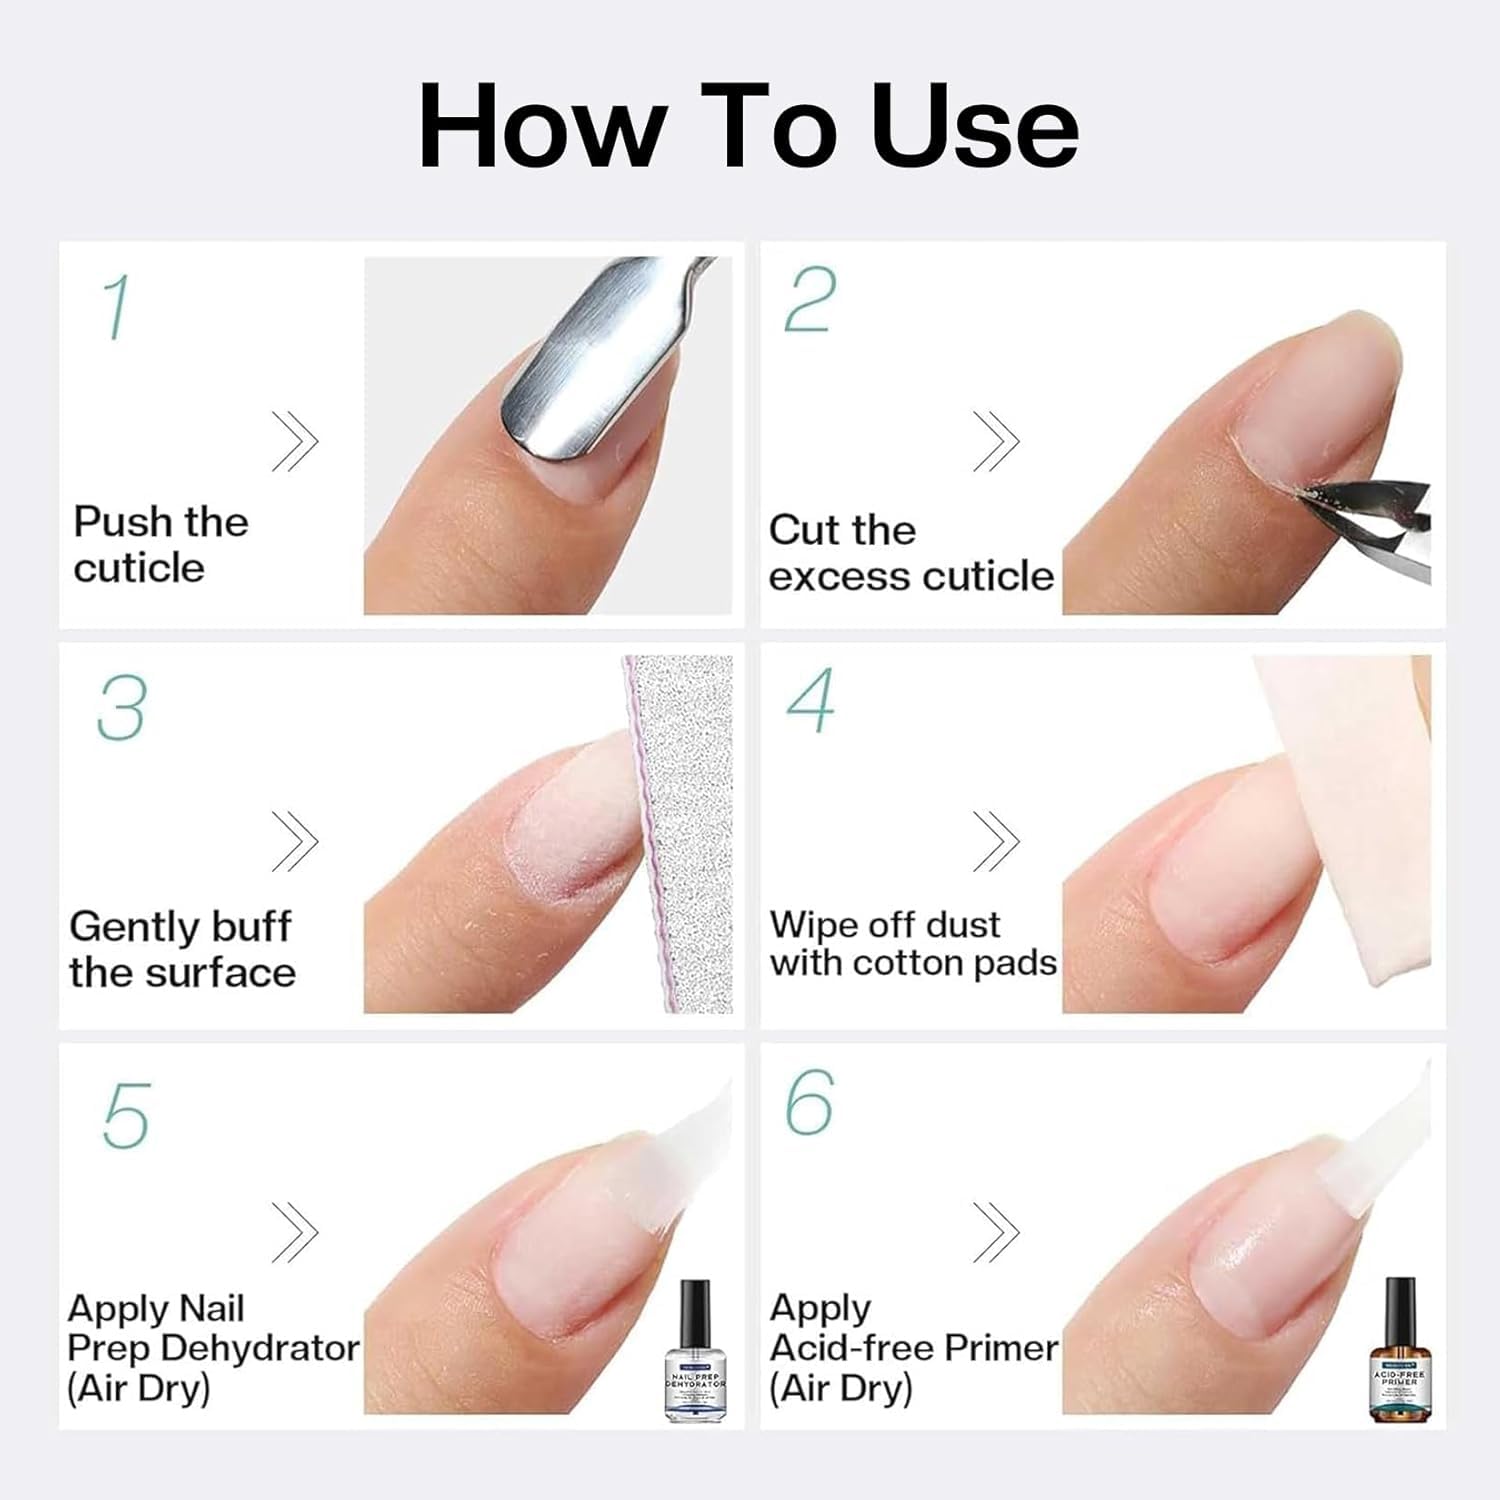
There are several key components to effective nail preparation. First, thoroughly cleanse your hands and nails with soap and water. Next, gently push back your cuticles using a cuticle pusher. You can also use a cuticle remover to soften the cuticles for easier removal. After that, buff the surface of your nails lightly to create a slightly rough texture. This helps the gel polish adhere better. Finally, use a nail dehydrator and primer to remove any remaining oils and moisture from the nail plate. This is where products like Morovan Natural Nail Prep come into play, streamlining the dehydration and priming process into a single, convenient step. By following these steps diligently, you’ll create the ideal foundation for a beautiful and long-lasting gel manicure. Don’t underestimate the power of preparation; it’s the secret ingredient to achieving professional-looking results at home.
In-Depth Review of Morovan Professional Natural Nail Prep
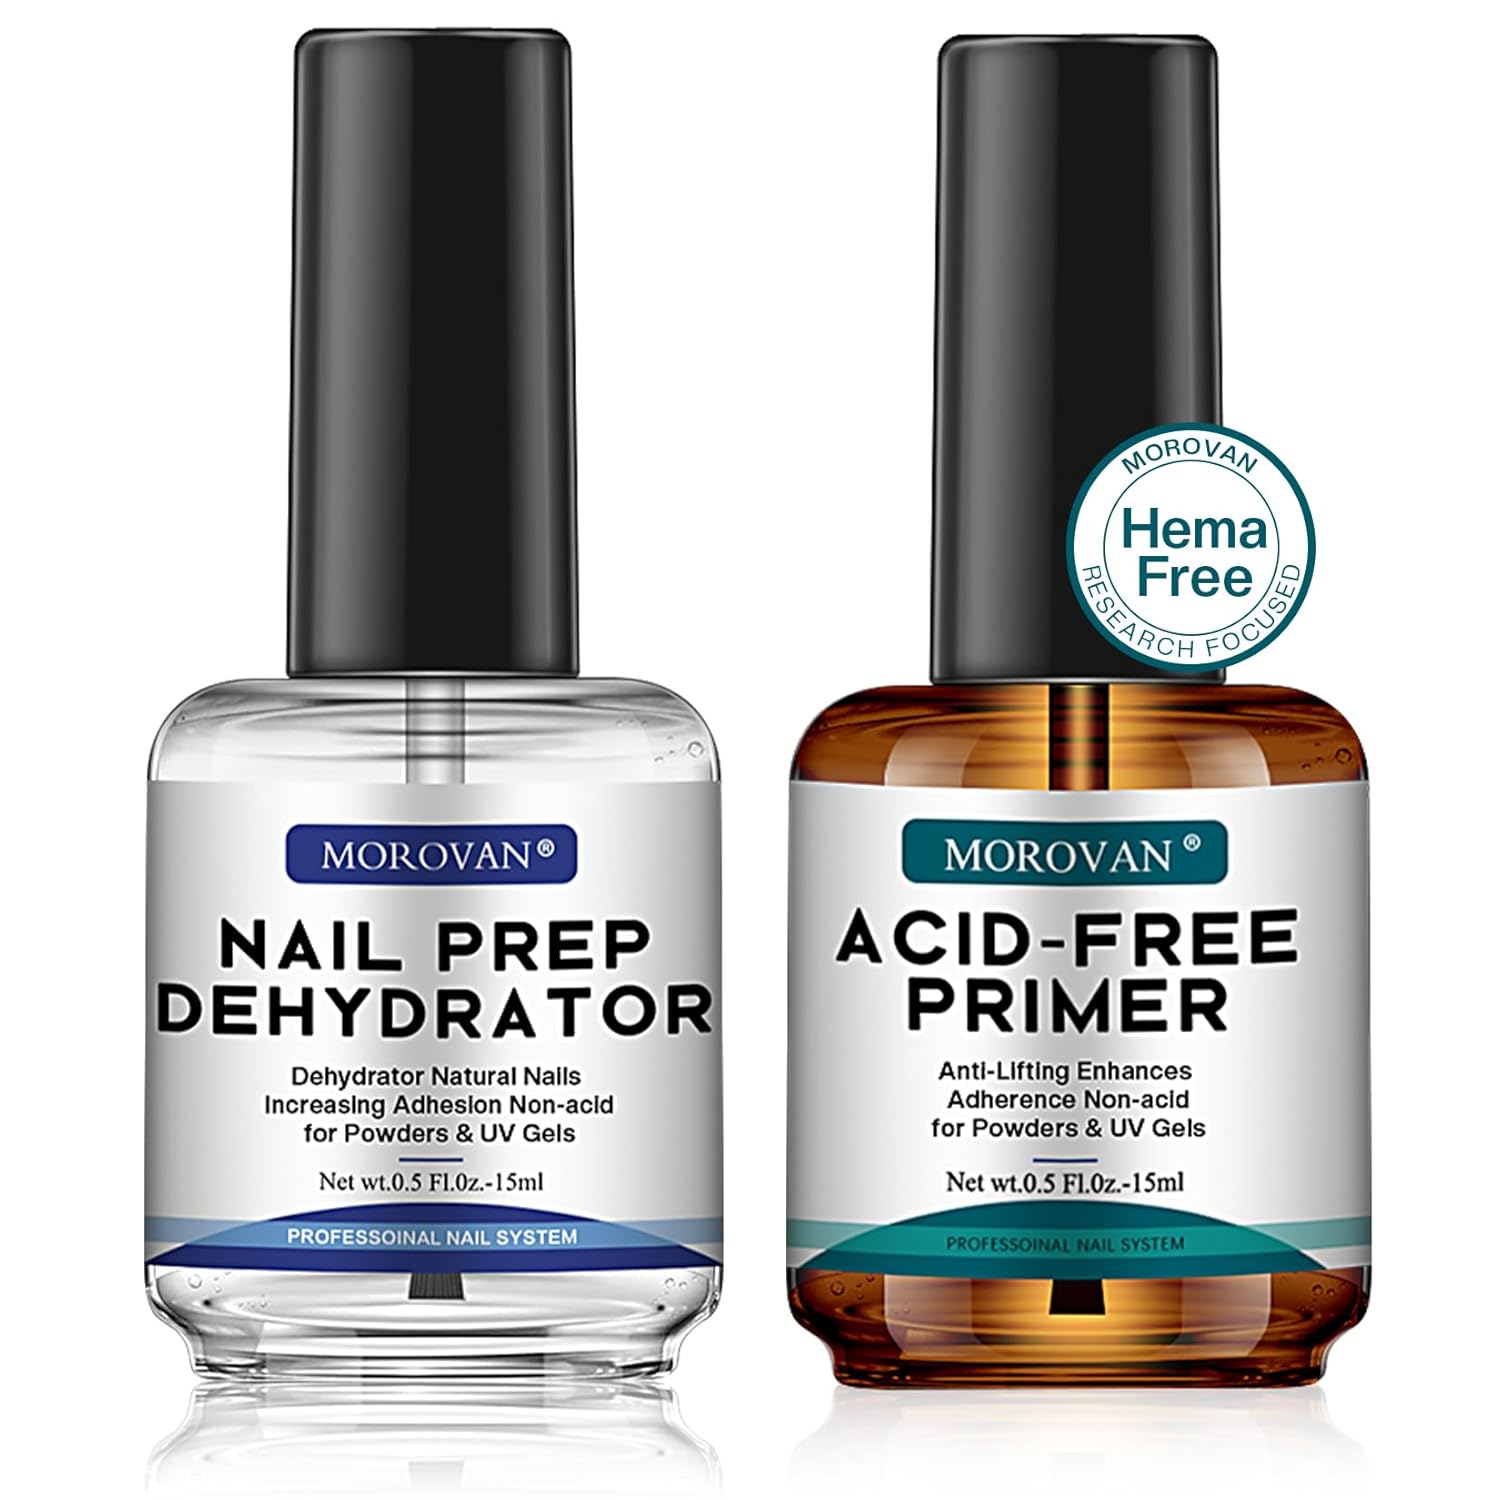
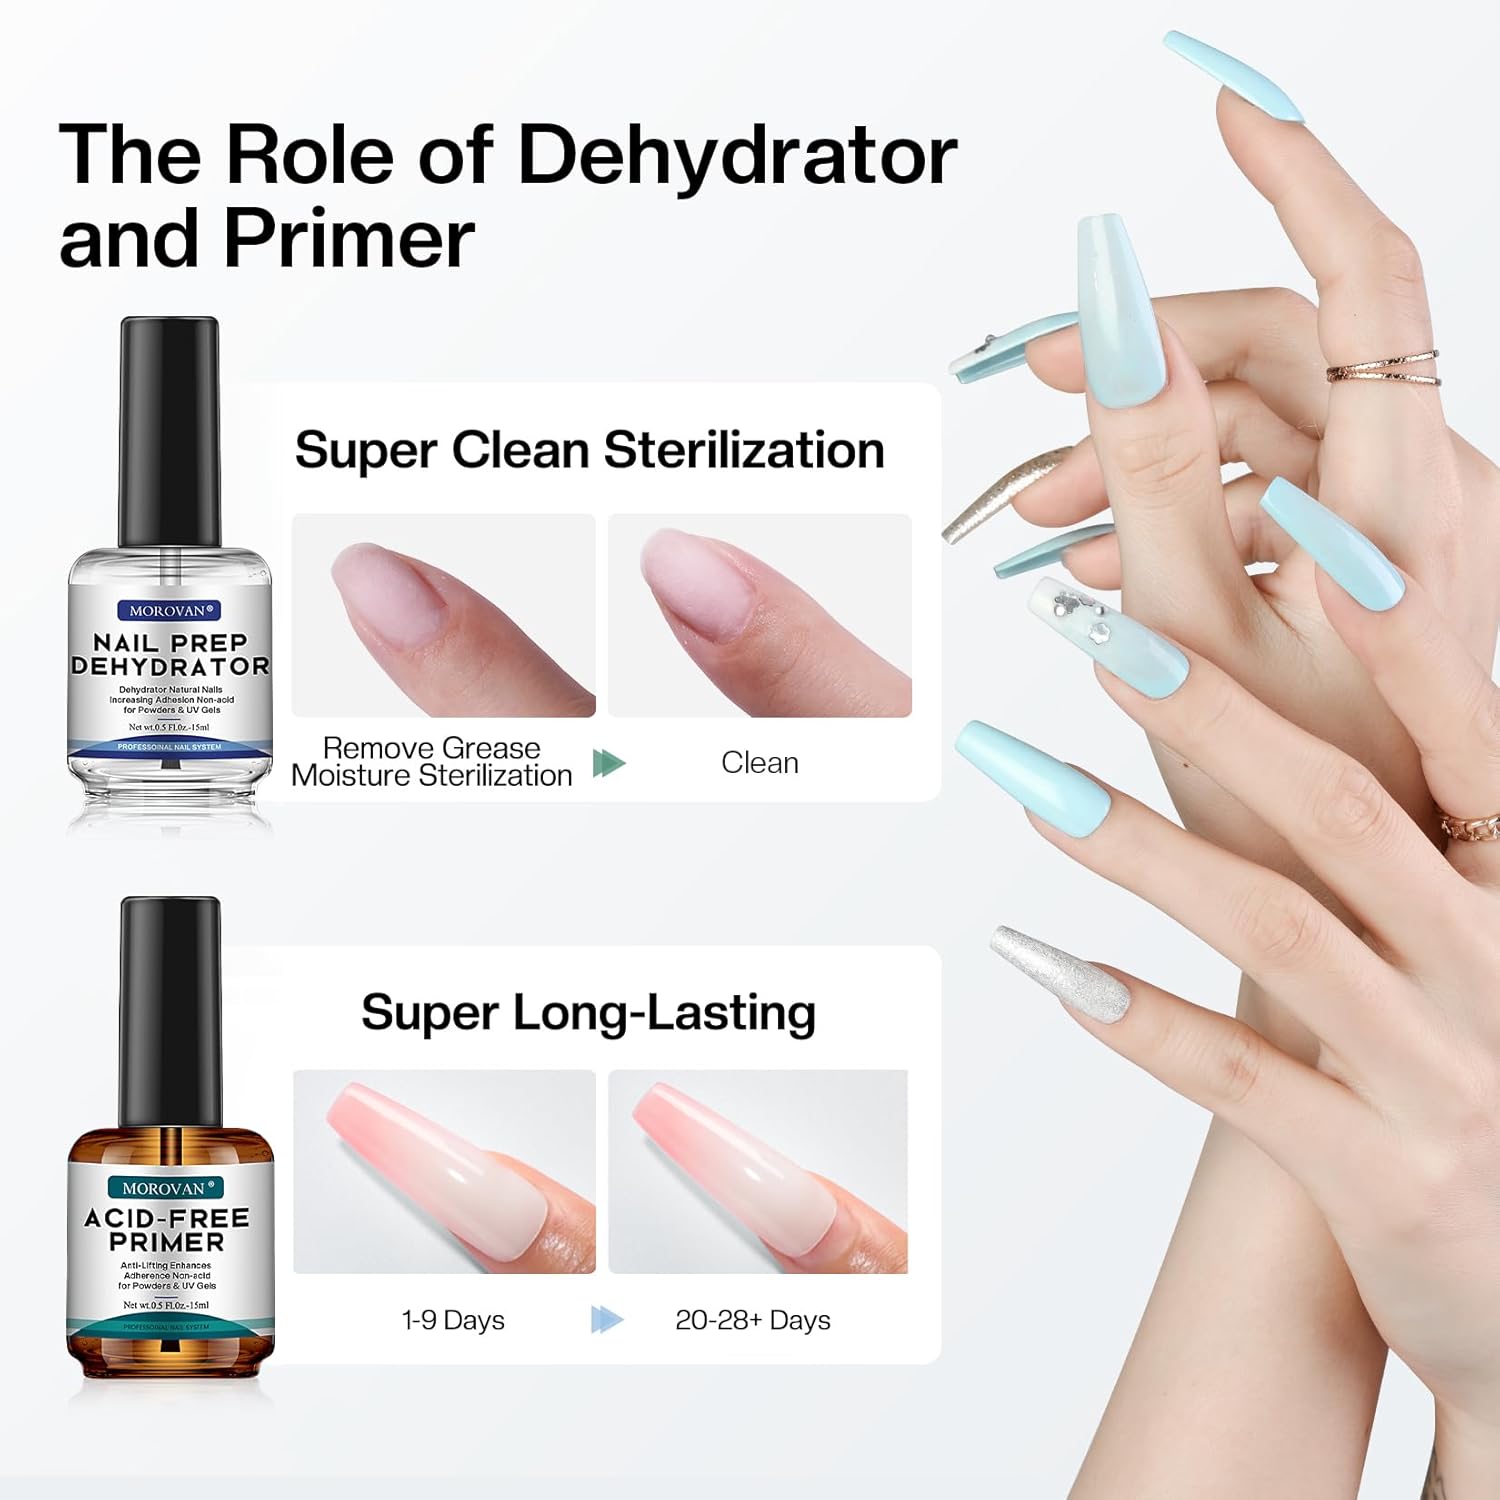
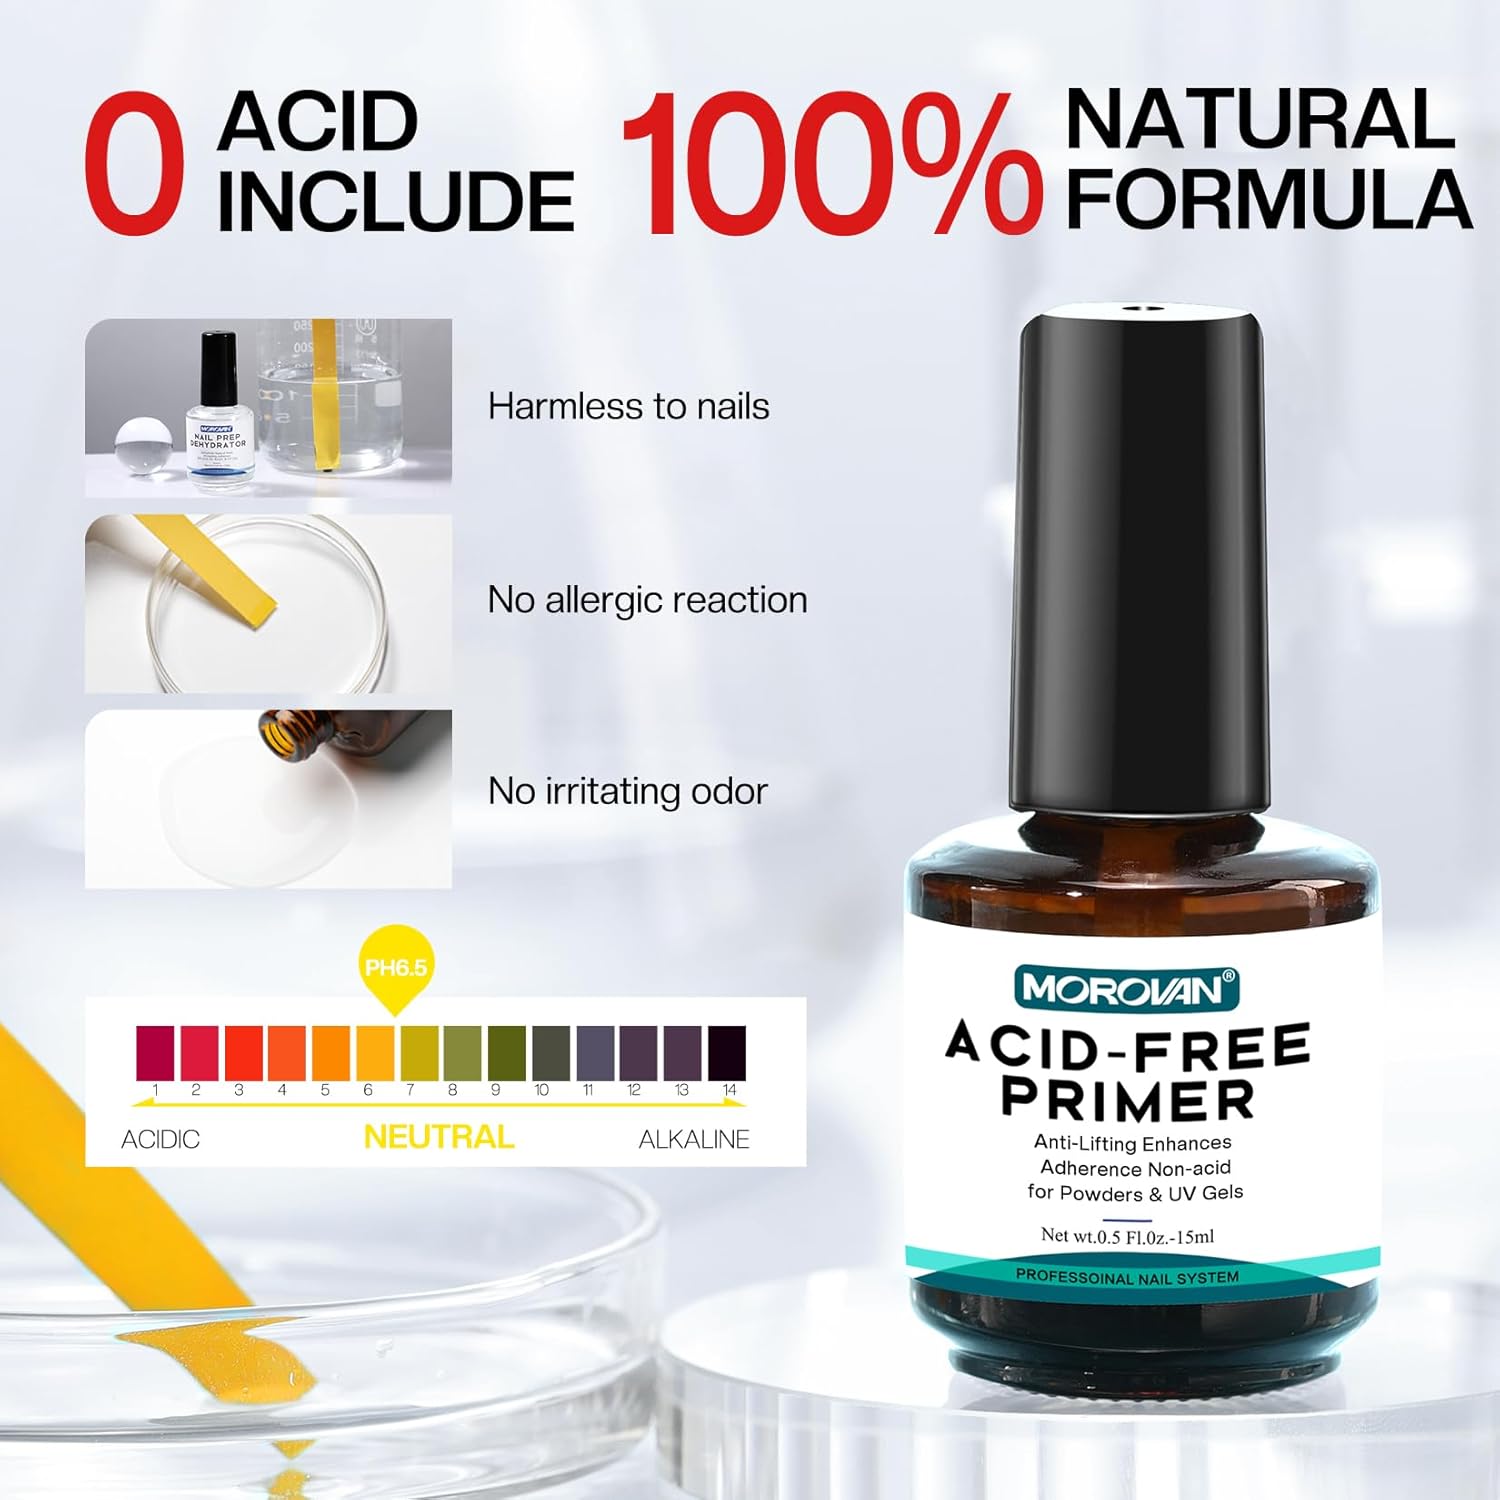
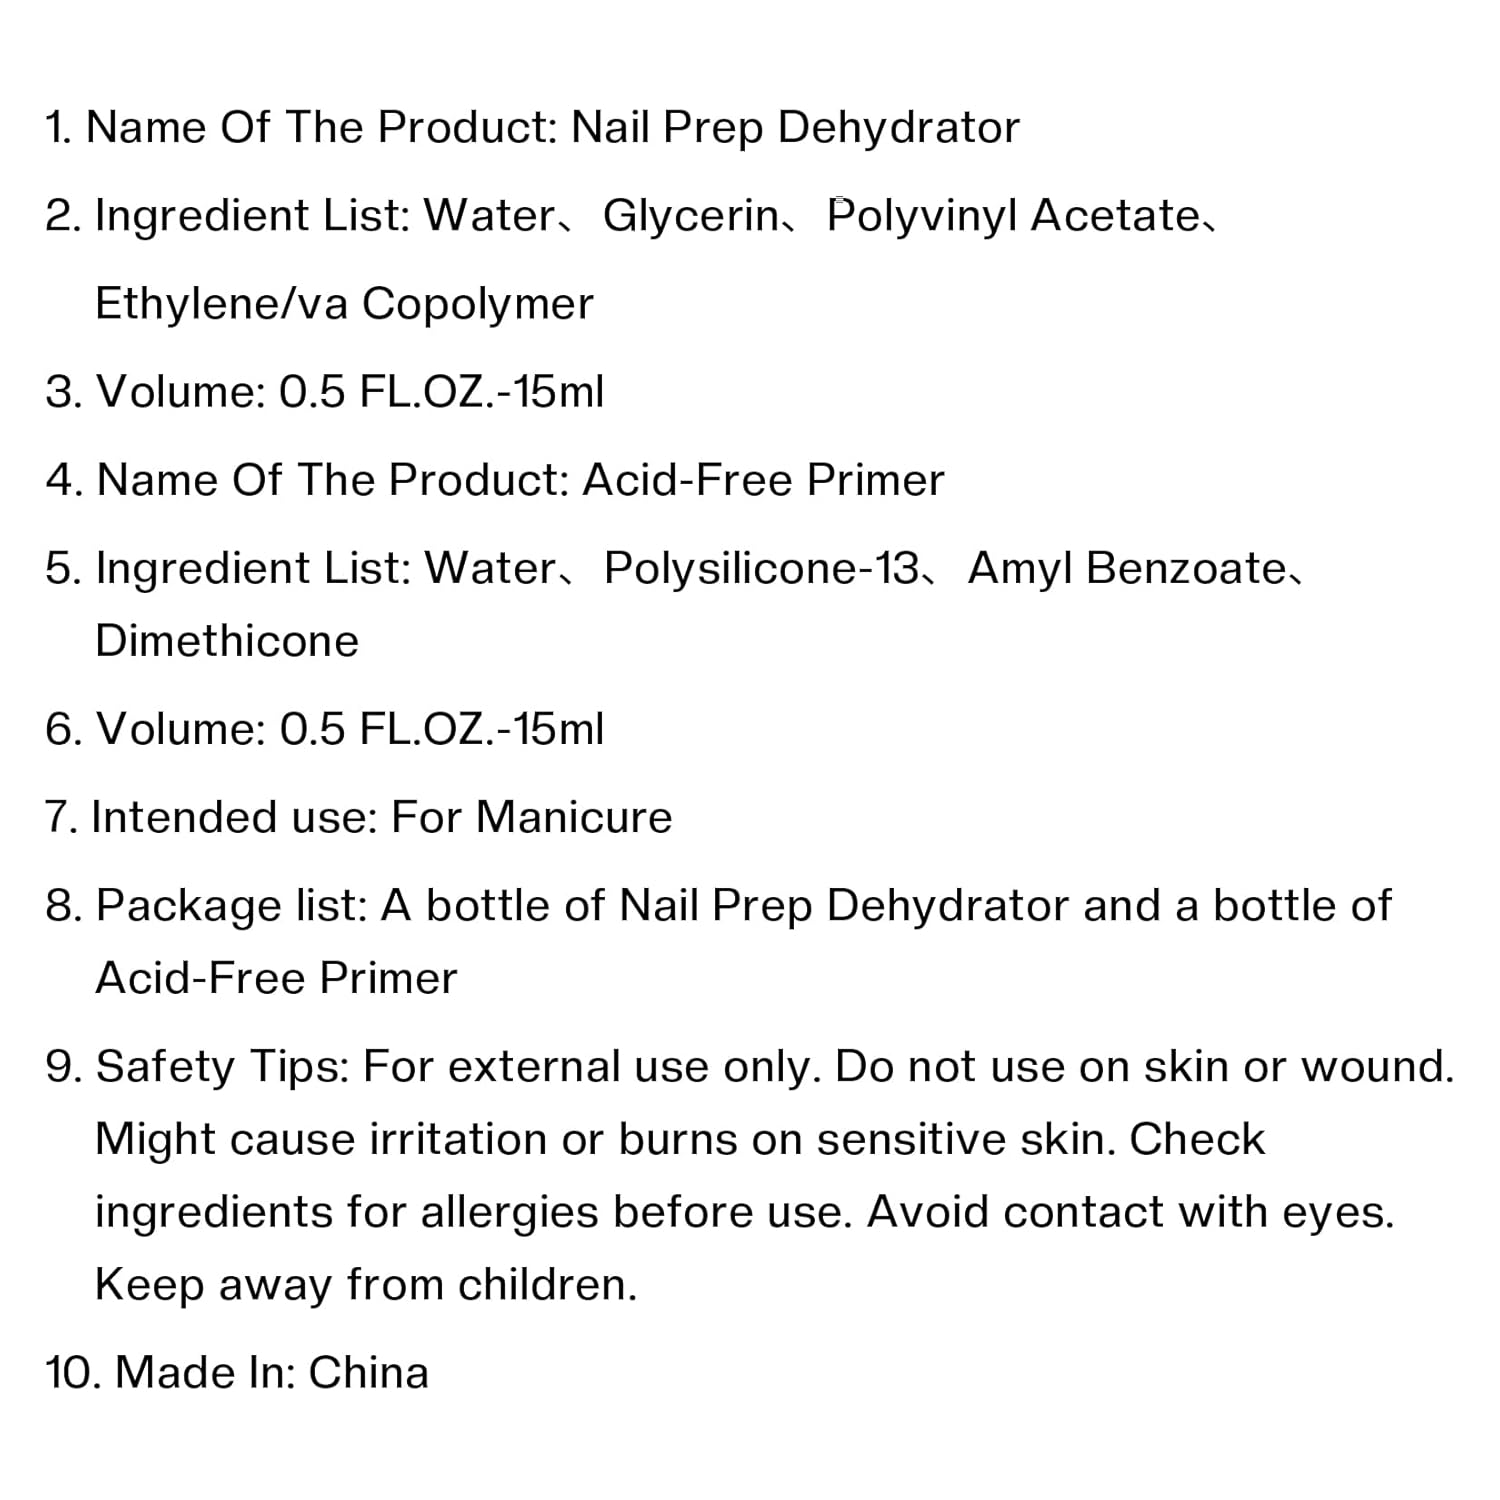
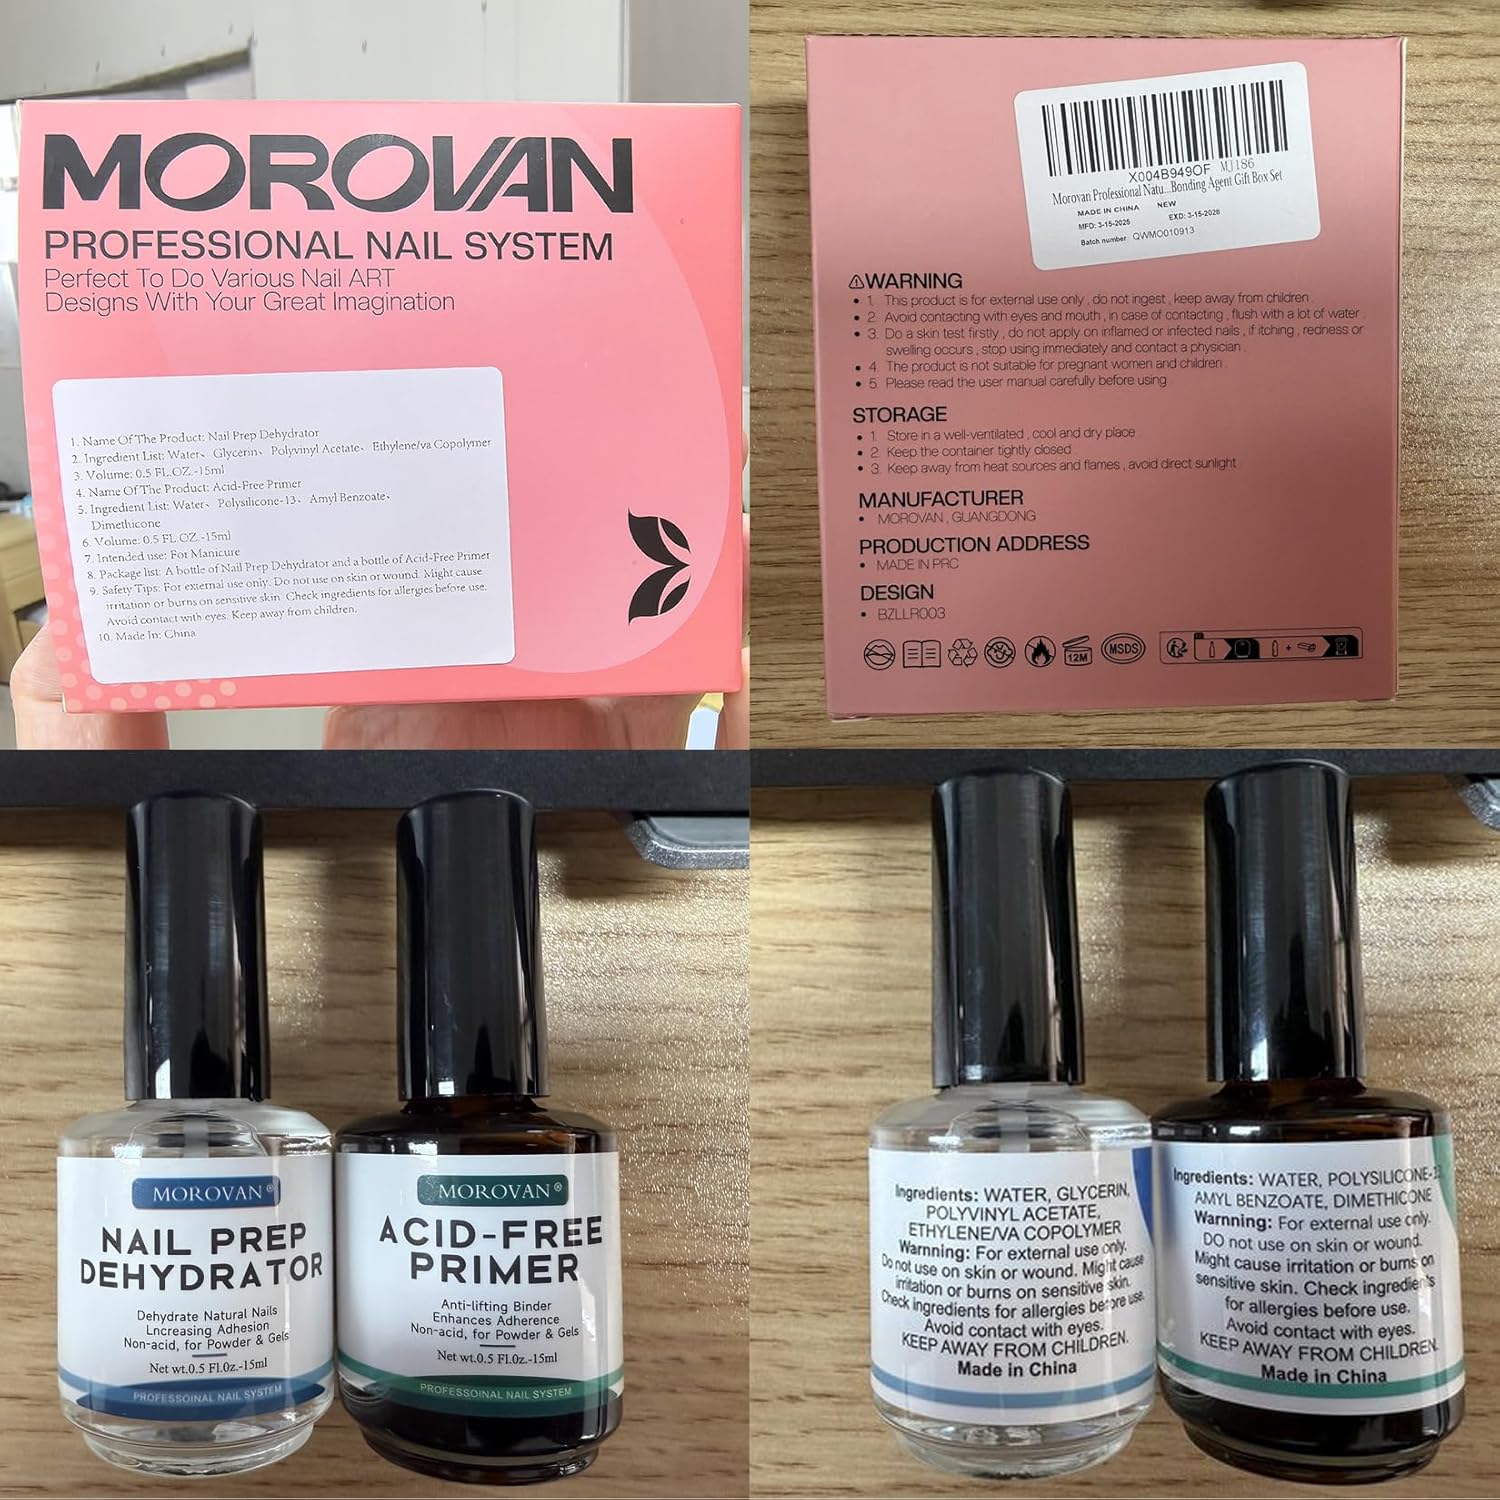
The Morovan Professional Natural Nail Prep is a product designed to streamline the nail preparation process for gel manicures. It aims to cleanse, dehydrate, and prime the nail surface, creating an optimal base for gel polish adhesion. This product stands out due to its ease of use and its promise of extending the life of your gel manicure. Many users praise its ability to prevent lifting and chipping, resulting in a more durable and long-lasting result. It’s formulated to be gentle on natural nails while effectively removing oils and impurities. However, it’s important to remember that individual results may vary depending on nail type and application technique.
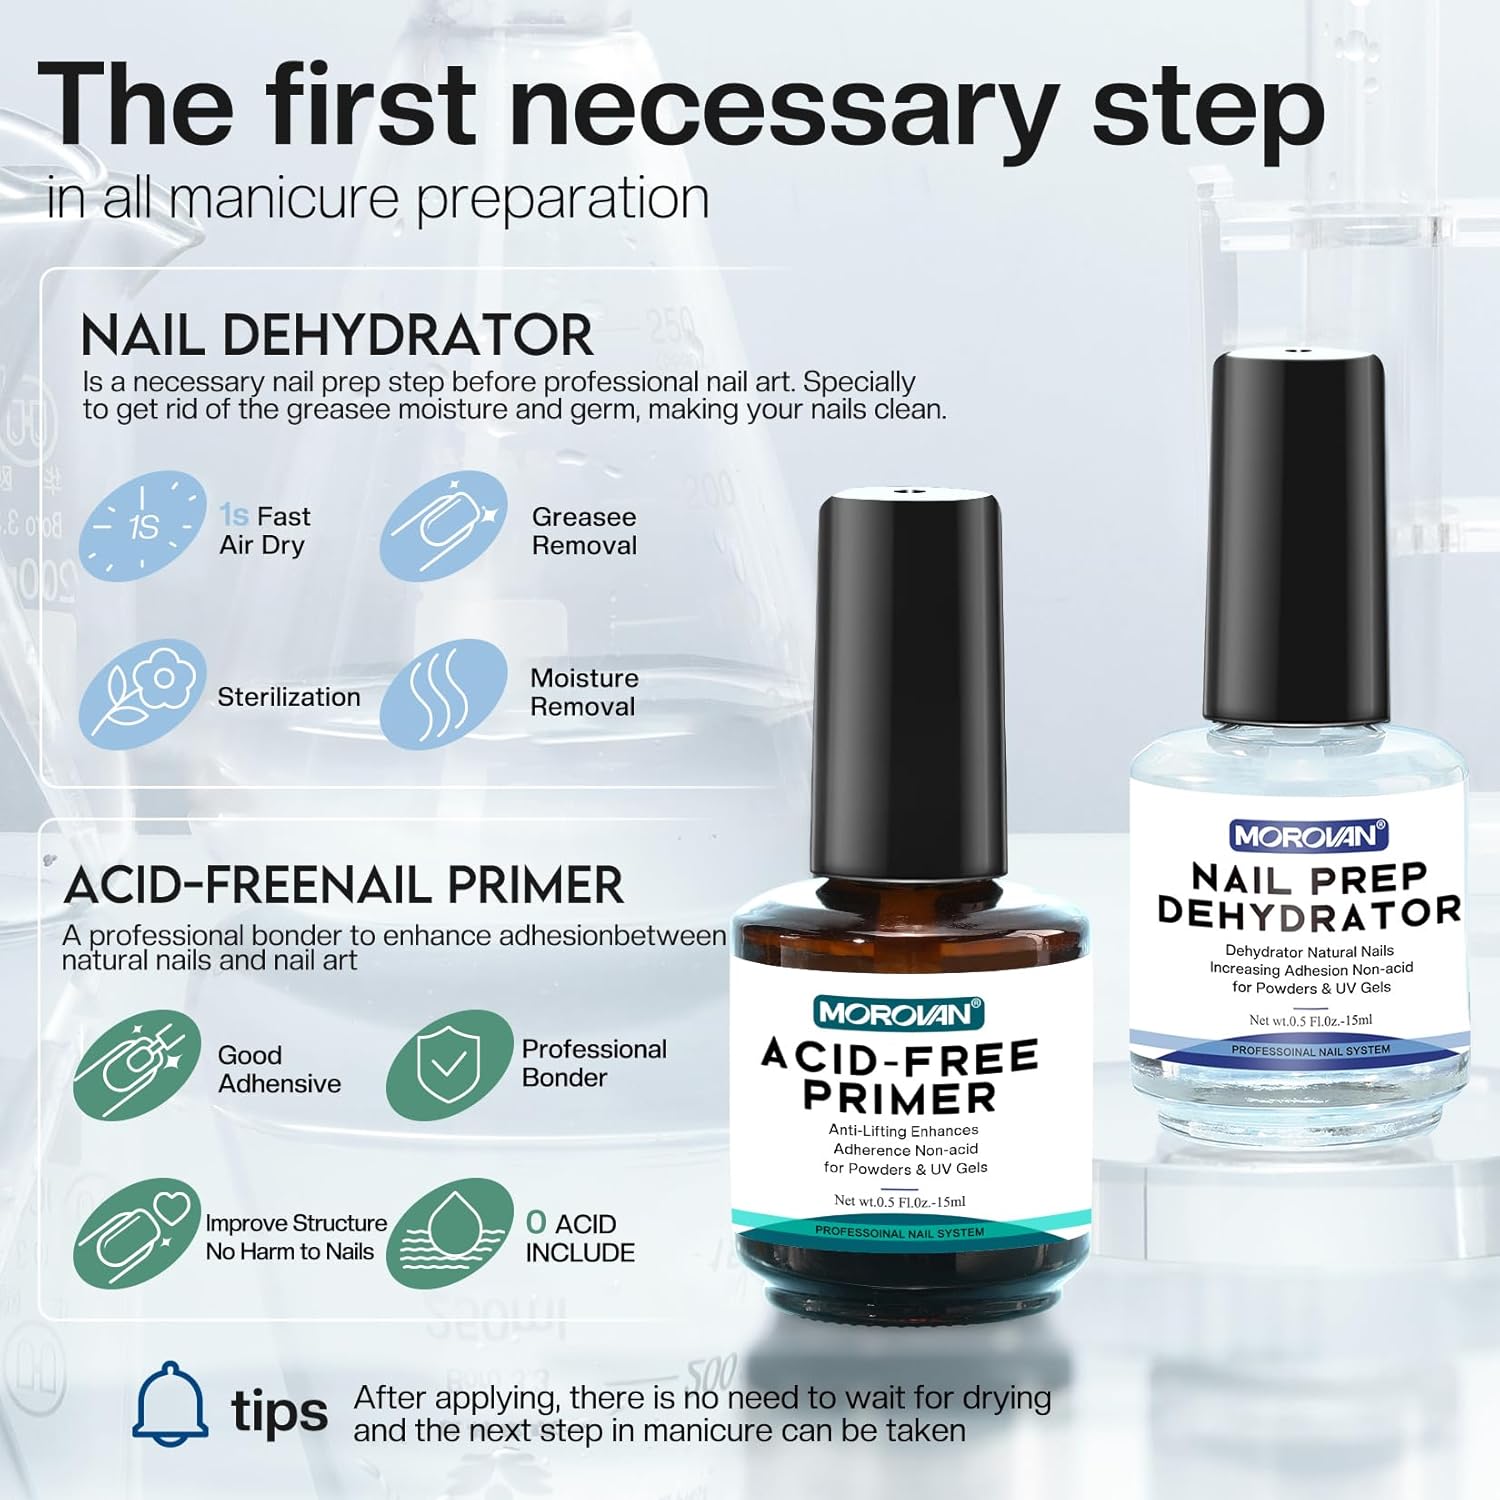
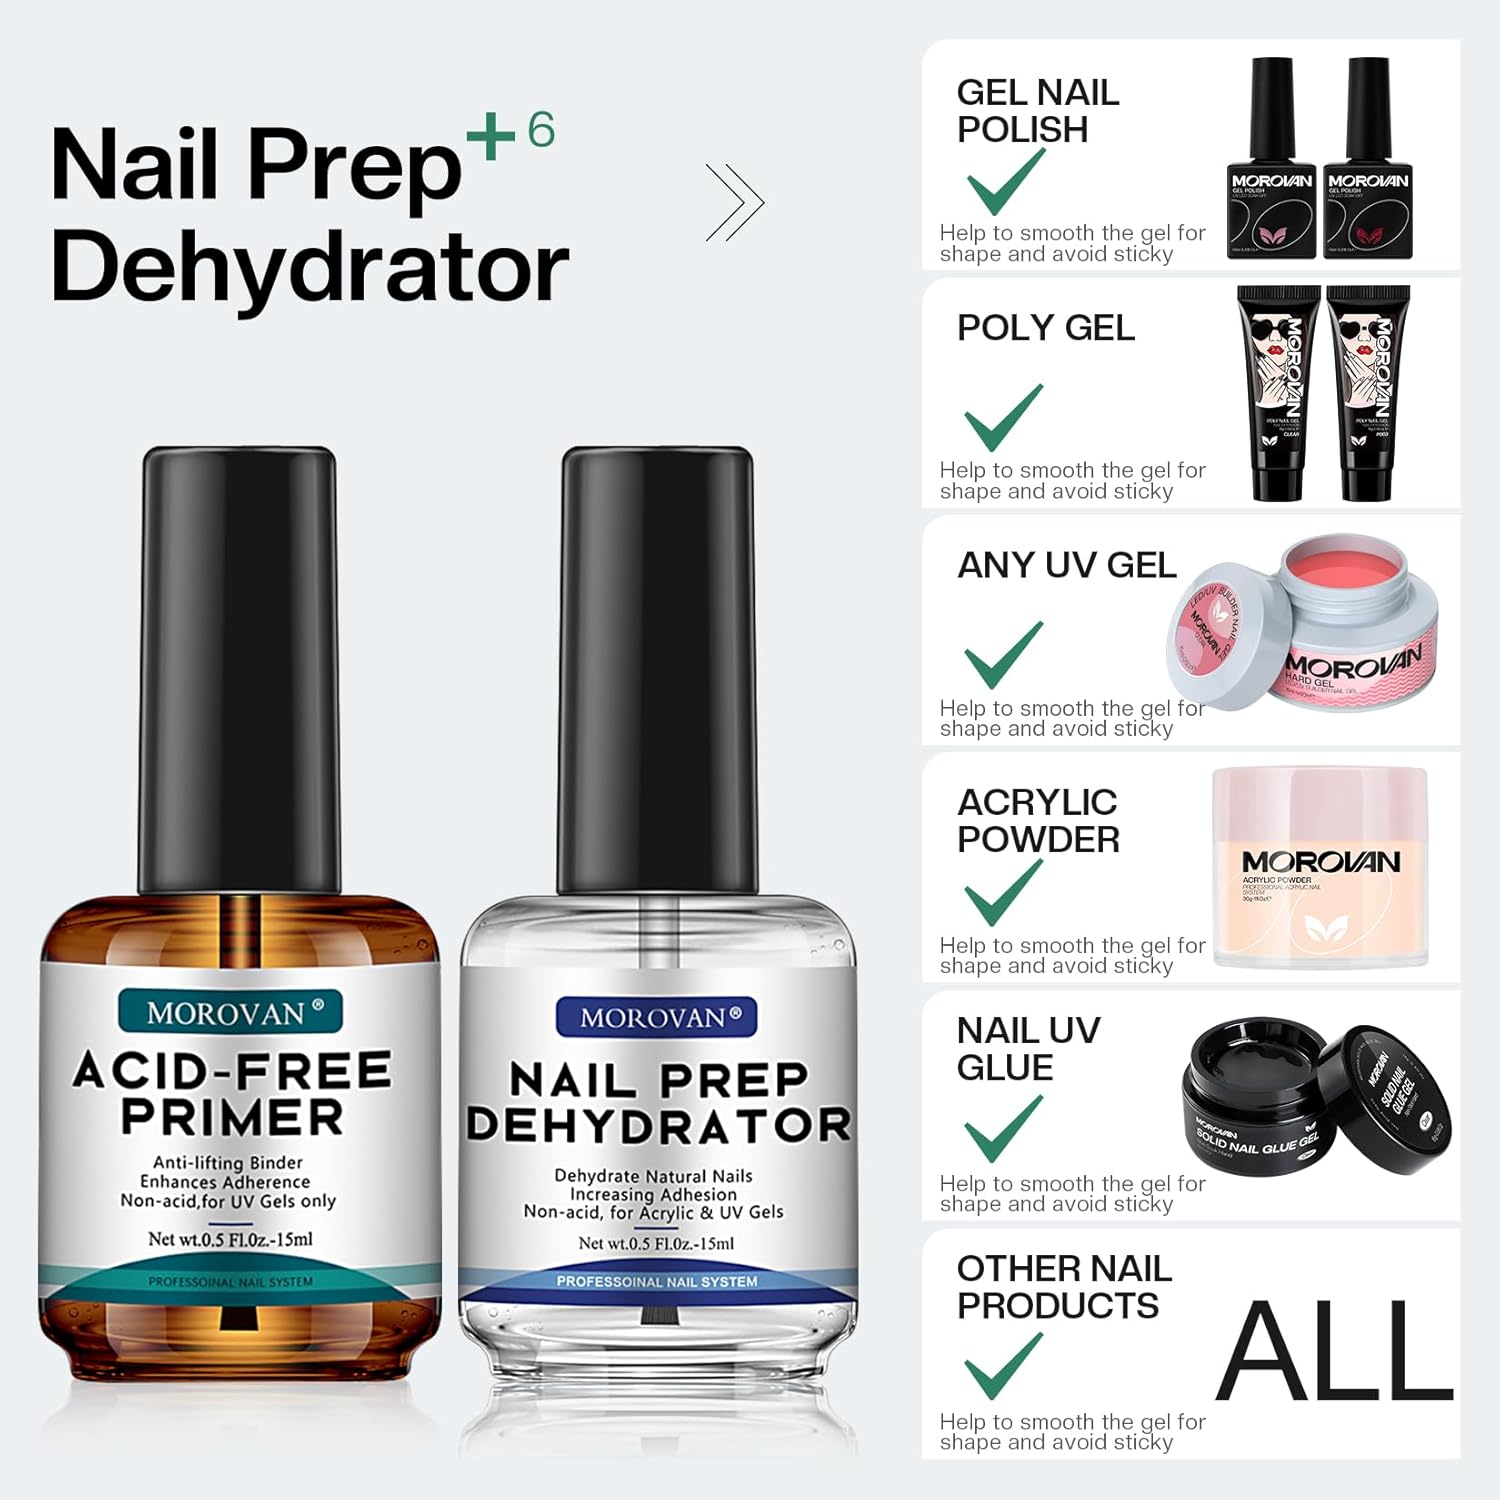
Let’s break down the specific features and benefits of the Morovan Natural Nail Prep. First and foremost, it acts as a dehydrator, removing excess moisture from the nail surface. This is crucial because moisture can interfere with the adhesion of the gel polish, leading to lifting and chipping. Secondly, it functions as a primer, creating a slightly tacky surface that allows the gel polish to grip the nail more effectively. This dual action simplifies the nail preparation process, eliminating the need for separate dehydrator and primer products. Furthermore, the Morovan Natural Nail Prep is formulated to be acid-free, making it gentler on natural nails compared to some other prep products. This is particularly important for individuals with sensitive nails or those who frequently use gel polish. The application is simple and straightforward: apply a thin coat to each nail after buffing and shaping, and allow it to air dry for a few seconds before applying your base coat. Its quick-drying formula saves time and allows you to move on to the next step of your manicure without delay.
To give you a clearer picture of its performance, here’s a comparison of the Morovan Natural Nail Prep against other popular nail prep products on the market:
| Product | Price (Approx.) | Key Features | Pros | Cons |
|---|---|---|---|---|
| Morovan Professional Natural Nail Prep | $8 – $12 | Dehydrates and primes, acid-free, quick-drying | Easy to use, effective in preventing lifting, gentle on nails | May not be strong enough for extremely oily nail beds |
| OPI Bond-Aid | $12 – $16 | Dehydrates nail surface, improves adhesion | Well-known brand, reliable performance | Can be drying, more expensive than some alternatives |
| Mia Secret Nail Prep | $6 – $10 | Dehydrates and balances pH, antiseptic | Affordable, good for preventing infections | Strong scent, may be too drying for some |
User reviews for the Morovan Professional Natural Nail Prep are generally positive. Many users report a significant improvement in the longevity of their gel manicures after incorporating this product into their routine. They also appreciate its ease of use and the fact that it doesn’t dry out their nails excessively. However, some users with particularly oily nail beds have found that it may not be strong enough to completely prevent lifting. In such cases, using a separate, stronger dehydrator in conjunction with the Morovan Natural Nail Prep may be necessary. Overall, the Morovan Professional Natural Nail Prep is a solid choice for those looking for a convenient and effective nail prep product that is gentle on natural nails.
Choosing the Right Gel Nail System: A Comprehensive Guide
Selecting the right gel nail system is essential for achieving beautiful, long-lasting results and maintaining healthy nails. A “gel nail system” isn’t just a bottle of colored gel polish; it’s a complete collection of products designed to work together synergistically to create a durable and attractive manicure. This includes the base coat, colored gel polish, top coat, nail prep solution (like the Morovan Natural Nail Prep discussed earlier), and specialized tools like a UV/LED lamp. Each component plays a vital role in the overall outcome, so it’s important to choose a system that is well-formulated and compatible with your nail type and lifestyle.
There are several factors to consider when choosing a gel nail system. The first is the quality of the products themselves. Look for brands that are reputable and have a good track record of producing long-lasting, chip-resistant gel polishes. Read reviews from other users to get an idea of the product’s performance and durability. Pay attention to the ingredients list, as some gel polishes contain harsh chemicals that can damage your nails over time. Opt for formulas that are free of formaldehyde, toluene, and dibutyl phthalate (DBP) whenever possible. The second factor to consider is the UV/LED lamp. Gel polish requires a UV or LED lamp to cure, which is the process of hardening the polish and bonding it to the nail. Different lamps have different wattages and curing times, so it’s important to choose one that is compatible with the gel polish you’re using. LED lamps generally cure gel polish faster than UV lamps, and they also have a longer lifespan. However, some gel polishes are specifically formulated for use with UV lamps, so be sure to check the product instructions carefully.
Beyond the basics, consider your individual needs and preferences. Do you prefer highly pigmented, opaque colors, or sheer, subtle shades? Do you want a system that offers a wide range of colors and finishes, or are you content with a more limited selection? Think about the types of manicures you typically do. If you frequently create intricate nail art designs, you’ll want a system that includes a variety of tools and accessories, such as brushes, sponges, and dotting tools. If you’re primarily interested in simple, solid-color manicures, a more basic system may suffice. Ultimately, the best gel nail system for you is the one that meets your specific needs and allows you to achieve the desired results with ease and confidence. Don’t be afraid to experiment with different brands and products until you find a combination that works well for you. Remember that the initial investment in a quality gel nail system will pay off in the long run, saving you time and money compared to frequent salon visits. Furthermore, taking the time to learn proper application techniques and nail care practices will help you maintain healthy, beautiful nails for years to come.
Application Techniques for Flawless Gel Nails
Even the best gel nail products can fall short if not applied correctly. Mastering the proper application techniques is crucial for achieving a flawless and long-lasting gel manicure. This involves several key steps, each requiring attention to detail and precision. From prepping the nails to applying the top coat, every stage of the process contributes to the final outcome. This section will outline the essential techniques for achieving professional-looking results at home. Proper application ensures that your investment in quality products translates into a manicure you’ll be proud to show off. The right technique also prevents common problems like bubbling, wrinkling, and uneven coverage.
The first step, as previously discussed, is nail preparation. This involves cleaning, shaping, buffing, and dehydrating the nails. Once the nails are prepped, apply a thin layer of base coat. Be sure to cap the free edge of the nail to prevent chipping. Cure the base coat under the UV/LED lamp according to the manufacturer’s instructions. Next, apply the first layer of colored gel polish. Again, apply a thin layer and cap the free edge. Cure under the lamp. Repeat this process for a second or even a third layer of colored gel polish, depending on the desired opacity. Remember to cure each layer individually. Applying the gel polish in thin layers is essential for preventing bubbling and wrinkling. It also ensures that the polish cures properly all the way through. After applying the colored gel polish, apply a top coat to seal in the color and add shine. Cap the free edge and cure under the lamp. Finally, remove the sticky inhibition layer (if applicable) with a lint-free wipe soaked in isopropyl alcohol or a specialized gel cleanser.
To further enhance your application technique, consider these tips: Always work in a well-lit area to ensure that you can see what you’re doing clearly. Use a fine-tipped brush to clean up any excess gel polish around the cuticles. Avoid getting gel polish on your skin, as this can cause irritation or allergic reactions. If you do get gel polish on your skin, remove it immediately with a cotton swab dipped in acetone. Store your gel polishes in a cool, dark place to prevent them from thickening or changing color. Avoid exposing your gel polishes to direct sunlight or heat. Invest in quality brushes and tools to make the application process easier and more precise. Practice makes perfect, so don’t be discouraged if your first few gel manicures aren’t perfect. With time and experience, you’ll develop your own techniques and preferences. Mastering the art of gel nail application is a rewarding skill that will allow you to create beautiful and long-lasting manicures at home, saving you time and money compared to salon visits. Using the long lasting gel nail polish helps to ensure a beautiful manicure for weeks. Experiment with different colors and designs to express your creativity and personalize your look. Gel nail systems are also designed to easily add a bit of flair.
Troubleshooting Common Gel Nail Problems
Even with careful preparation and application, gel nail problems can still arise. Knowing how to troubleshoot these issues is essential for maintaining a flawless manicure and avoiding damage to your natural nails. Common problems include lifting, chipping, peeling, bubbling, wrinkling, and dullness. Understanding the causes of these problems and how to fix them will help you achieve professional-looking results every time. Furthermore, early detection and intervention can prevent minor issues from escalating into more serious problems, such as nail infections or damage to the nail bed.
Lifting is often caused by inadequate nail preparation, improper application, or exposure to excessive moisture or oils. To prevent lifting, ensure that you thoroughly dehydrate and prime your nails before applying the base coat. Avoid getting gel polish on your skin, as this can create a weak point that leads to lifting. If lifting occurs, gently file down the lifted area and reapply the gel polish. Chipping is often caused by applying the gel polish too thinly or by neglecting to cap the free edge of the nail. To prevent chipping, apply at least two layers of colored gel polish and always cap the free edge. If chipping occurs, carefully file down the chipped area and reapply the gel polish. Peeling is often caused by using incompatible products or by applying the gel polish too thickly. To prevent peeling, use products from the same brand or system and apply the gel polish in thin layers. If peeling occurs, remove the entire manicure and start over. Bubbling is often caused by shaking the gel polish bottle too vigorously or by applying the gel polish in a warm environment. To prevent bubbling, roll the gel polish bottle gently to mix the contents and apply the gel polish in a cool, well-ventilated area. If bubbles appear, try using a toothpick to gently pop them before curing. Wrinkling is often caused by applying the gel polish too thickly or by curing it for too long. To prevent wrinkling, apply the gel polish in thin layers and follow the manufacturer’s instructions for curing time. If wrinkling occurs, remove the entire manicure and start over. Dullness is often caused by using a low-quality top coat or by exposing the manicure to harsh chemicals or abrasive materials. To prevent dullness, use a high-quality top coat and avoid exposing your manicure to harsh chemicals or abrasive materials. If your manicure becomes dull, apply a fresh coat of top coat. With careful attention to detail and a little bit of troubleshooting knowledge, you can overcome these common gel nail problems and achieve a flawless manicure every time. Using a professional gel nail product can make all the difference.
Frequently Asked Questions
What is nail prep and why is it so important for gel manicures?
Nail prep is the process of preparing your natural nails before applying any artificial enhancements, such as gel polish. It typically involves cleaning, shaping, buffing, pushing back cuticles, and dehydrating the nail plate. This process is crucial because it creates a clean, smooth, and oil-free surface for the gel polish to adhere to. Without proper nail prep, the gel polish is likely to lift, chip, or peel prematurely. Oils, dirt, and moisture on the nail surface can interfere with the adhesion of the gel, preventing it from bonding properly. Think of it like painting a wall – you wouldn’t paint over dirt and grime; you’d clean and prime the surface first. Proper nail prep is the foundation for a long-lasting and beautiful gel manicure, ensuring that your investment in time and products pays off. It also helps to protect the health of your natural nails by preventing moisture from being trapped beneath the gel, which can lead to fungal infections.
How does Morovan Natural Nail Prep work?
The Morovan Natural Nail Prep is designed to both dehydrate and prime the nail surface in one step. As a dehydrator, it removes excess oils and moisture from the nail plate, creating a dry surface that is ideal for gel polish adhesion. This is achieved through the use of solvents that evaporate quickly, drawing moisture away from the nail. As a primer, it creates a slightly tacky surface that allows the gel polish to grip the nail more effectively. The primer component typically contains ingredients that promote adhesion, forming a chemical bond between the natural nail and the gel polish. By combining these two functions into a single product, Morovan Natural Nail Prep simplifies the nail preparation process, saving time and effort. It helps to improve the longevity of gel manicures by providing a strong and stable foundation for the gel polish to adhere to, preventing lifting, chipping, and peeling. The acid-free formula is also designed to be gentle on natural nails, minimizing the risk of damage or irritation.
Is Morovan Natural Nail Prep suitable for all nail types?
Generally, Morovan Natural Nail Prep is suitable for most nail types, but individual results can vary. For individuals with particularly oily nail beds, it might be necessary to use a stronger dehydrator in addition to the Morovan Natural Nail Prep to ensure optimal adhesion. Those with dry or sensitive nails may find it beneficial to use a moisturizing base coat or nail oil after removing the gel polish to replenish moisture. However, it is always a good idea to perform a patch test before using any new product on your nails to check for any allergic reactions or sensitivities. Apply a small amount of the product to one nail and wait for 24 hours to see if any irritation occurs. If you experience any redness, itching, or swelling, discontinue use immediately. Remember that proper nail care practices, such as avoiding harsh chemicals and moisturizing regularly, are essential for maintaining healthy nails, regardless of your nail type.
What are the key ingredients to avoid in gel nail products?
When choosing gel nail products, it’s important to be aware of certain ingredients that can be harmful to your health and the health of your nails. The “toxic trio” – formaldehyde, toluene, and dibutyl phthalate (DBP) – are commonly found in nail polishes and should be avoided. Formaldehyde is a known carcinogen and can cause allergic reactions and skin irritation. Toluene is a neurotoxin that can affect the central nervous system. DBP is an endocrine disruptor that can interfere with hormone function. Other ingredients to watch out for include camphor, xylene, and ethyl tosylamide, as these can also cause skin irritation and allergic reactions. Look for gel nail products that are labeled as “3-free,” “5-free,” or “7-free,” indicating that they are free of these harmful ingredients. Choosing products with fewer chemicals can help to minimize the risk of adverse reactions and protect the long-term health of your nails. Consider using “long-tail variations of gel nail”.
How often should I apply gel polish?
The frequency of gel polish application depends on several factors, including the health of your nails, the growth rate of your nails, and your personal preferences. Generally, it’s recommended to remove and reapply gel polish every two to three weeks to prevent damage to your natural nails. Leaving gel polish on for longer than three weeks can increase the risk of lifting, chipping, and peeling, which can weaken the nails. Additionally, prolonged wear can make it more difficult to remove the gel polish without causing damage. It’s important to give your nails a break from gel polish occasionally to allow them to recover and rehydrate. You can do this by taking a week or two off between gel manicures and using a nail strengthener or cuticle oil to nourish and protect your nails. Pay attention to the condition of your nails and adjust the frequency of gel polish application accordingly. If you notice any signs of weakness, thinning, or brittleness, reduce the frequency of application or take a longer break.
What’s the best way to remove gel polish without damaging my nails?
The key to removing gel polish without causing damage to your natural nails is patience and proper technique. Avoid picking or peeling off the gel polish, as this can remove layers of the nail plate and weaken the nails. The most common and effective method is to soak cotton balls in acetone and place them on each nail. Wrap each nail with aluminum foil to hold the cotton ball in place and allow the acetone to soak for 10-15 minutes. After soaking, the gel polish should be soft and easily scraped off with a cuticle pusher or orangewood stick. If the gel polish is still difficult to remove, repeat the soaking process for a few more minutes. Once the gel polish is removed, gently buff the nails to smooth out any imperfections and apply a cuticle oil to rehydrate the nails. Avoid using harsh tools or excessive force, as this can damage the nail plate. Remember, patience is key to removing gel polish safely and effectively. Another option is to use a gel polish remover machine, which uses heat and acetone vapor to remove the gel polish more quickly and gently.
Can I use regular nail polish under gel polish?
While it’s generally not recommended, you *can* technically use regular nail polish under gel polish, but there are a few important considerations. The main concern is that regular nail polish doesn’t cure under a UV/LED lamp like gel polish does. This means it will remain soft and can potentially interfere with the adhesion of the gel polish, leading to lifting, chipping, or peeling. If you choose to use regular nail polish as a base color, make sure it is completely dry before applying the gel base coat. Apply thin, even coats of regular nail polish and allow ample drying time – at least 30 minutes to an hour is recommended. It’s also a good idea to use a clear base coat over the regular nail polish to create a smoother surface for the gel polish to adhere to. Keep in mind that using regular nail polish under gel polish may shorten the longevity of your gel manicure. If you want to add color or designs under gel polish, consider using gel polish colors or nail art products that are specifically designed for use with gel systems. Also remember that using long-tail variations of gel nail, may provide added benefits.
Price: $6.99 - $6.16
(as of Sep 09, 2025 01:32:15 UTC – Details)


