Cuisinart Ice Cream Maker Machine, Review ice cream churn Buying Guide – Oemiu
Cuisinart Ice Cream Maker Machine: A Churn Above the Rest & Buying Guide
Imagine a hot summer afternoon. The sun blazes, a gentle breeze offers little respite, and all you crave is a scoop of something cold, creamy, and utterly decadent. Now, imagine that instead of settling for a store-bought option laden with preservatives and questionable ingredients, you could whip up a batch of artisanal ice cream, sorbet, or frozen yogurt right in your own kitchen. This is the promise of the Cuisinart ice cream maker. More than just a kitchen gadget, it’s a portal to frozen dessert nirvana, offering control over ingredients, flavors, and textures. But with various models and features available, choosing the right Cuisinart ice cream churn can feel a little overwhelming. This comprehensive guide will navigate you through the delicious world of Cuisinart ice cream makers, helping you select the perfect machine to satisfy your sweet tooth and unleash your inner gelato artist.
Understanding the Allure of Homemade Frozen Desserts
Beyond the immediate satisfaction of a perfectly crafted scoop, making ice cream at home offers a wealth of benefits that go far beyond what you can find in the freezer aisle. First and foremost is control over ingredients. Commercial ice creams often contain artificial flavors, stabilizers, and preservatives designed to extend shelf life. By making your own, you can use fresh, high-quality ingredients, tailoring the recipe to your dietary needs and preferences. Want organic vanilla bean ice cream? No problem. Lactose-free chocolate sorbet? Easily done. The possibilities are limited only by your imagination. This level of customization is particularly valuable for individuals with allergies, sensitivities, or specific dietary requirements. You can avoid common allergens like gluten, dairy, or soy with ease, ensuring that everyone can enjoy a delicious frozen treat. Furthermore, making ice cream at home is a creative outlet. Experiment with different flavor combinations, infusions, and textures. Infuse your cream with lavender, add a swirl of homemade caramel, or fold in chunks of your favorite cookies. Each batch becomes a unique culinary adventure, a chance to express your personal taste and impress your friends and family. In a world saturated with mass-produced foods, homemade ice cream offers a return to simpler pleasures, a connection to the ingredients, and a genuine sense of satisfaction.
The fun doesn’t stop with ice cream. Explore the world of sorbets with fresh fruits of the season. Think of a vibrant raspberry sorbet in the summer, or a comforting apple cider sorbet in the fall. Frozen yogurt allows for healthier options, using low-fat yogurt and natural sweeteners. Gelato, with its denser texture and intense flavor, is also within reach. By investing in a good ice cream machine, you are opening the door to a world of frozen desserts that you can create and tailor to your personal preferences. Plus, let’s not forget the sheer entertainment value. Ice cream making can be a fun and engaging activity for the whole family, especially with kids. They can participate in choosing flavors, adding ingredients, and watching the magic happen as the liquid mixture transforms into a creamy, frozen delight. It’s a great way to teach them about cooking, nutrition, and the joy of creating something from scratch.
Exploring the Cuisinart Ice Cream Maker Lineup: Models and Features
Cuisinart offers a range of ice cream makers designed to cater to different needs and budgets. Understanding the key features and differences between models is crucial for making an informed decision. The most common type of Cuisinart ice cream maker is the freezer bowl model. These machines require pre-freezing the bowl for a specified amount of time (typically 16-24 hours) before use. This pre-freezing process is essential for the machine to properly freeze the ice cream mixture. The advantage of freezer bowl models is that they are generally more affordable and compact than compressor models. However, the need to pre-freeze the bowl requires planning ahead, and you are limited to making only one batch of ice cream at a time unless you have multiple freezer bowls.
Cuisinart also offers compressor models, which eliminate the need for pre-freezing. These machines have a built-in compressor that cools the ice cream mixture directly, allowing you to make multiple batches back-to-back without any waiting time. Compressor models are more expensive but offer greater convenience and flexibility. They are ideal for those who make ice cream frequently or who want to experiment with different flavors without being constrained by the freezer bowl’s capacity. Within both the freezer bowl and compressor categories, Cuisinart offers variations in capacity, features, and design. Some models have pre-set programs for different types of frozen desserts, such as ice cream, sorbet, and gelato. Others have a simple on/off switch and require manual monitoring. Some models have a countdown timer, and others will simply run until you turn them off.
Consider the capacity of the ice cream maker. Smaller models are suitable for individuals or small families, while larger models are better for entertaining or for those who want to make larger batches for future consumption. Also, consider the ease of use and cleaning. Look for models with removable parts that are dishwasher safe. Finally, consider the noise level of the machine. Some ice cream makers can be quite noisy, especially during the churning process. Read reviews and watch videos to get an idea of the noise level before making a purchase. The Cuisinart ICE-21 is a popular entry-level freezer bowl model, known for its affordability and ease of use. The Cuisinart ICE-100 is a higher-end compressor model, offering greater convenience and features. Choosing the right model depends on your individual needs and preferences. No matter your choice, understanding the features is the first step toward the perfect homemade frozen dessert.
| Model | Type | Capacity | Key Features | Approximate Price |
|---|---|---|---|---|
| Cuisinart ICE-21 | Freezer Bowl | 1.5 Quarts | Simple operation, pre-freeze bowl required | $70 – $100 |
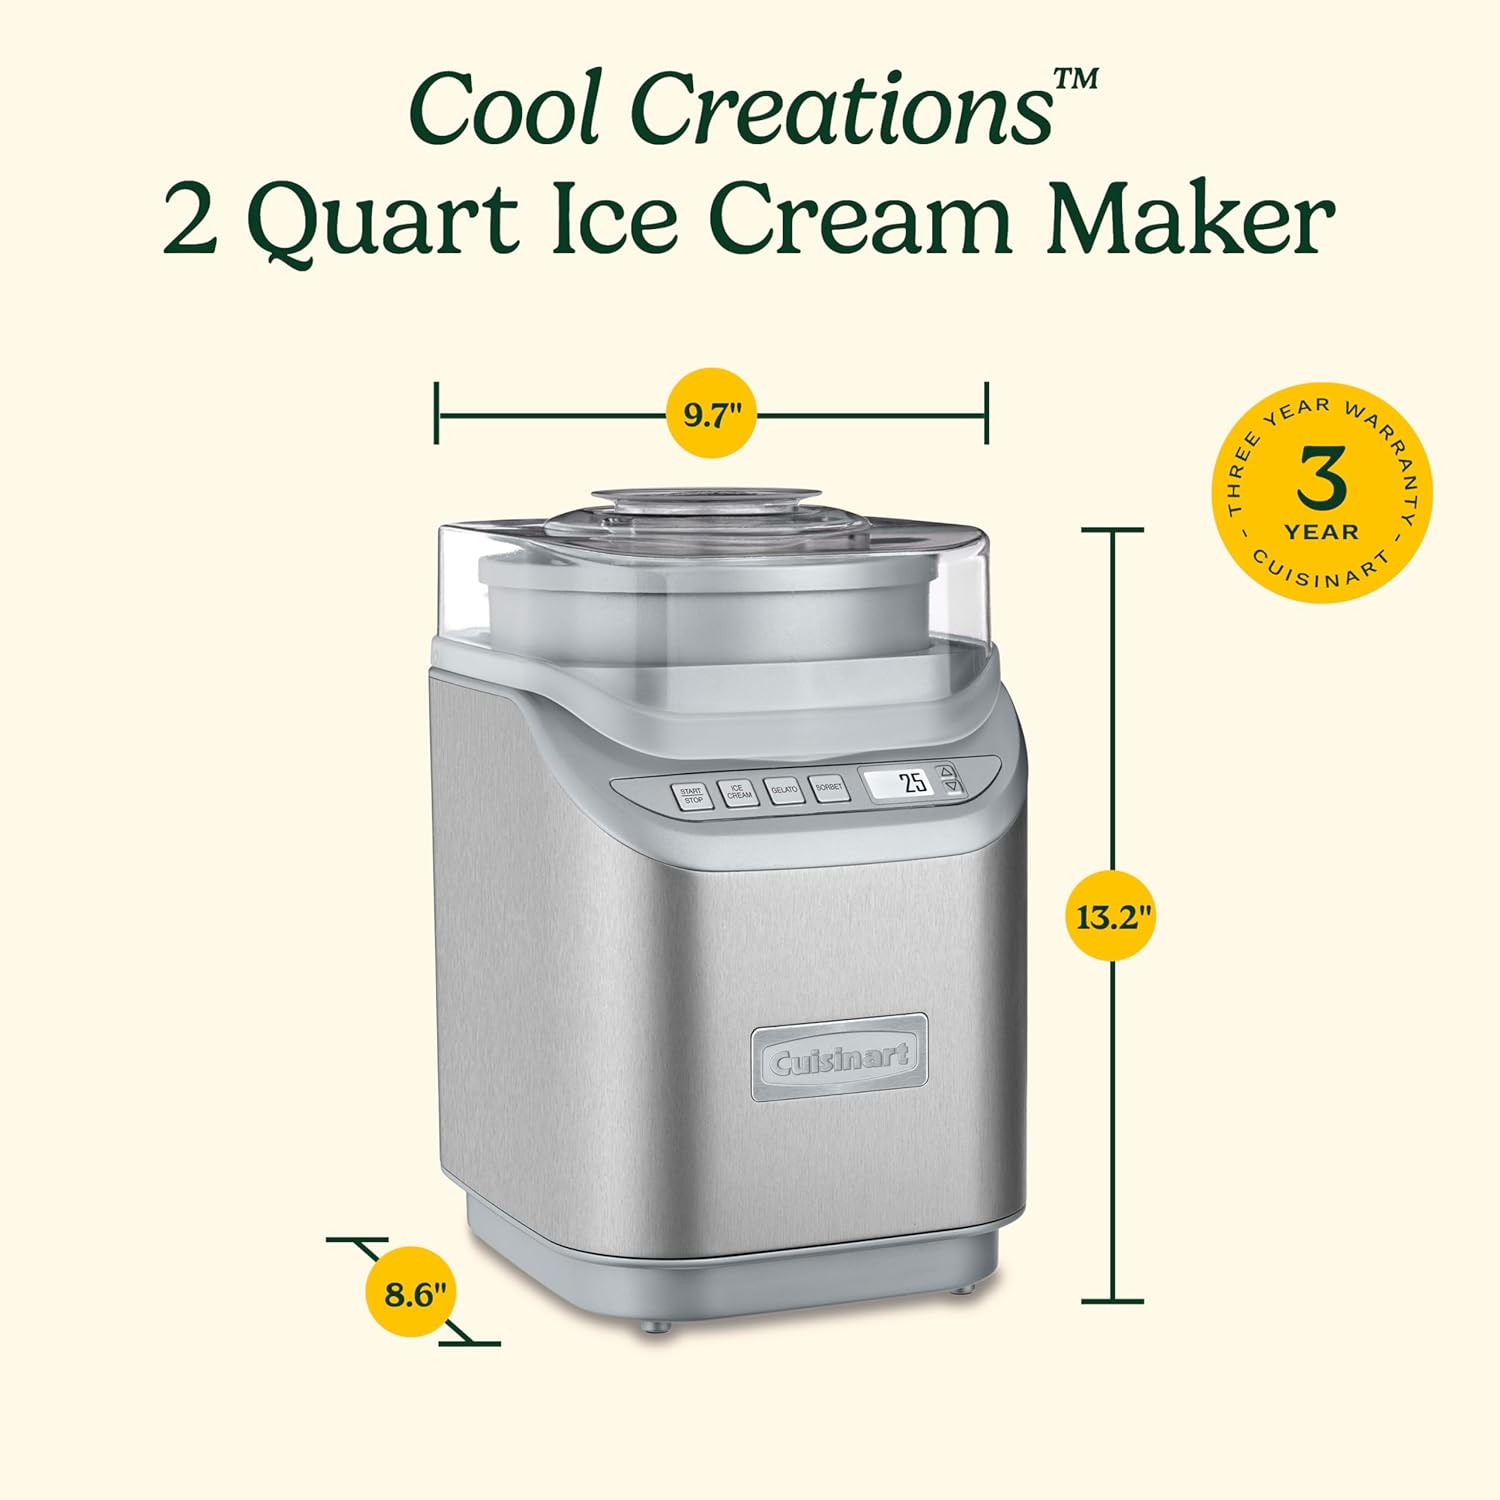
| Cuisinart ICE-30BC | Freezer Bowl | 2 Quarts | Larger capacity, brushed chrome finish, pre-freeze bowl required | $80 – $120 |
| Cuisinart ICE-45 | Freezer Bowl Soft Serve | 1.5 Quarts | Soft serve function, cone holder, pre-freeze bowl required | $100 – $150 |
| Cuisinart ICE-100 | Compressor | 1.5 Quarts | Built-in compressor, no pre-freezing required, pre-set programs | $250 – $350 |
Key Features to Consider When Choosing an Ice Cream Churn
Beyond the basic distinction between freezer bowl and compressor models, several other features can significantly impact your ice cream making experience. One crucial aspect is the capacity of the bowl. Consider how much ice cream you typically want to make at a time. A smaller capacity may be sufficient for individual use or small families, while a larger capacity is better for entertaining guests or preparing larger batches for storage. Freezer bowl models require pre-freezing the bowl for a specified period, typically 16 to 24 hours. This pre-freezing time is essential for the machine to function correctly. Ensure that you have enough freezer space to accommodate the bowl and that you can plan ahead to pre-freeze it before you want to make ice cream. Compressor models, on the other hand, eliminate the need for pre-freezing. They have a built-in compressor that cools the ice cream mixture directly, allowing you to make multiple batches back-to-back without any waiting time. This feature is particularly valuable for those who make ice cream frequently or who want to experiment with different flavors without being constrained by the freezer bowl’s capacity.
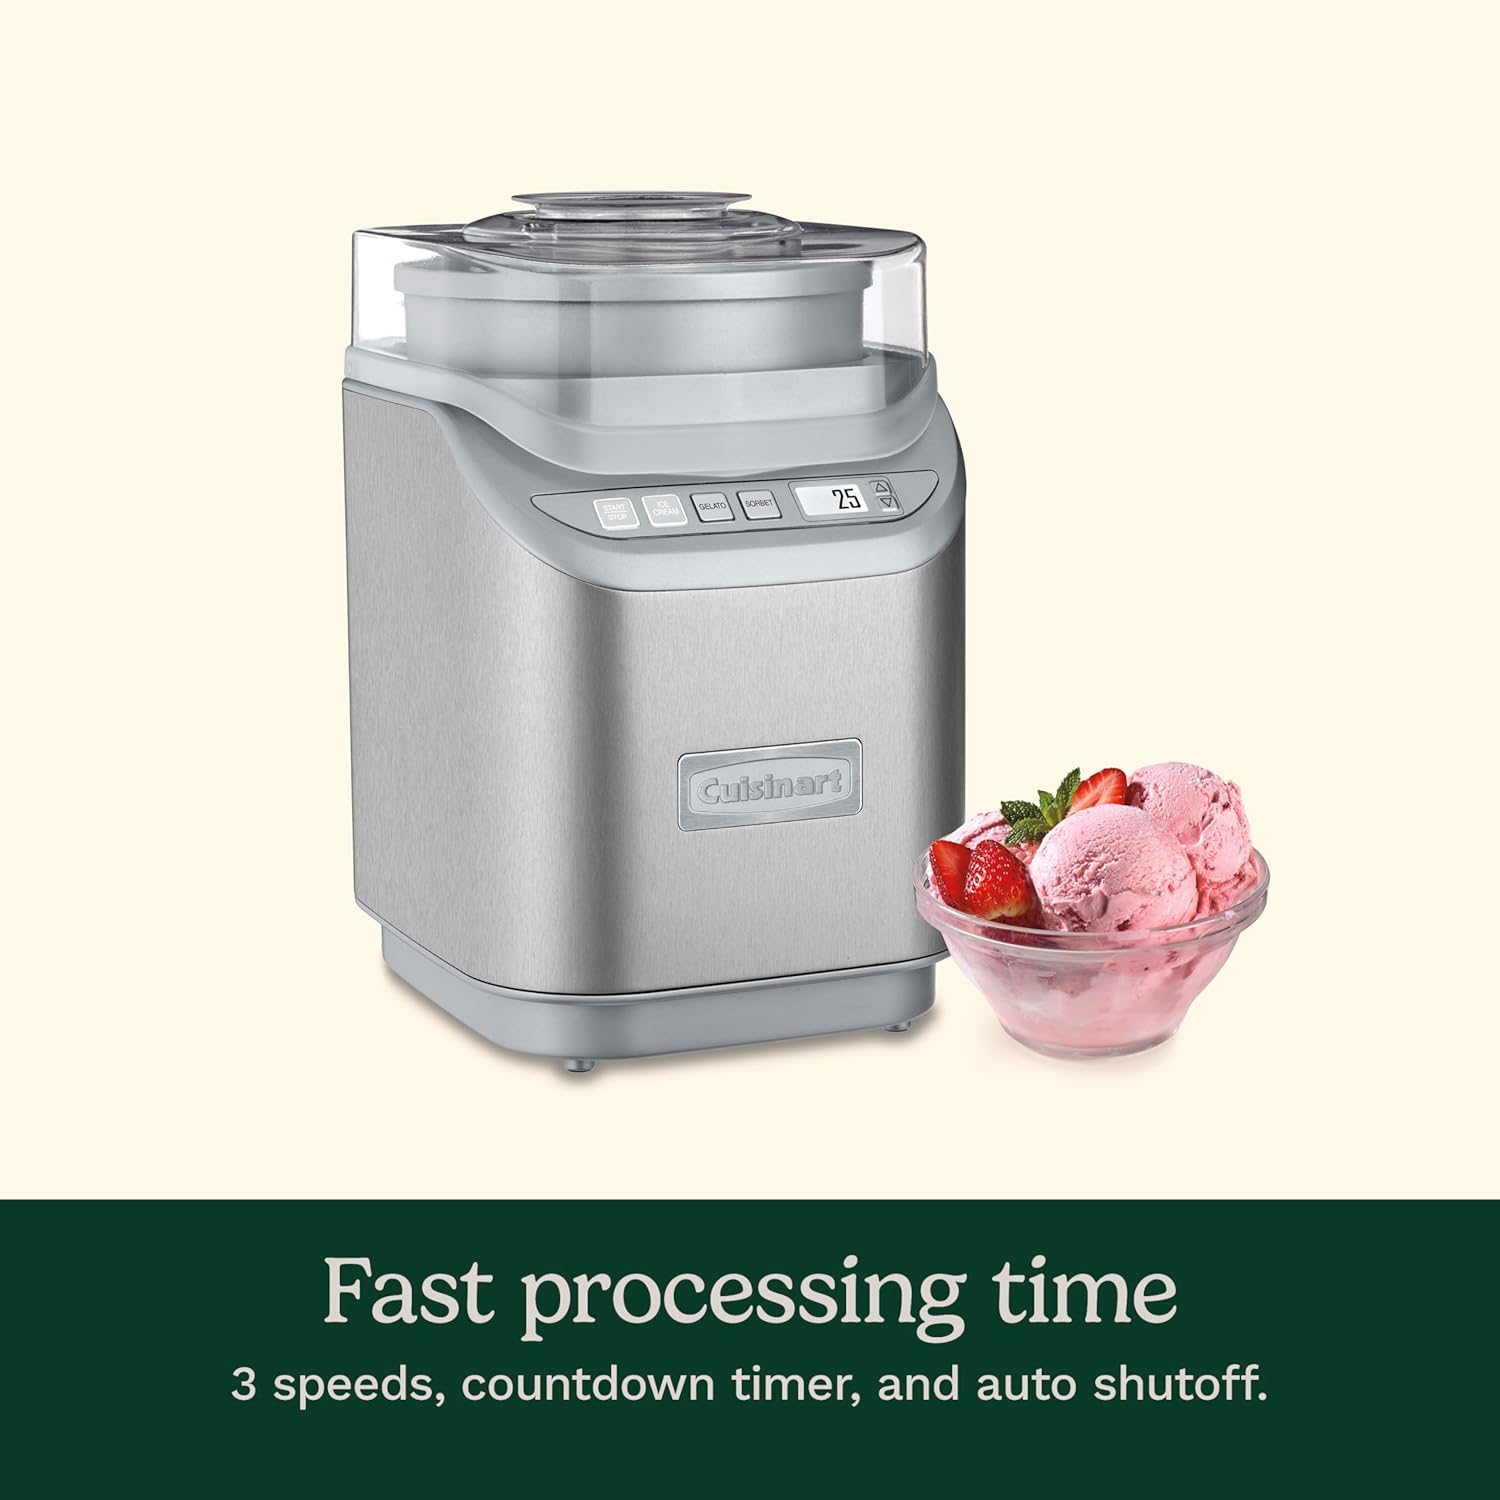
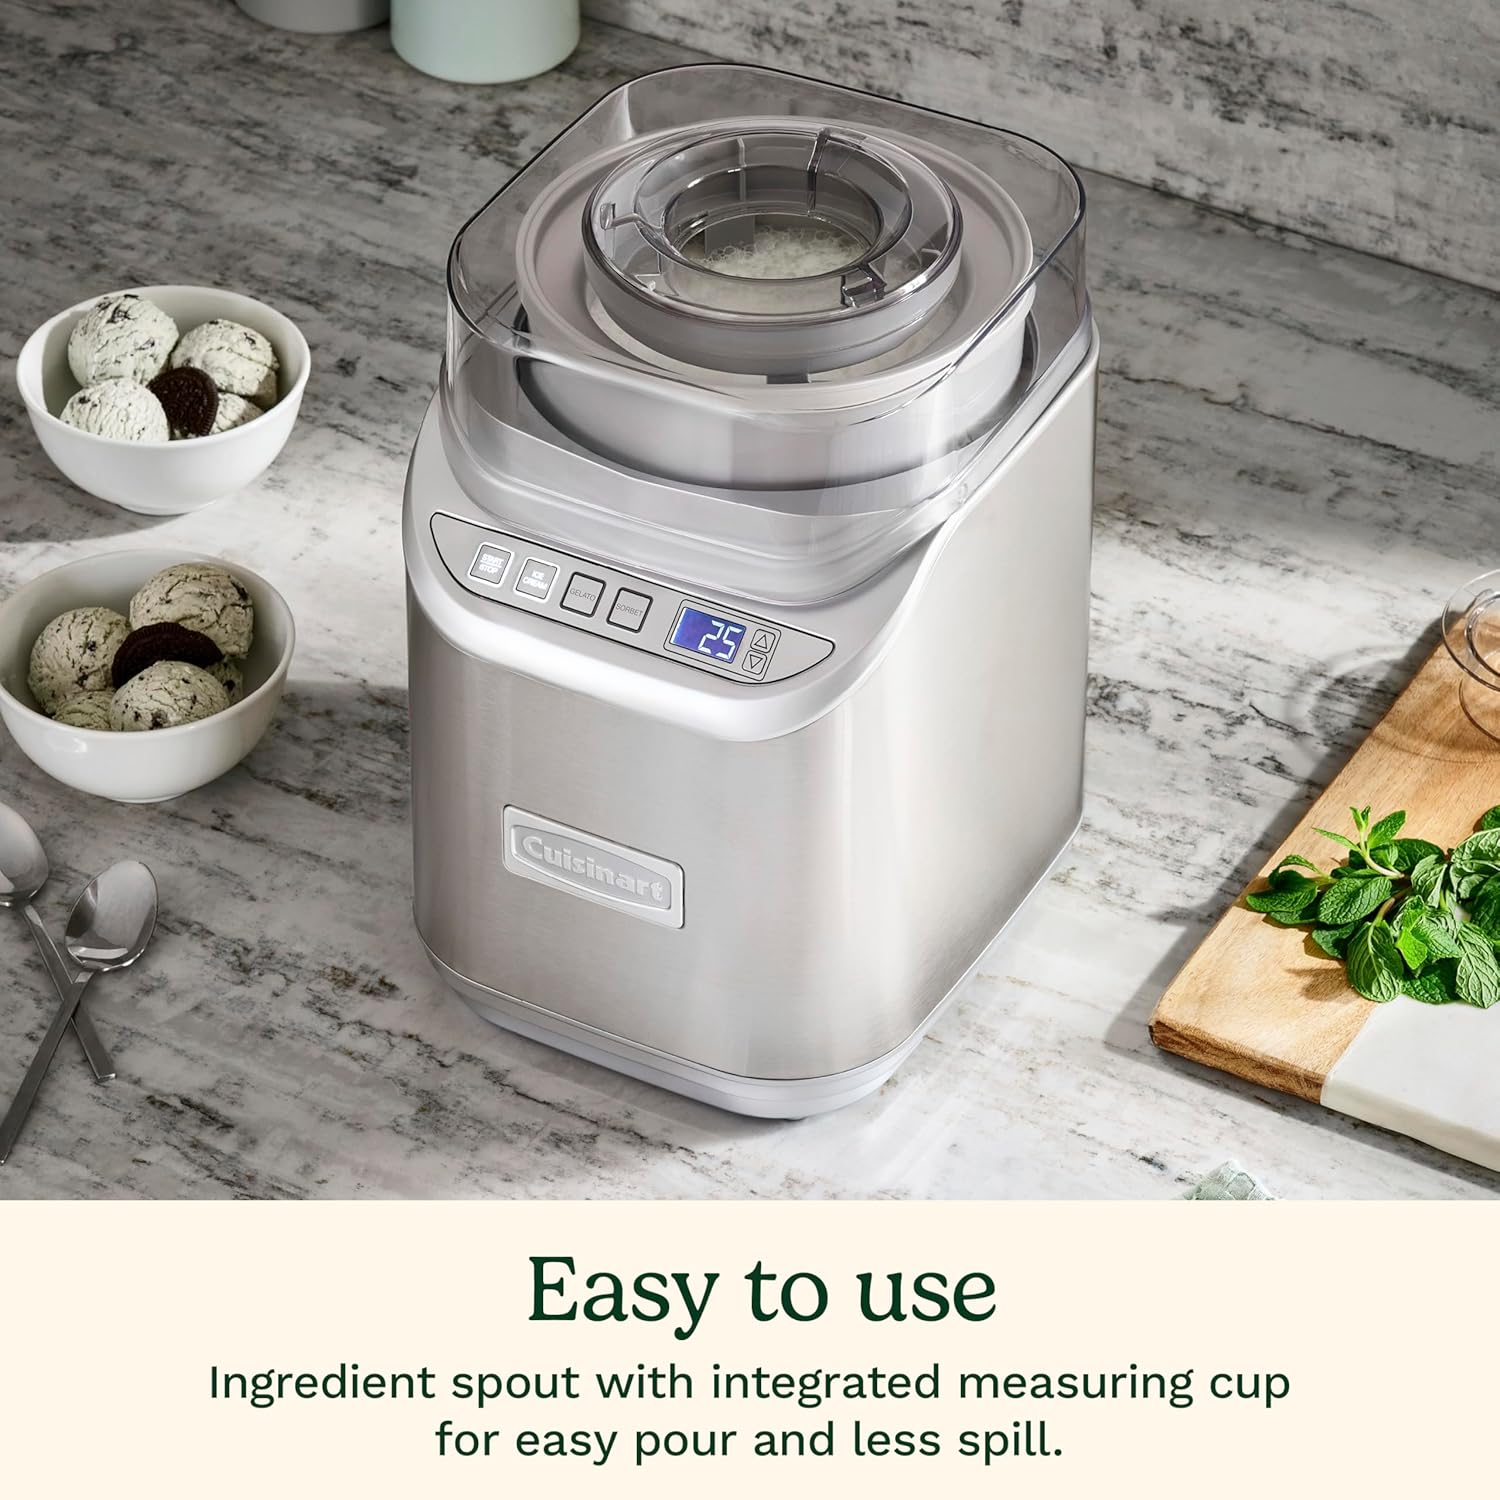
Look for models with features like a transparent lid, which allows you to monitor the churning process without opening the machine and interrupting the freezing. A large ingredient spout is also beneficial for adding mix-ins like chocolate chips, nuts, or fruit during the churning process. Ease of use and cleaning is another important factor to consider. Choose a model with simple controls and intuitive operation. Removable parts that are dishwasher safe make cleaning much easier and more convenient. Some models have pre-set programs for different types of frozen desserts, such as ice cream, sorbet, and gelato. These programs automatically adjust the churning time and speed to optimize the texture and consistency of each dessert. Other models have a simple on/off switch and require manual monitoring, giving you more control over the churning process.
The power and efficiency of the motor is important. A powerful motor will churn the ice cream mixture more effectively, resulting in a smoother and creamier texture. Look for models with a motor that can handle thicker mixtures and larger batches. Noise level is another factor to consider, especially if you plan to use the ice cream maker frequently or have sensitive ears. Some models can be quite noisy during the churning process. Read reviews and watch videos to get an idea of the noise level before making a purchase. Finally, consider the overall design and build quality of the ice cream maker. Look for a model that is sturdy, well-built, and made from high-quality materials. A durable ice cream maker will last longer and provide years of reliable service. The type of ice cream churn that you pick will have a great impact on how your recipes turn out. The best ice cream churn should be effective and easy to use.
Tips and Tricks for Perfect Homemade Ice Cream
Mastering the art of homemade ice cream requires more than just a good machine; it also involves understanding the fundamentals of ice cream making and employing some helpful tips and tricks. The foundation of any great ice cream is the base. The most common base is a custard base, which involves cooking cream, milk, sugar, and egg yolks to create a rich and stable mixture. Tempering the eggs is crucial to prevent them from scrambling. Slowly whisk a small amount of the hot cream mixture into the beaten egg yolks to gradually raise their temperature before adding them to the rest of the cream. This technique ensures a smooth and creamy custard. Other bases include Philadelphia-style ice cream, which uses just cream, milk, and sugar, and is known for its simplicity and clean flavor. Experiment with different bases to find your preferred texture and flavor profile. Before churning, chill the ice cream base thoroughly in the refrigerator for at least 4 hours, or preferably overnight. This allows the flavors to meld and the mixture to cool down completely, which is essential for proper freezing. A chilled base will freeze faster and result in a smoother, creamier texture. Don’t skip this step.
When adding mix-ins, such as chocolate chips, nuts, or fruit, do so during the last few minutes of churning. This prevents the mix-ins from sinking to the bottom of the bowl and ensures that they are evenly distributed throughout the ice cream. For soft mix-ins, like chopped fruit, consider macerating them in sugar or liqueur for a few hours before adding them to the ice cream. This helps to draw out the moisture and prevent the fruit from becoming icy in the finished product. Once the ice cream is churned, transfer it to an airtight container and freeze it for at least 2-4 hours to allow it to harden completely. This hardening process is crucial for achieving the desired scoopable texture. If the ice cream is too soft, it will melt quickly and lose its shape. To prevent ice crystals from forming, press a piece of plastic wrap directly onto the surface of the ice cream before sealing the container. This minimizes air exposure and helps to maintain a smooth and creamy texture. When serving, allow the ice cream to soften slightly at room temperature for a few minutes before scooping. This will make it easier to scoop and enhance the flavor. Use an ice cream scoop that has been dipped in hot water to create perfect, round scoops. Keep a few simple recipes on hand, then modify them to create your own customized desserts.
Experiment with different flavor combinations, infusions, and textures to create your own signature ice cream recipes. Infuse your cream with herbs, spices, or citrus zest for a unique flavor profile. Add a swirl of homemade caramel, chocolate sauce, or fruit compote for an extra touch of decadence. Fold in chunks of your favorite cookies, brownies, or candies for a fun and playful treat. The possibilities are endless. Don’t be afraid to try new things and have fun with the process. With a little practice and experimentation, you’ll be creating delicious homemade ice cream that rivals anything you can buy in the store. The freezer bowl ice cream machine is a great tool to have on hand for this process.
Maintaining and Cleaning Your Cuisinart Ice Cream Machine
Proper maintenance and cleaning are essential for ensuring the longevity and performance of your Cuisinart ice cream maker. After each use, thoroughly clean all the removable parts, including the freezer bowl, mixing paddle, and lid. Wash them with warm, soapy water and rinse them thoroughly. Ensure that all traces of ice cream residue are removed. Many parts are dishwasher-safe, but always refer to the manufacturer’s instructions to confirm. Never immerse the motor base in water or any other liquid. To clean the motor base, simply wipe it down with a damp cloth. Avoid using abrasive cleaners or scouring pads, as they can damage the surface. For freezer bowl models, thoroughly dry the bowl before placing it back in the freezer. Any moisture left in the bowl can freeze and cause ice crystals to form, which can affect the performance of the machine. Before storing the ice cream maker, ensure that all parts are completely dry. Store the machine in a clean, dry place away from direct sunlight and extreme temperatures. If you have a freezer bowl model, store the freezer bowl in the freezer so it is always ready for use. This will save you time and ensure that you can make ice cream whenever the craving strikes. Regularly inspect the machine for any signs of wear or damage, such as cracks in the freezer bowl or frayed cords. If you notice any damage, discontinue use and contact Cuisinart customer service for assistance. Periodically check the mixing paddle for any signs of wear or damage. If the paddle is worn or damaged, replace it with a new one. A worn paddle can affect the texture and consistency of the ice cream. Clean the exterior of the motor base regularly to remove any dust or dirt. Use a soft cloth or brush to avoid scratching the surface. Consider using a mild cleaning solution if necessary.
Descaling your ice cream machine if you have a compressor model is important. Mineral deposits can build up over time and affect the performance of the machine. Follow the manufacturer’s instructions for descaling your specific model. When not in use, store the ice cream maker in its original packaging or a protective cover to prevent dust and dirt from accumulating. This will also help to protect the machine from accidental damage. By following these simple maintenance and cleaning tips, you can ensure that your Cuisinart ice cream maker remains in good working condition for years to come. This will allow you to enjoy countless batches of delicious homemade ice cream, sorbet, and frozen yogurt. Keeping your ice cream churn clean allows for the best performance of your machine. The best practices for upkeep are to keep the machine clean, dry and free from damage.
Frequently Asked Questions (FAQ)
What are the different types of Cuisinart ice cream makers?
Cuisinart primarily offers two types of ice cream makers: freezer bowl models and compressor models. Freezer bowl models are more affordable and require pre-freezing the bowl for 16-24 hours before use. They are compact and suitable for making one batch of ice cream at a time. Compressor models, on the other hand, have a built-in compressor that cools the ice cream mixture directly, eliminating the need for pre-freezing. They are more expensive but offer greater convenience and flexibility, allowing you to make multiple batches back-to-back. Within each type, Cuisinart offers variations in capacity, features, and design. For example, some freezer bowl models have a larger capacity or a soft serve function, while some compressor models have pre-set programs for different types of frozen desserts. When choosing between a freezer bowl and compressor model, consider your budget, frequency of use, and desired level of convenience.
How long does it take to make ice cream in a Cuisinart ice cream maker?
The churning time for a Cuisinart ice cream maker typically ranges from 20 to 40 minutes, depending on the model, the recipe, and the temperature of the ingredients. Freezer bowl models may take slightly longer to churn the ice cream mixture, especially if the bowl is not thoroughly pre-frozen. Compressor models generally churn ice cream faster due to their built-in cooling system. Once the ice cream is churned, it will have a soft serve consistency. To achieve a firmer, scoopable texture, transfer the ice cream to an airtight container and freeze it for an additional 2-4 hours. This hardening process allows the ice cream to fully freeze and develop the desired consistency. Keep in mind that the hardening time can vary depending on the freezer temperature and the recipe used. If you are using a freezer bowl model, ensure the bowl is adequately frozen for optimal results.
Is it necessary to pre-chill the ice cream base before churning?
Yes, chilling the ice cream base thoroughly before churning is crucial for achieving the best results. Chilling the base allows the flavors to meld and the mixture to cool down completely, which is essential for proper freezing. A chilled base will freeze faster and result in a smoother, creamier texture. Ideally, chill the ice cream base in the refrigerator for at least 4 hours, or preferably overnight. This allows the flavors to fully develop and the mixture to reach a stable temperature. If you are short on time, you can chill the base in an ice bath for a quicker cooling process, but be sure to monitor it closely to prevent it from freezing. Skipping the chilling step can result in a grainy or icy texture in the finished ice cream. Proper chilling is a simple yet essential step for creating delicious homemade ice cream.
How do I prevent ice crystals from forming in my homemade ice cream?
Ice crystals can form in homemade ice cream due to several factors, including slow freezing, temperature fluctuations, and air exposure. To minimize ice crystal formation, follow these tips: Ensure that the ice cream base is thoroughly chilled before churning. Use high-quality ingredients, especially cream and milk. Add stabilizers like guar gum or cornstarch to the ice cream base. These stabilizers help to bind the water molecules and prevent ice crystals from forming. Avoid over-churning the ice cream, as this can incorporate too much air and lead to ice crystal formation. Transfer the churned ice cream to an airtight container immediately after churning. Press a piece of plastic wrap directly onto the surface of the ice cream before sealing the container. This minimizes air exposure and helps to maintain a smooth and creamy texture. Store the ice cream in the coldest part of the freezer, away from the door. Avoid opening and closing the freezer frequently, as this can cause temperature fluctuations. If ice crystals do form, you can try re-churning the ice cream to break them up.
What can I do if my ice cream is too soft after churning?
If your ice cream is too soft after churning, it may not have been frozen long enough or the ice cream base may not have been properly chilled. Transfer the ice cream to an airtight container and freeze it for an additional 2-4 hours to allow it to harden completely. Ensure that the freezer temperature is set to a sufficiently cold setting (around 0°F or -18°C). If the ice cream is still too soft after several hours, consider adding a small amount of alcohol, such as vodka or rum, to the ice cream base. Alcohol lowers the freezing point of the mixture and can help to prevent it from becoming too hard or icy. Start with a small amount (about 1-2 tablespoons per quart of ice cream) and adjust to taste. Another option is to add a small amount of dry milk powder to the ice cream base. Dry milk powder helps to absorb excess moisture and improve the texture of the ice cream. Use high-fat dairy. You can also try using a more powerful ice cream maker or chilling your bowl longer if using the freezer bowl kind of ice cream machine.
Can I use non-dairy milk alternatives in a Cuisinart ice cream maker?
Yes, you can use non-dairy milk alternatives, such as almond milk, soy milk, coconut milk, or oat milk, in a Cuisinart ice cream maker. However, the texture and flavor of the finished ice cream may differ slightly from traditional dairy-based ice cream. Non-dairy milk alternatives typically have a lower fat content than dairy milk, which can result in a less creamy texture. To compensate for this, consider adding a thickening agent, such as cornstarch or arrowroot powder, to the ice cream base. You can also add a small amount of coconut oil or avocado to increase the fat content and improve the texture. When using non-dairy milk alternatives, choose unsweetened varieties to control the sweetness of the ice cream. Experiment with different brands and types of non-dairy milk to find the one that works best for your taste preferences. Add vanilla for a smoother, richer flavor. Many recipes online will give you a variety of options.
How do I clean and maintain my Cuisinart ice cream maker?
Proper cleaning and maintenance are essential for ensuring the longevity and performance of your Cuisinart ice cream maker. After each use, thoroughly clean all the removable parts, including the freezer bowl, mixing paddle, and lid. Wash them with warm, soapy water and rinse them thoroughly. Ensure that all traces of ice cream residue are removed. Many parts are dishwasher-safe, but always refer to the manufacturer’s instructions to confirm. Never immerse the motor base in water or any other liquid. To clean the motor base, simply wipe it down with a damp cloth. Avoid using abrasive cleaners or scouring pads, as they can damage the surface. For freezer bowl models, thoroughly dry the bowl before placing it back in the freezer. Store the machine in a clean, dry place away from direct sunlight and extreme temperatures. Periodically check the mixing paddle for any signs of wear or damage. It is important to clean your ice cream churn thoroughly and with each use to keep your machine operating at its best.
Price: $189.95 - $156.60
(as of Sep 09, 2025 06:24:41 UTC – Details)


