Best CALPALMY 14&30 Packs Paper Mache Mask – Idea Halloween Mask Review – Oemiu
Unleashing Creativity: A Deep Dive into CALPALMY Paper Mache Masks
The allure of Halloween lies not just in the candy and spooky decorations, but also in the opportunity for creative expression. A well-crafted costume can transform you into anyone or anything imaginable, and at the heart of many impressive costumes lies a thoughtfully designed mask. While pre-made masks offer convenience, they often lack the personal touch and unique flair that makes a costume truly stand out. This is where the CALPALMY 14&30 Packs Paper Mache Masks come into play, offering a blank canvas for unleashing your inner artist and crafting a truly one-of-a-kind Halloween mask. These masks aren’t just craft supplies; they’re vessels of imagination, ready to be molded and painted into the embodiment of your Halloween dreams. Whether you’re aiming for terrifyingly realistic, whimsically cartoonish, or elegantly mysterious, these paper mache masks provide the perfect foundation. The sheer volume offered in the CALPALMY packs – both the 14 and 30-pack options – makes them ideal for families, classrooms, or anyone planning a large Halloween gathering where DIY costumes are the centerpiece. Beyond Halloween, these masks find uses in theater productions, art projects, and even simple dress-up fun. The versatility is a major selling point, making them a worthwhile investment for anyone with a penchant for creativity. But are they the right choice for your specific needs? Let’s delve deeper into the features, benefits, and potential drawbacks of the CALPALMY Paper Mache Masks to help you make an informed decision.
Exploring the Potential: Design, Material, and Versatility
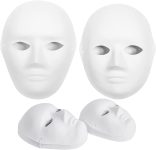
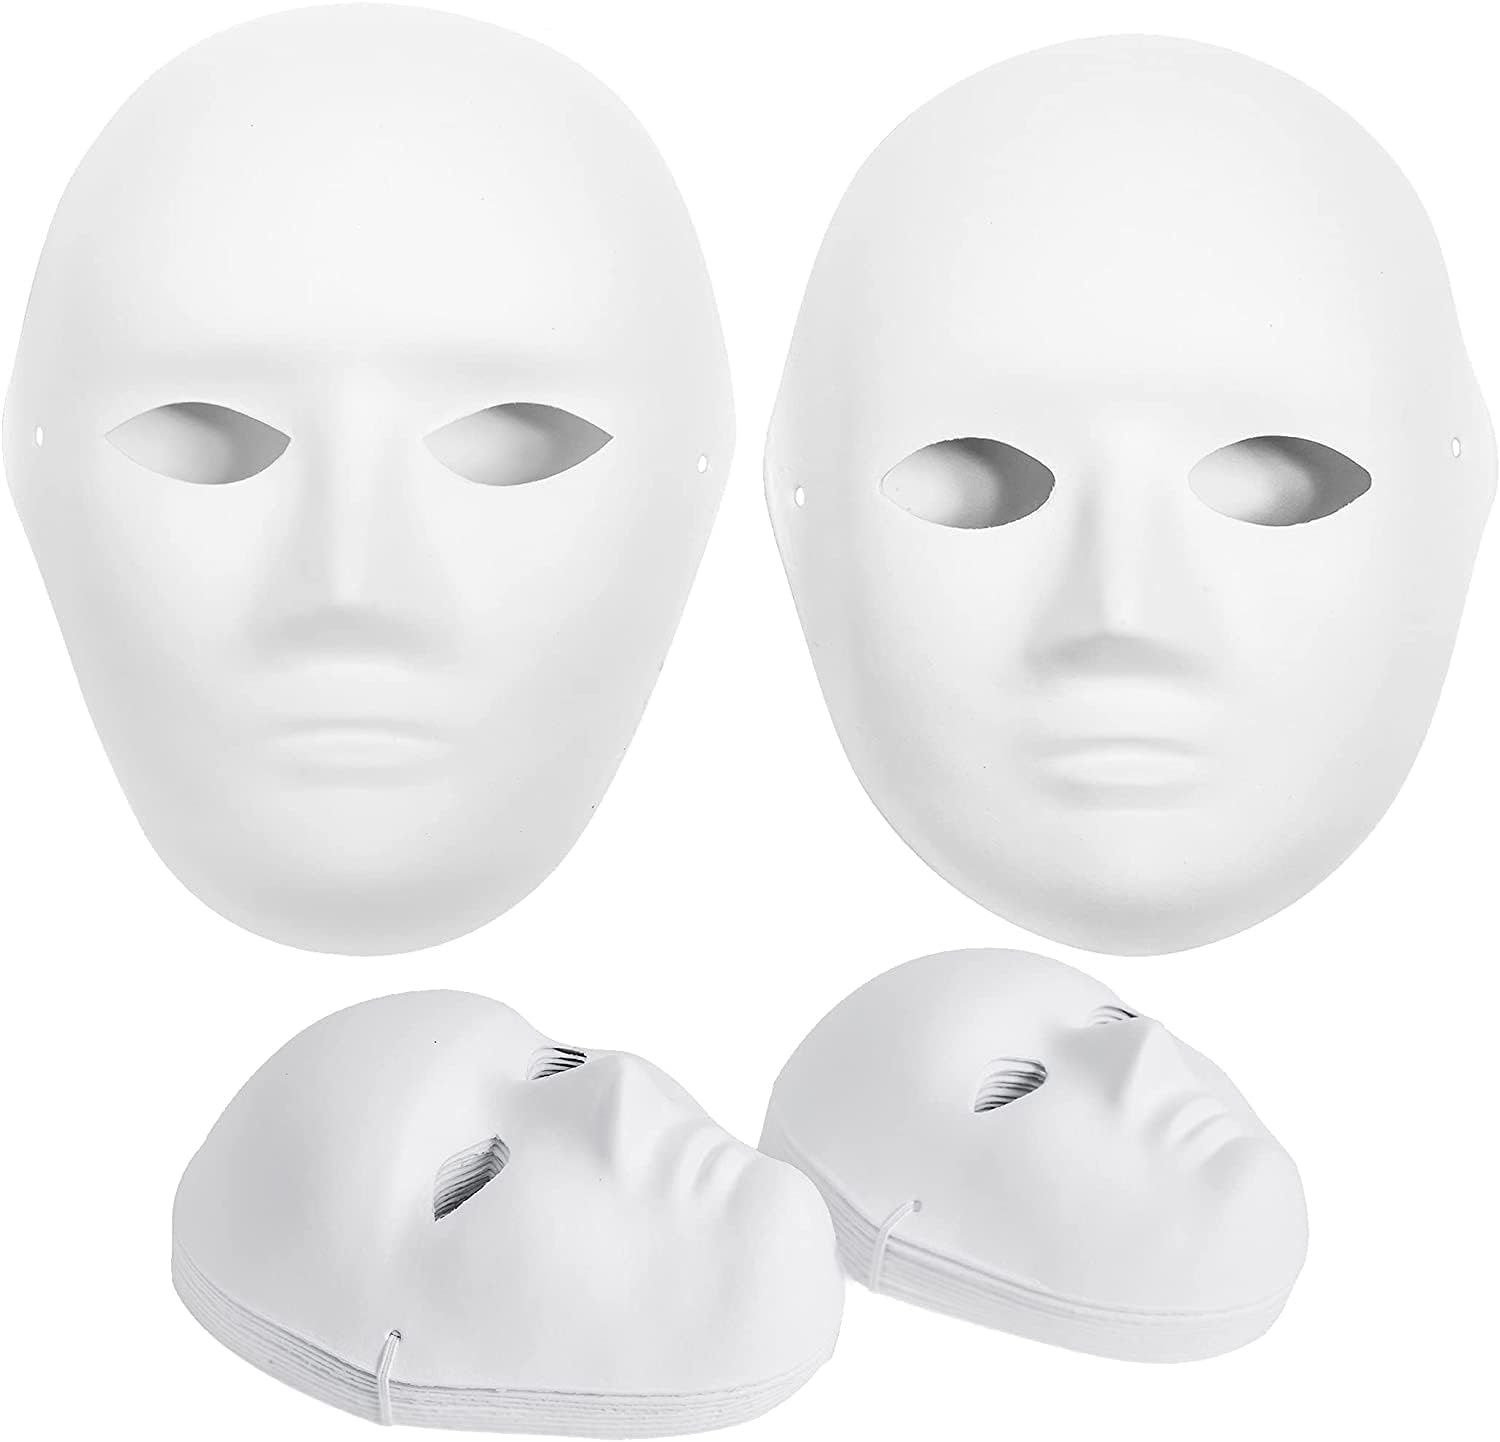
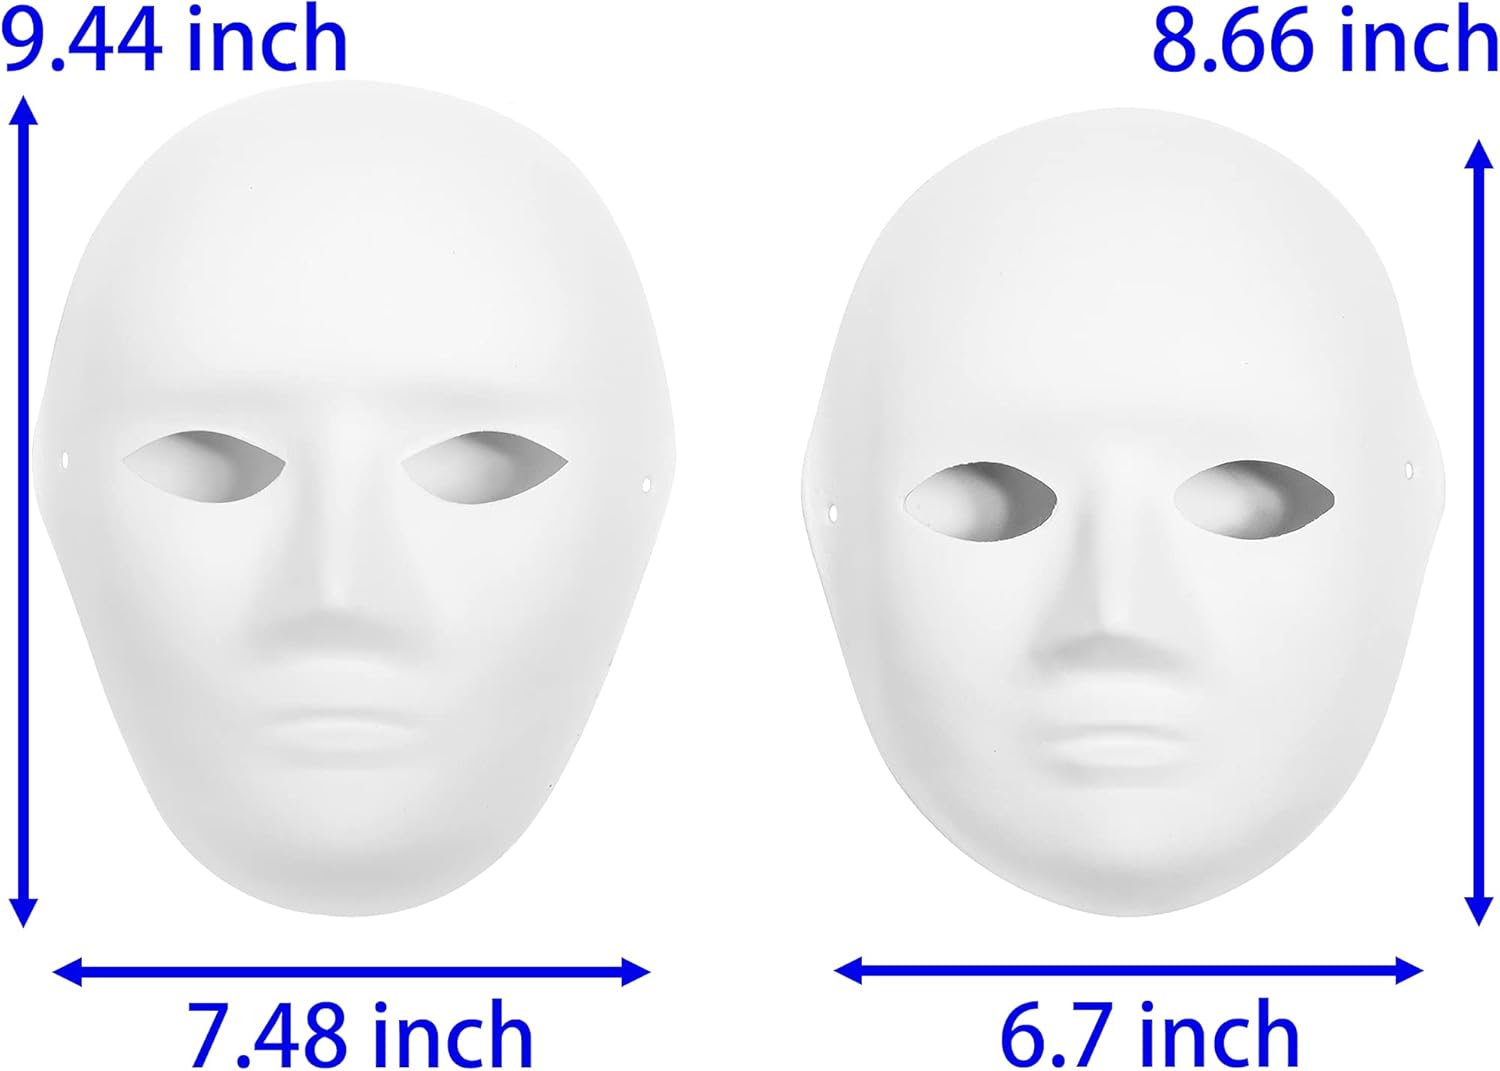
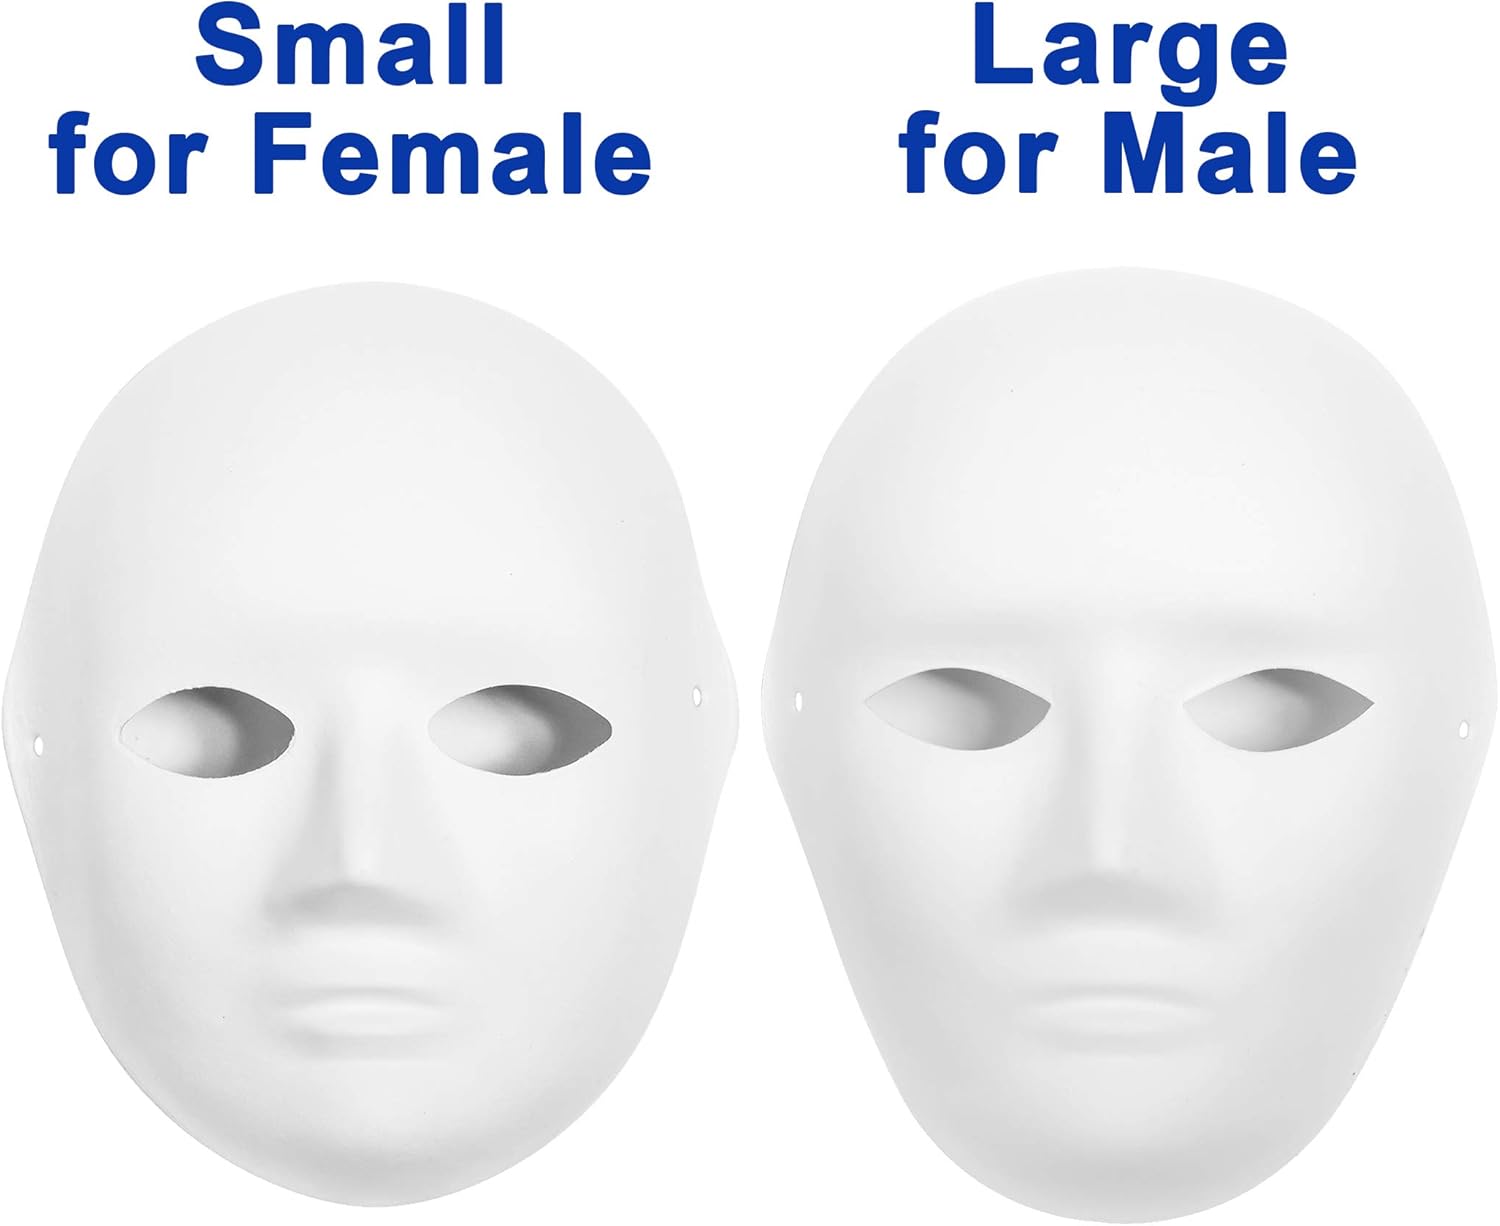
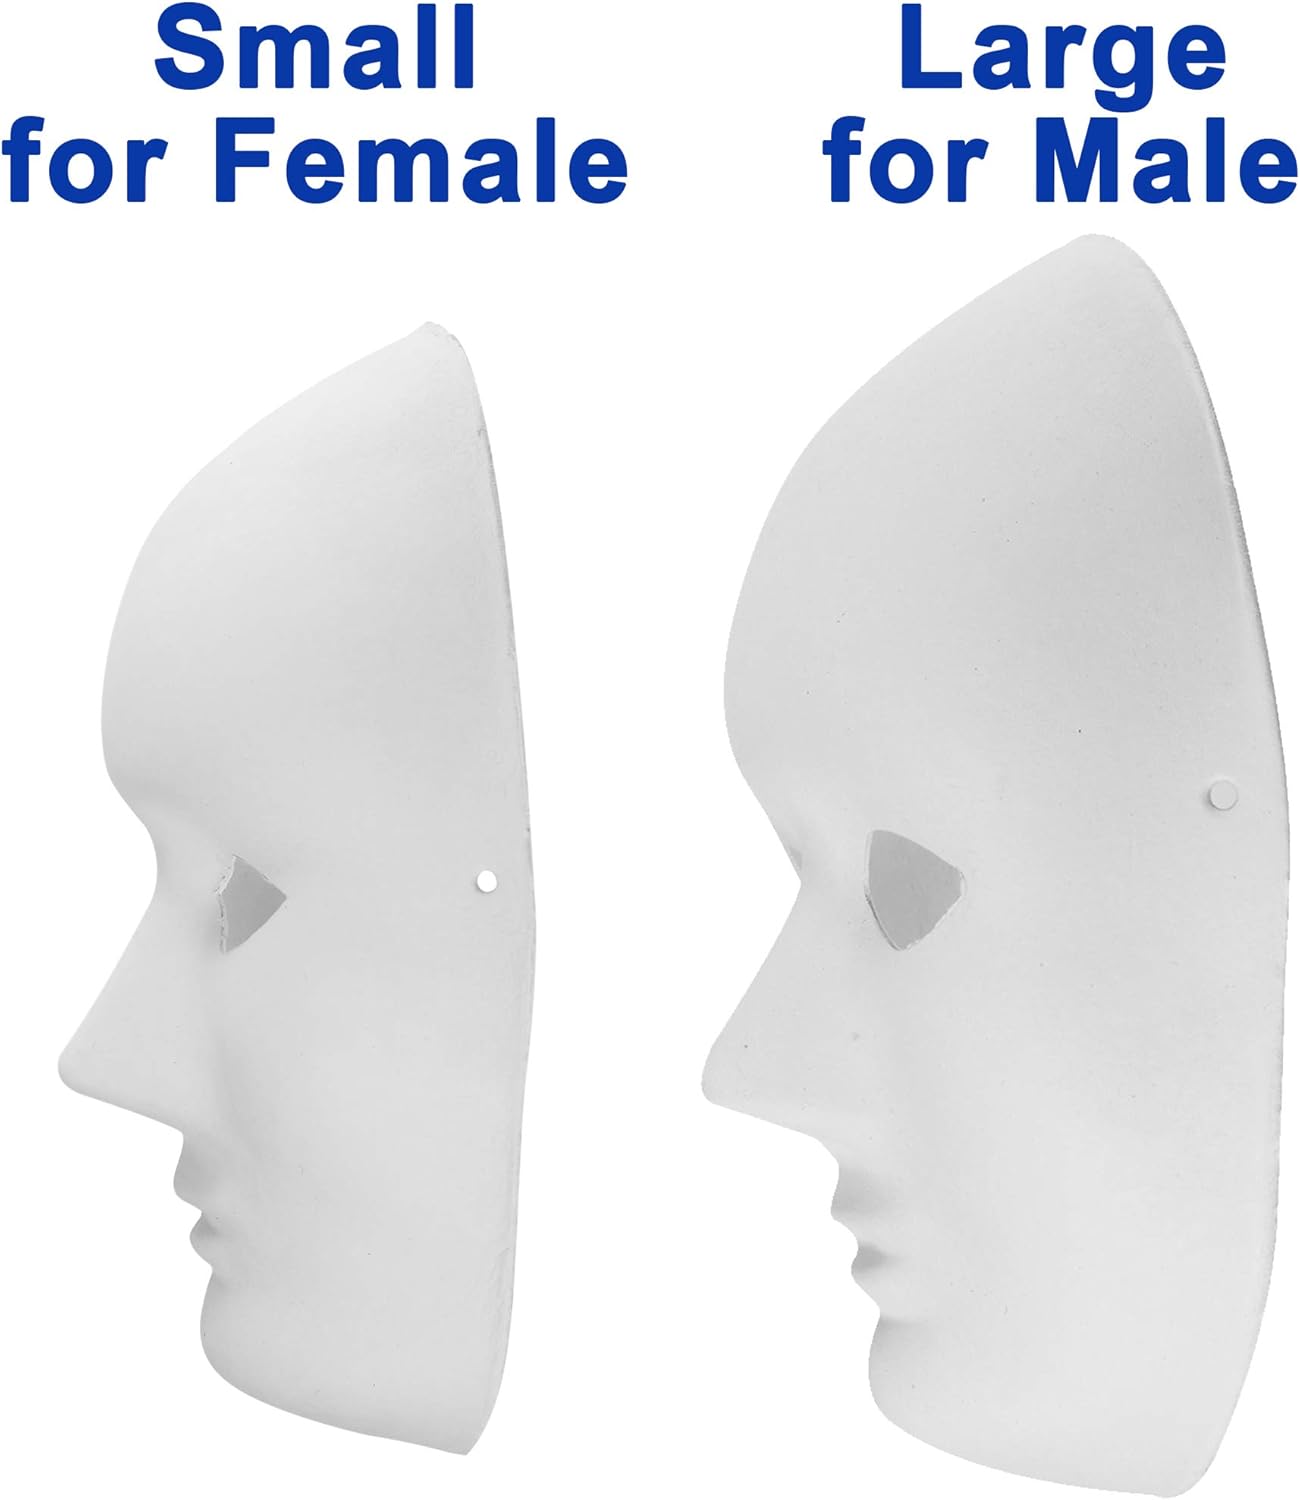
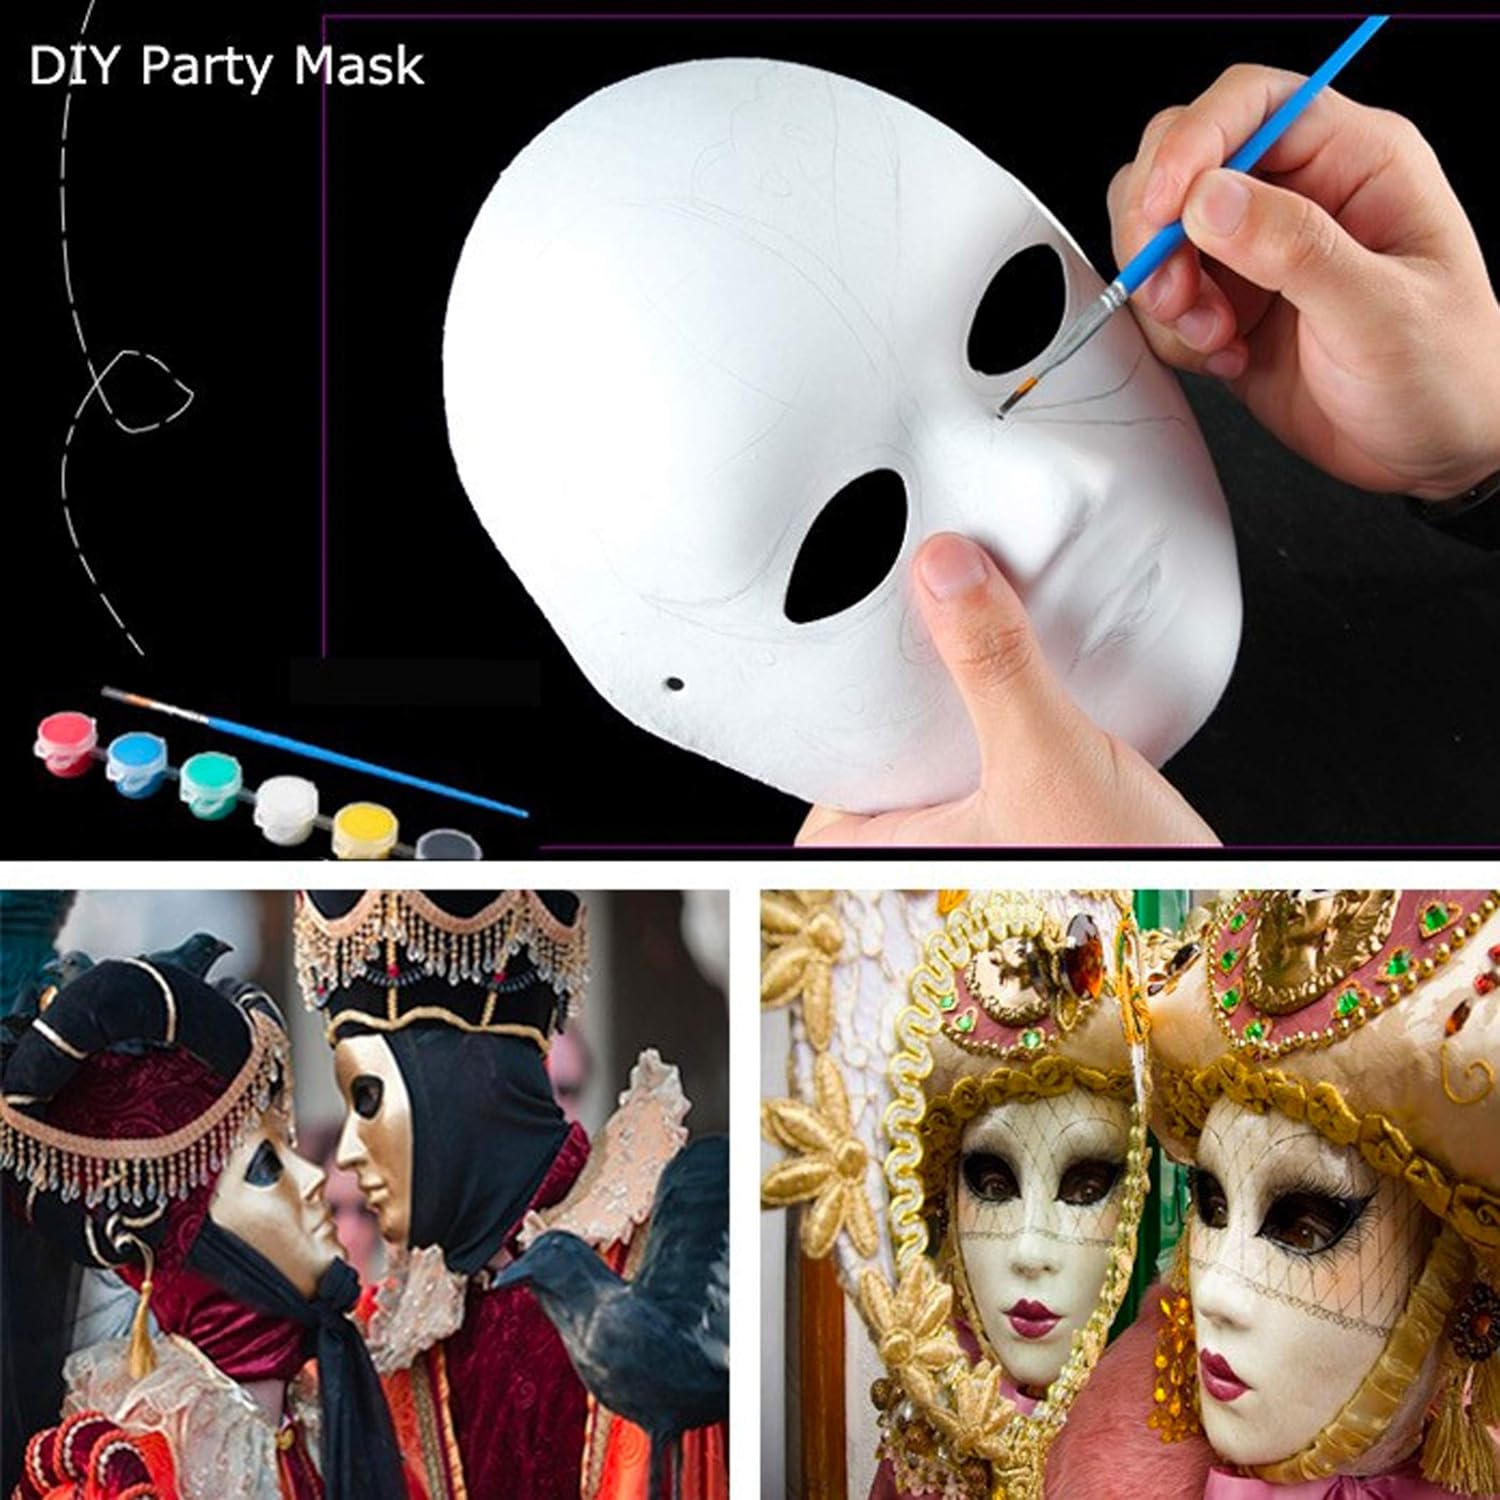
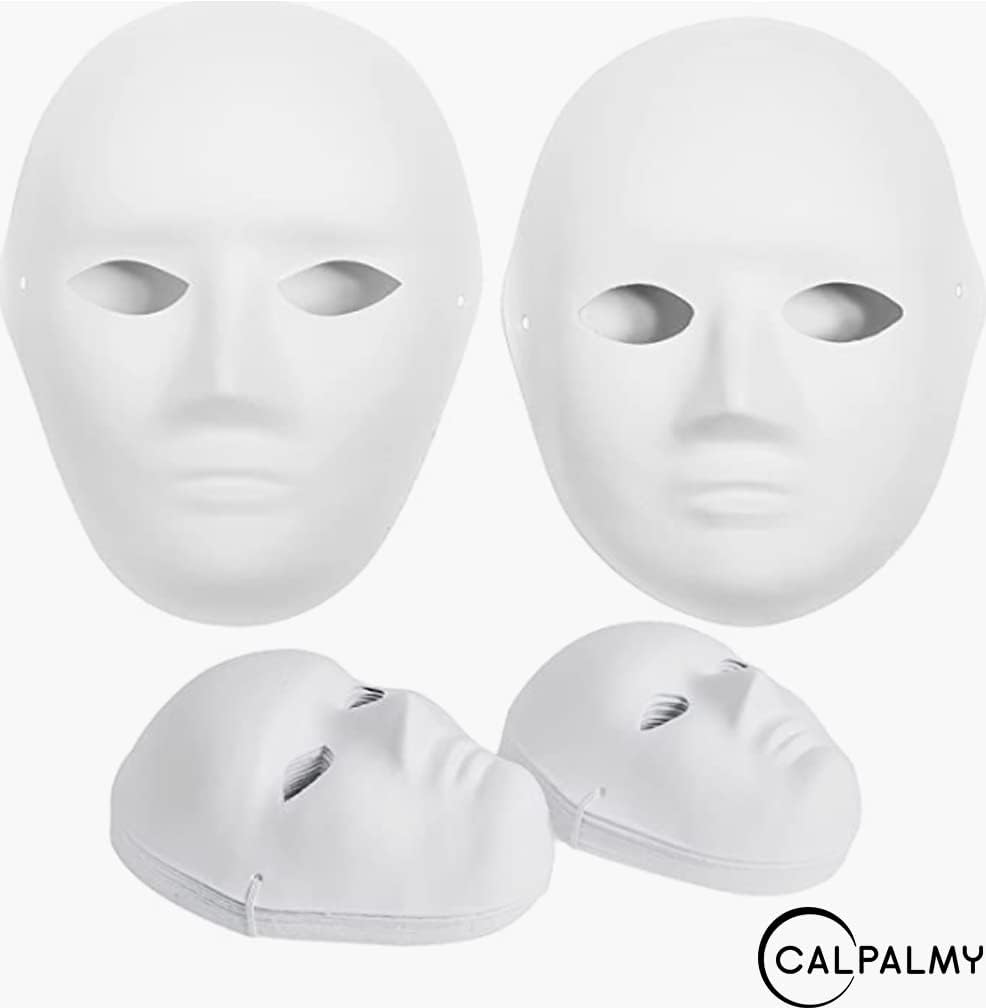
The first thing that strikes you about the CALPALMY Paper Mache Masks is their simple, yet effective design. They arrive in a clean, unadorned state, ready to accept whatever creative vision you have in mind. This blank slate is crucial, allowing for complete customization without the need to strip away existing paint or embellishments. The shape of the masks is generally a classic human face form, providing a recognizable base for a wide range of characters and creatures. The eye holes are strategically placed and adequately sized, allowing for comfortable vision without compromising the overall aesthetic. Some variations might include different facial expressions already molded into the mask, adding another layer of potential to your designs. The material is, as the name suggests, paper mache. This is a lightweight, relatively sturdy material that holds paint and other embellishments well. However, it’s important to remember that paper mache isn’t indestructible. Excessive moisture or rough handling can damage the masks, so careful crafting and storage are essential. The versatility of these masks is truly where they shine. They can be painted with acrylics, watercolors, markers, or even spray paint. You can glue on feathers, glitter, beads, fabric scraps, or any other craft supplies you can imagine. They can be cut, shaped, and molded (to a limited extent) to create unique features and details. Think about the possibilities: a regal lion mask with a flowing mane made of yarn, a spooky skull mask adorned with glow-in-the-dark paint, or a whimsical fairy mask embellished with delicate paper flowers. The only limit is your imagination. This blank canvas approach also makes them ideal for group activities. Imagine a classroom of children each designing and decorating their own unique mask for a school play or a family creating a set of themed masks for a Halloween party. The CALPALMY packs provide enough masks to accommodate such activities, fostering creativity and collaboration. The potential for learning and development through this type of art project is significant, making these masks a valuable resource for educators and parents alike.
Comparing Value: 14-Pack vs. 30-Pack Options
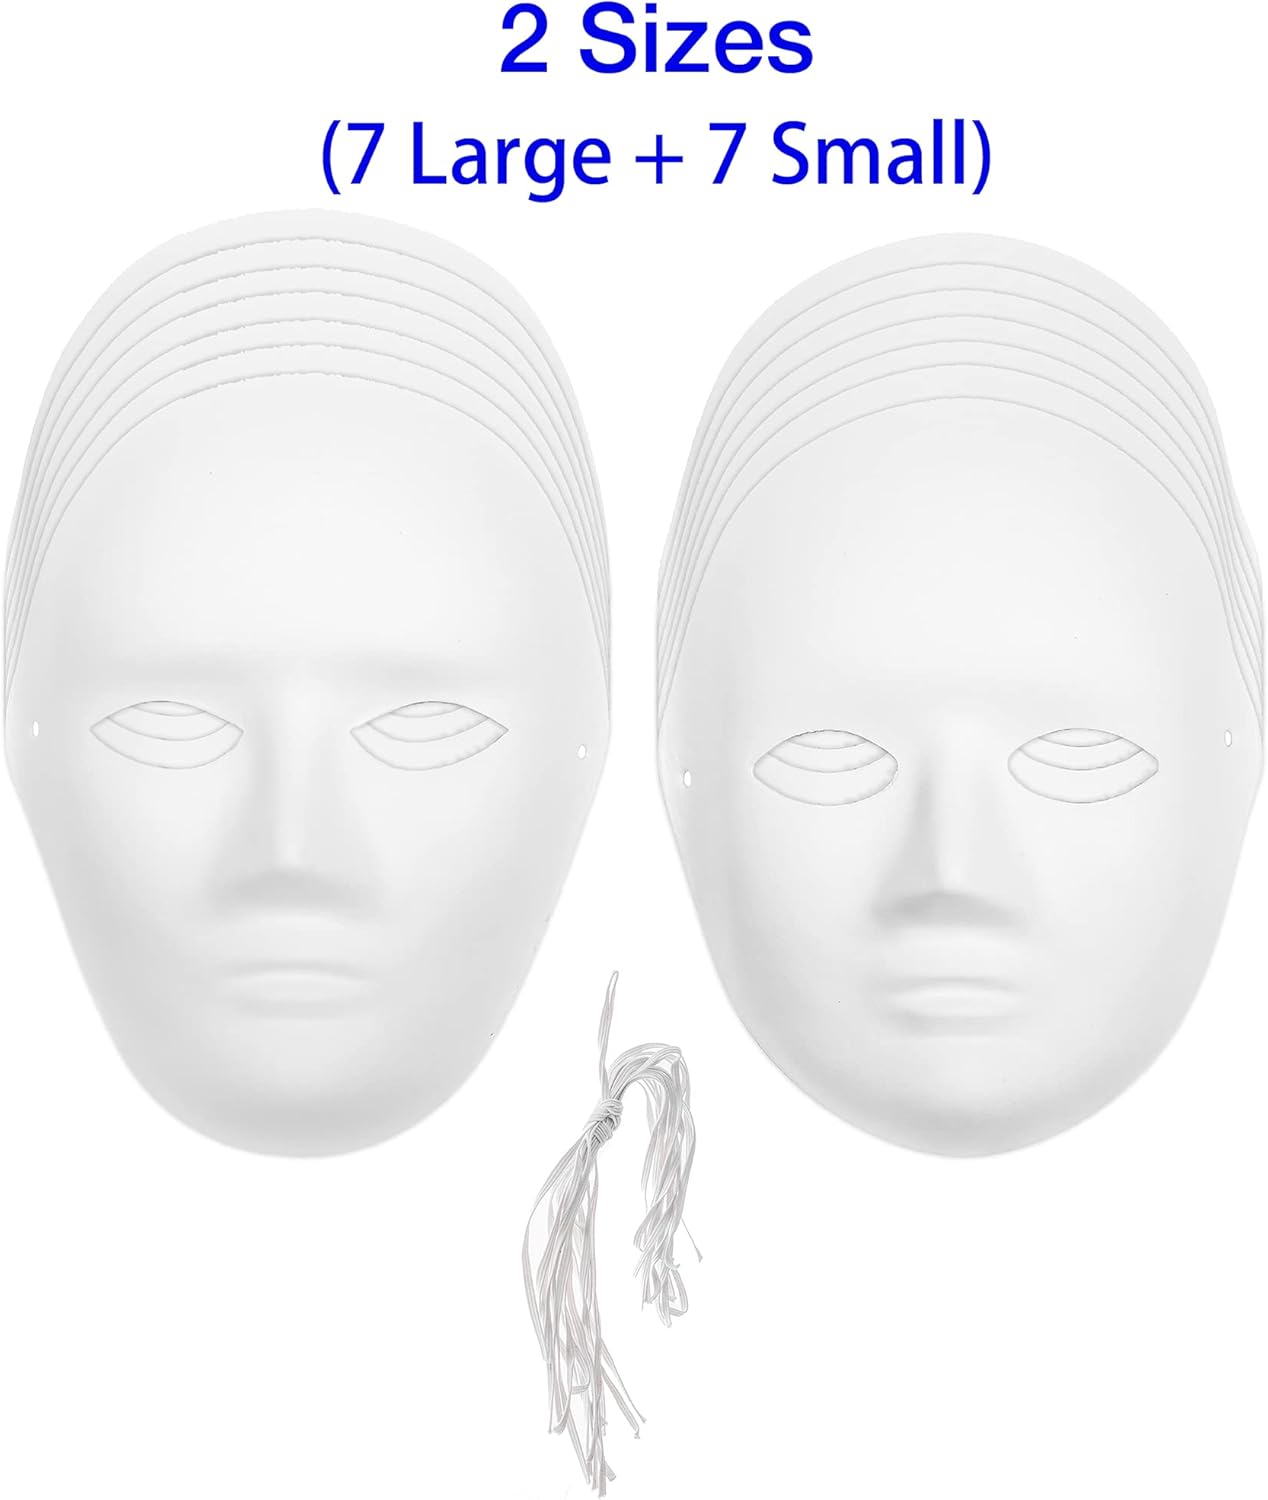
Choosing between the 14-pack and 30-pack options of CALPALMY Paper Mache Masks ultimately depends on your specific needs and budget. The 14-pack is a good choice for individuals or small families who only need a few masks for personal use. It provides enough masks for a variety of projects without being overwhelming. The 30-pack, on the other hand, is ideal for larger groups, classrooms, or anyone who anticipates needing a significant quantity of masks for multiple projects. The per-mask cost is generally lower with the 30-pack, making it a more economical choice if you plan to use a lot of masks. To illustrate the difference in value, consider the following comparison:
| Feature | CALPALMY 14-Pack | CALPALMY 30-Pack |
|---|---|---|
| Number of Masks | 14 | 30 |
| Ideal For | Individuals, small families | Large groups, classrooms |
| Per-Mask Cost | Higher | Lower |
| Storage Space | Less | More |
Beyond the quantity and cost, consider the potential waste. If you only need a few masks, purchasing the 30-pack might result in unused masks that end up collecting dust or being discarded. On the other hand, if you frequently engage in crafting activities or plan to host multiple Halloween parties, the 30-pack could save you money in the long run and ensure that you always have masks on hand when you need them. Think about your long-term crafting habits and the potential uses for the masks beyond a single Halloween season. Could you use them for birthday parties, theater productions, or other creative projects? If so, the 30-pack might be a worthwhile investment. Ultimately, the best choice depends on your individual circumstances and preferences. Weigh the pros and cons of each option carefully to determine which pack best aligns with your needs and budget. The CALPALMY paper mache mask can be a source of unlimited opportunities.
Crafting Considerations: Painting, Embellishments, and Durability
While the CALPALMY Paper Mache Masks offer a fantastic blank canvas, there are a few crafting considerations to keep in mind to ensure optimal results. Firstly, the type of paint you use can significantly impact the final look and feel of your mask. Acrylic paints are generally recommended for their durability and vibrant colors. They adhere well to the paper mache surface and provide a long-lasting finish. Watercolors can also be used, but they may require multiple coats to achieve the desired opacity. Markers are a convenient option for adding fine details and intricate designs, but be sure to use permanent markers that won’t bleed or fade over time. Spray paint can provide a smooth, even coat of color, but it’s important to apply it in a well-ventilated area and use a primer to ensure proper adhesion. When it comes to embellishments, the possibilities are endless. Feathers, glitter, beads, sequins, fabric scraps, yarn, and even dried flowers can be glued onto the masks to add texture, dimension, and visual interest. Hot glue is generally the most effective adhesive for attaching heavier embellishments, while craft glue or glue sticks can be used for lighter materials. Consider the overall design of your mask when selecting embellishments. Do you want to create a realistic representation of an animal, a whimsical fantasy character, or a spooky monster? Choose embellishments that complement your chosen theme and enhance the overall aesthetic. Durability is another important factor to consider. While paper mache is relatively sturdy, it’s not indestructible. Avoid exposing the masks to excessive moisture or rough handling, as this can cause them to warp, crack, or break. To reinforce the masks, you can apply a layer of sealant or varnish after painting and embellishing them. This will protect the surface from scratches, moisture, and UV damage, extending the lifespan of your creations. Proper storage is also essential for maintaining the integrity of the masks. Store them in a cool, dry place away from direct sunlight and extreme temperatures. Avoid stacking them on top of each other, as this can cause them to become deformed. By taking these crafting considerations into account, you can ensure that your CALPALMY Paper Mache Masks not only look fantastic but also last for years to come.
Maximizing the Creative Process: Tips and Tricks for Stunning Results
To elevate your CALPALMY Paper Mache Mask creations from simple crafts to stunning works of art, consider incorporating these tips and tricks into your creative process. Before you even pick up a paintbrush, spend some time sketching out your design. This will help you visualize the final product and plan the placement of colors, embellishments, and other details. Use reference images to inspire your design and ensure accuracy. If you’re creating a mask of a specific animal or character, look up pictures online or in books to study their features and proportions. Don’t be afraid to experiment with different techniques and materials. Try blending colors, layering embellishments, or using unconventional tools to create unique textures and effects. If you’re unsure about a particular technique, practice on a scrap piece of paper mache before applying it to your mask. Consider using stencils or templates to create intricate designs or patterns. You can find stencils online or create your own using cardstock or acetate. When applying paint, use thin, even coats and allow each coat to dry completely before applying the next. This will prevent the paint from clumping or peeling. When gluing on embellishments, use a generous amount of adhesive and press the embellishments firmly into place. Allow the glue to dry completely before handling the mask. To add depth and dimension to your mask, use shading and highlighting techniques. Apply darker shades to areas that should recede and lighter shades to areas that should stand out. Consider the comfort of the wearer when designing your mask. Ensure that the eye holes are properly aligned and that the mask fits snugly but comfortably. Add padding to the inside of the mask if necessary to prevent irritation. Most importantly, don’t be afraid to let your creativity flow and have fun! The process of creating a mask should be enjoyable and rewarding. Embrace your mistakes and learn from them. The more you practice, the better you’ll become at crafting stunning, one-of-a-kind masks. The CALPALMY paper mache mask represents only a door to unlock your unlimited opportunities.
Real-World Applications: Beyond Halloween
While the CALPALMY Paper Mache Masks are undoubtedly a popular choice for Halloween costumes, their versatility extends far beyond a single holiday. These masks can be used for a wide range of creative projects and events, making them a valuable addition to any crafter’s toolkit. Theater productions are a natural fit for paper mache masks. They can be used to create character masks for plays, musicals, and dance performances. The lightweight nature of the masks makes them comfortable for actors to wear for extended periods of time, and the customizable surface allows for intricate and expressive designs. Schools and community centers can use the masks for educational projects. Children can learn about different cultures and traditions by creating masks inspired by various ethnic groups. They can also explore themes of identity, emotion, and storytelling through mask-making activities. Art therapy is another area where paper mache masks can be beneficial. The act of creating a mask can be a cathartic and empowering experience, allowing individuals to express their emotions and explore their inner selves. The masks can be used as a tool for self-discovery, healing, and personal growth. Cosplay enthusiasts can use the masks as a base for creating elaborate and realistic costumes. The customizable surface allows for precise detailing and accurate representation of characters from movies, video games, and anime. Parties and events can be enhanced with themed masks. Imagine a masquerade ball where guests create their own unique masks, or a birthday party where children decorate animal masks to wear during the festivities. The possibilities are endless. Even home décor can benefit from the addition of paper mache masks. They can be painted, embellished, and hung on the wall as unique and eye-catching works of art. Consider creating a gallery wall of masks inspired by different cultures or artistic styles. The CALPALMY paper mache masks are more than just a Halloween accessory; they are a versatile and creative tool that can be used for a wide range of purposes. By thinking outside the box and exploring the possibilities, you can unlock the full potential of these masks and bring your creative visions to life. Whether you need to craft a unique Halloween mask or other festive Halloween masks, you now know where to start.
Frequently Asked Questions
What kind of paint works best on these masks?
The best type of paint for CALPALMY Paper Mache Masks is acrylic paint. Acrylics are known for their vibrant colors, durability, and excellent adhesion to paper mache surfaces. They dry quickly, providing a water-resistant finish that helps protect the mask from damage. Watercolors can also be used, but they typically require multiple coats to achieve the desired opacity. Consider using a primer beforehand to help the watercolors adhere better and prevent them from soaking into the paper mache. Markers, especially permanent markers, are great for adding fine details and outlines. However, be cautious when using markers, as some types may bleed or fade over time. Spray paint can provide a smooth, even coat of color, but it’s crucial to use it in a well-ventilated area and apply a primer beforehand to ensure proper adhesion and prevent the paint from cracking. Ultimately, the choice of paint depends on the desired effect and the level of detail you want to achieve.
How can I make the masks more durable?
Making your CALPALMY Paper Mache Masks more durable involves a few key steps during and after the crafting process. Firstly, consider applying a sealant or varnish after you’ve finished painting and embellishing the mask. This will create a protective layer that shields the surface from scratches, moisture, and UV damage. A clear acrylic sealant or varnish is a good option. Another tip is to reinforce the paper mache itself before painting. You can do this by applying a thin layer of gesso or a similar primer. This will help to strengthen the paper mache and provide a smoother surface for painting. Avoid exposing the masks to excessive moisture or extreme temperatures, as these can cause them to warp, crack, or break. When storing the masks, keep them in a cool, dry place away from direct sunlight. Finally, handle the masks with care. Paper mache is not indestructible, so avoid dropping them or subjecting them to rough handling.
What are some good embellishment ideas?
The possibilities for embellishing CALPALMY Paper Mache Masks are truly endless, limited only by your imagination! Consider using feathers to create a whimsical or exotic look. Glitter can add sparkle and glamour to any mask, while beads and sequins can be used to create intricate patterns and textures. Fabric scraps can be glued onto the masks to add texture and dimension. Yarn can be used to create hair, beards, or other decorative elements. Dried flowers can add a touch of natural beauty. Consider using different types of paper, such as tissue paper or crepe paper, to create unique textures and effects. You can also use paint to create intricate designs, shading, and highlighting. Think about the overall theme or character you’re trying to create and choose embellishments that complement that theme. For example, if you’re creating a mask of a lion, you might use yarn for the mane and felt for the ears. If you’re creating a mask of a fairy, you might use glitter, sequins, and dried flowers.
Are these masks safe for children to use?
Yes, the CALPALMY Paper Mache Masks are generally safe for children to use, but adult supervision is recommended, especially for younger children. Ensure that the materials used to decorate the masks are non-toxic and child-safe. Avoid using small parts that could be a choking hazard for young children. Supervise children when they are using sharp tools, such as scissors or craft knives, to cut or shape the masks. Make sure that the eye holes are properly aligned and large enough for children to see comfortably. Avoid using paints or adhesives that have strong fumes or require special ventilation. If children have any allergies, be sure to avoid using materials that could trigger an allergic reaction. With proper supervision and safe materials, these masks can provide hours of creative fun for children of all ages.
Can I cut or reshape these masks?
Yes, you can cut and reshape CALPALMY Paper Mache Masks, but it’s important to do so carefully to avoid damaging them. Use a sharp craft knife or scissors to cut the masks. For larger cuts, a utility knife may be necessary. Work slowly and carefully, making small cuts and gradually shaping the mask to your desired form. Be aware that paper mache can be brittle, so avoid applying too much pressure or bending the mask too sharply. If you’re planning to make significant changes to the shape of the mask, consider reinforcing it with additional layers of paper mache or fabric. This will help to strengthen the mask and prevent it from cracking or breaking. When reshaping the mask, you can use water to soften the paper mache and make it more pliable. However, avoid soaking the mask, as this can damage it. Use a spray bottle to lightly mist the areas you want to reshape. Once you’ve reshaped the mask, allow it to dry completely before painting or embellishing it.
How do I attach elastic or ribbons to hold the mask on?
Attaching elastic or ribbons to CALPALMY Paper Mache Masks to secure them to the wearer’s face is a straightforward process. First, decide where you want to attach the elastic or ribbons. Typically, they are attached to the sides of the mask, near the temples. Use a small hole punch or a sharp needle to create small holes on each side of the mask. Be careful not to make the holes too large, as this could weaken the paper mache. Cut two pieces of elastic or ribbon to the desired length. The length will depend on the size of the wearer’s head. A good rule of thumb is to measure from one temple to the other, over the top of the head, and add a few inches for tying. Thread one end of each piece of elastic or ribbon through the holes on each side of the mask. Tie a knot in each end of the elastic or ribbon to secure it to the mask. Make sure the knots are tight enough to prevent the elastic or ribbon from slipping out. Alternatively, you can use glue to secure the elastic or ribbon to the mask. Hot glue works well for this purpose, but be careful not to burn yourself.
Where can I find inspiration for mask designs?
Finding inspiration for mask designs is easier than ever with the wealth of resources available online and in the real world. Start by browsing online image search engines like Google Images or Pinterest. Search for terms like “mask designs,” “Halloween masks,” “masquerade masks,” or “tribal masks.” You’ll find a vast array of images to inspire your creativity. Look to different cultures for inspiration. Many cultures have rich traditions of mask-making, with unique designs and symbolism. Research masks from African, Asian, and Native American cultures. Visit museums and art galleries to see examples of masks from different periods and cultures. Look to nature for inspiration. Use natural forms and colors to create masks that represent animals, plants, or landscapes. Watch movies and TV shows that feature masks. Fantasy, science fiction, and historical dramas often feature elaborate and visually stunning masks. Consider attending a masquerade ball or costume party to see what other people are creating. Most importantly, don’t be afraid to experiment and try new things. The best way to find inspiration is to simply start creating and see where your imagination takes you.
Price: $14.99
(as of Sep 04, 2025 11:44:45 UTC – Details)


