Best 2 Pack Halloween Skeleton Hands Review Halloween Charcuterie Board – Oemiu
Spooky Delights: A Comprehensive Review of Skeleton Hands & Halloween Charcuterie Boards
Halloween is that magical time of year when we embrace the spooky, the kooky, and the downright fun. From elaborate costumes to haunting decorations, it’s a holiday that encourages creativity and a touch of the macabre. And what better way to celebrate than with a chillingly curated Halloween charcuterie board, complete with unsettling yet delightful snacks and the perfect eerie ambiance? Key to setting that ambiance is finding the right decorations, which is where the 2 Pack Halloween Skeleton Hands come into play. But are these bony appendages just a novelty item, or can they genuinely elevate your Halloween spread to the next level? Let’s delve into the world of skeleton hands and the art of crafting the ultimate Halloween charcuterie board, exploring how these two seemingly disparate elements can combine to create a truly unforgettable Halloween experience.
The Allure of Skeleton Hands: Decoration and Functionality
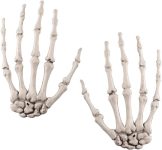
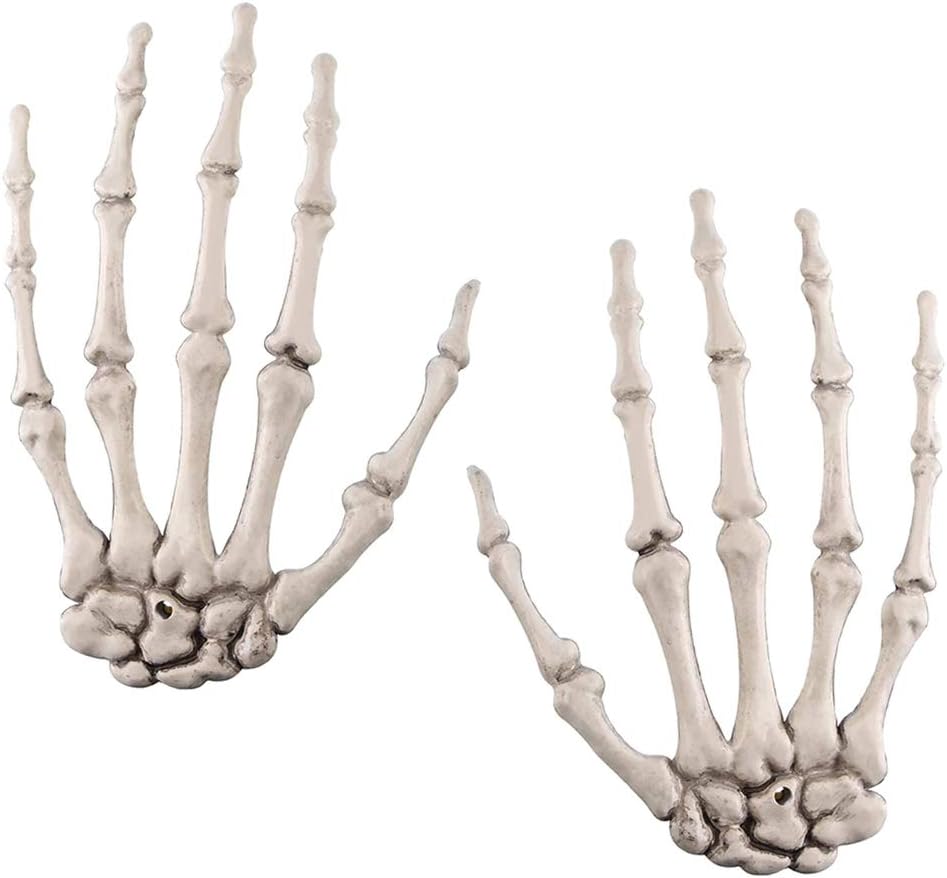
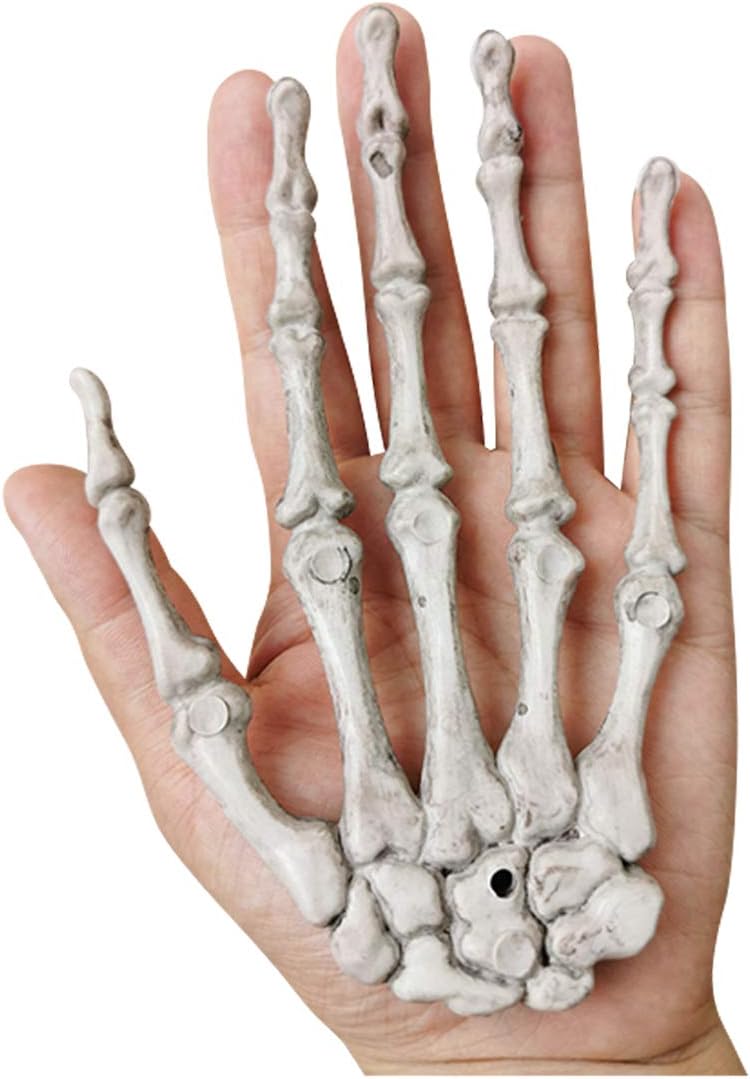
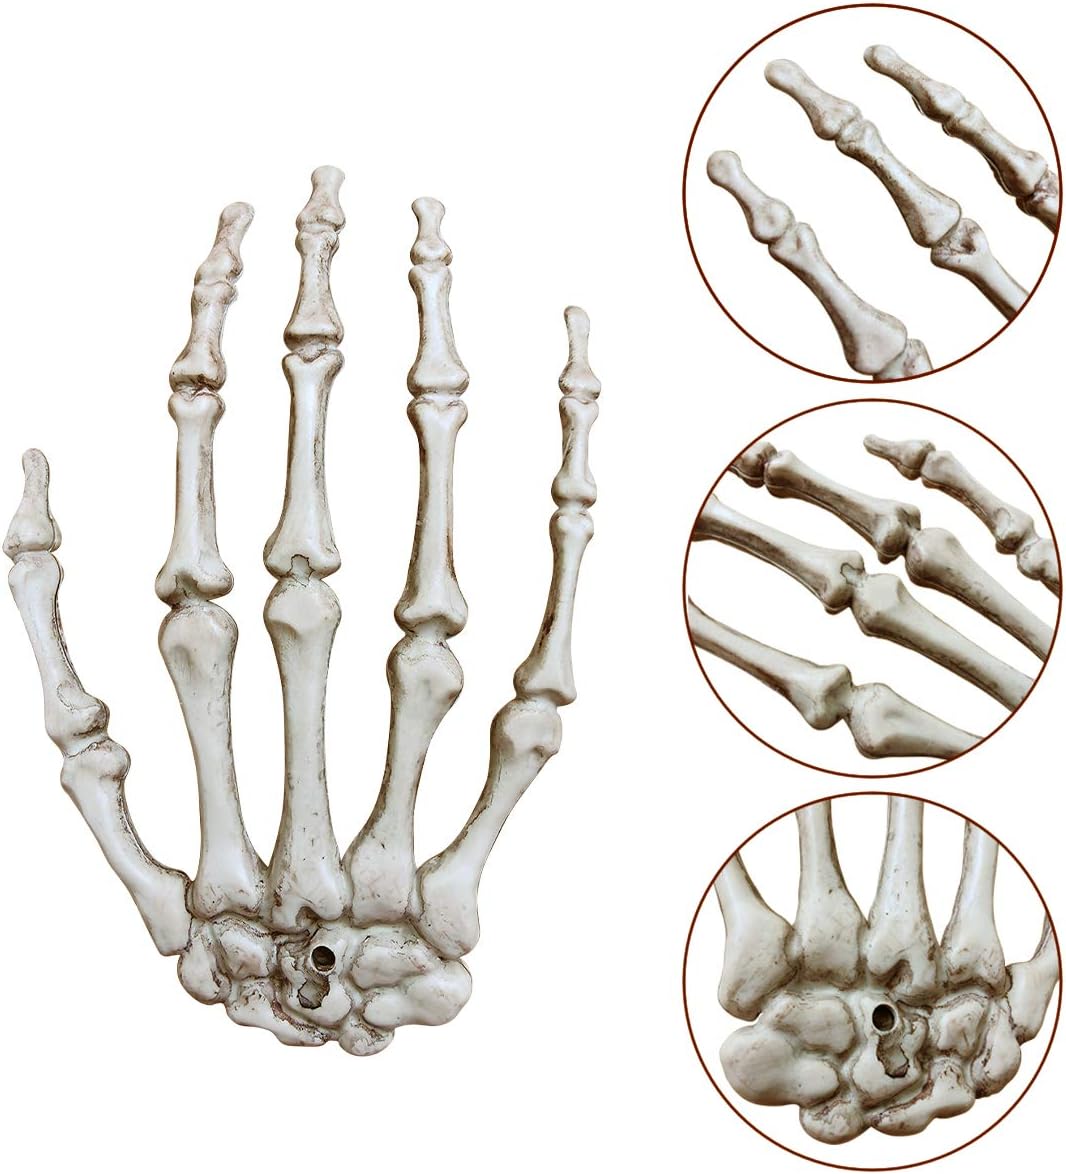
Skeleton hands, those iconic symbols of Halloween, have evolved from simple props to versatile decorations with surprising functionality. Beyond their decorative appeal, these bony appendages can be used to hold snacks, display treats, or even serve as makeshift serving utensils. The key is finding a set that strikes the right balance between aesthetic appeal and practical use. When considering a 2 Pack Halloween Skeleton Hands set, several factors come into play. Material is paramount; you want something durable enough to withstand repeated use, but also lightweight enough to be easily positioned and moved. Plastic is a common choice, offering affordability and weather resistance if you plan on using them outdoors. Resin skeleton hands, on the other hand, often boast greater detail and a more realistic appearance, but may be more susceptible to damage. The size and articulation of the hands also matter. Larger hands can hold more substantial items, while articulated joints allow for greater flexibility in posing and presentation. Consider what you primarily intend to use the skeleton hands for. Are they meant to be a subtle accent, or a prominent feature of your Halloween display? Answering this question will help you determine the ideal size, style, and material for your needs. The texture and finish of the skeleton hands also contributes to the overall effect. A matte finish can lend a more realistic, aged look, while a glossy finish may appear more artificial but is easier to clean. Ultimately, the best skeleton hands are those that seamlessly blend into your Halloween theme, adding a touch of macabre charm without overpowering your overall aesthetic. They can be the unexpected detail that transforms an ordinary display into a truly haunting spectacle. Also, think about storage after Halloween is over, you’ll want them to be durable and ready for use next season too!
Evaluating the 2 Pack Halloween Skeleton Hands
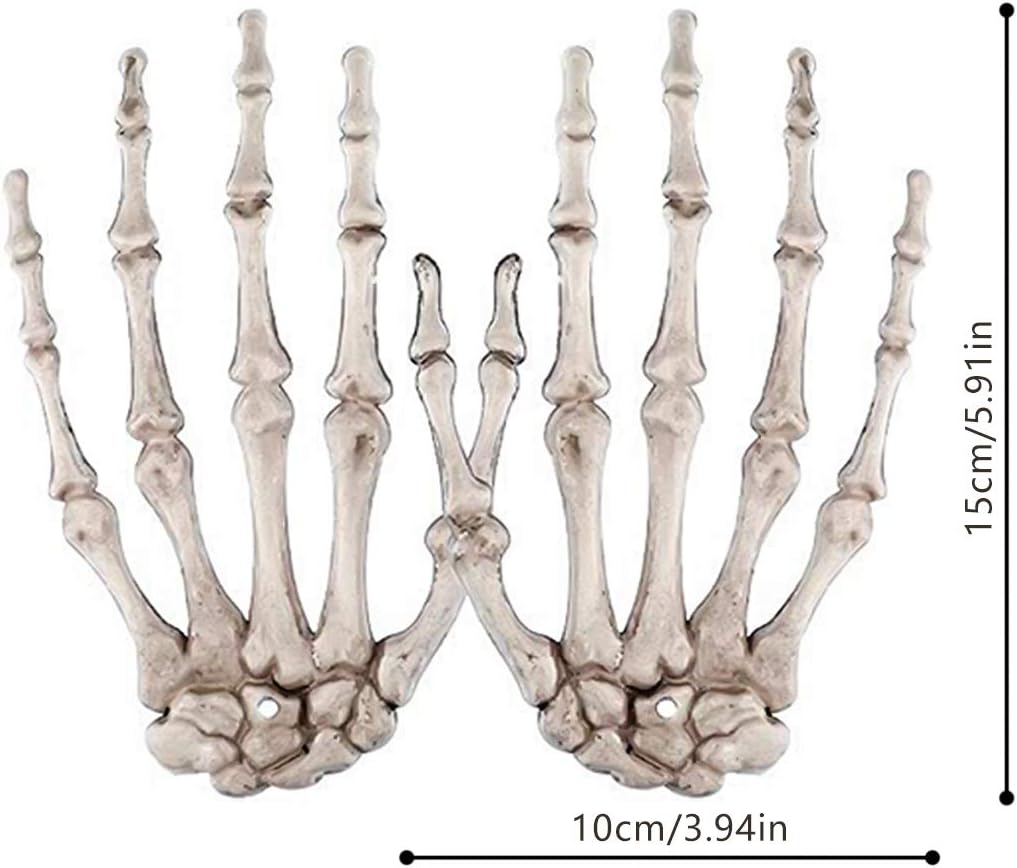
Before committing to a specific 2 Pack Halloween Skeleton Hands set, it’s crucial to carefully evaluate their features and specifications. Consider the following aspects:
- Material: What are the skeleton hands made of? (Plastic, resin, metal, etc.)
- Size and Dimensions: How large are the hands? Will they fit your intended purpose?
- Articulation: Are the fingers and joints movable?
- Durability: How sturdy are the hands? Will they withstand repeated use?
- Finish: What is the texture and appearance of the surface? (Matte, glossy, aged, etc.)
- Price: How affordable are the skeleton hands compared to similar options?
- Reviews: What are other customers saying about the quality and performance of the product?
Let’s imagine we are comparing two different sets of 2 Pack Halloween Skeleton Hands:
| Feature | Set A: Budget-Friendly Plastic | Set B: Realistic Resin |
|---|---|---|
| Material | Durable Plastic | High-Quality Resin |
| Size | 7 inches long | 9 inches long |
| Articulation | Fixed fingers | Articulated fingers and wrist |
| Durability | Weather-resistant, but may fade over time | Fragile, best for indoor use |
| Finish | Glossy, easy to clean | Matte, realistic texture |
| Price | $12.99 | $29.99 |
| Customer Reviews | 4.2 stars (150 reviews) | 4.8 stars (85 reviews) |
As you can see, Set A is a more affordable and practical option for those seeking a durable and weather-resistant decoration. Set B, on the other hand, offers a more realistic and visually appealing option, but at a higher price point and with reduced durability. The best choice depends on your individual needs and priorities. Consider the overall theme of your Halloween decorations and choose the set that best complements your existing setup. Don’t forget to read customer reviews to get a sense of the product’s real-world performance and reliability. A little research can go a long way in ensuring that you choose the perfect 2 Pack Halloween Skeleton Hands for your spooky celebration.
Crafting the Perfect Halloween Charcuterie Board
The Halloween charcuterie board, a modern twist on the classic appetizer, is the perfect way to showcase your creativity and culinary skills while embracing the spooky spirit of the season. It’s more than just a collection of snacks; it’s a carefully curated presentation designed to delight the senses and evoke a sense of eerie fun. When creating your Halloween charcuterie board, think beyond the typical cheese and crackers. Embrace the theme with spooky shapes, ghoulish colors, and unexpected flavor combinations. Start with a visually appealing board; a dark wood or slate surface can provide a dramatic backdrop for your culinary creations. Then, select a variety of cheeses, meats, fruits, vegetables, and sweets that align with your Halloween theme. Consider using cookie cutters to create cheese slices in the shape of bats, ghosts, or pumpkins. Dye cream cheese orange or green for a festive touch. Incorporate black olives, dried cranberries, and purple grapes to add pops of color. Don’t be afraid to get creative with your presentation. Arrange your snacks in spooky patterns, such as a spiderweb or a graveyard scene. Use skeleton hands to hold cheese knives or display crackers. Add edible eyeballs, gummy worms, and candy corn for a playful touch. Remember, the goal is to create a visually stunning and tantalizing spread that will impress your guests and set the mood for a memorable Halloween gathering. A spooky Halloween Charcuterie Board is a delightful way to bring the fun of Halloween to the table.
Elements of a Spine-Chilling Charcuterie Spread
A truly memorable Halloween charcuterie board goes beyond the ordinary. Here’s a breakdown of essential elements to consider:
- Cheeses: Select a variety of cheeses with different textures and flavors. Consider a creamy brie, a sharp cheddar, and a crumbly blue cheese.
- Meats: Include a selection of cured meats, such as salami, prosciutto, and pepperoni.
- Fruits and Vegetables: Offer a mix of sweet and savory options, such as grapes, apples, carrots, and celery.
- Crackers and Bread: Provide a variety of crackers, breadsticks, and crusty bread for dipping and spreading.
- Sweets: Incorporate Halloween-themed candies, cookies, and chocolates.
- Dips and Spreads: Offer a selection of dips, such as hummus, guacamole, and spinach artichoke dip.
- Garnishes: Use fresh herbs, edible flowers, and spooky decorations to add visual appeal.
Don’t underestimate the power of presentation. Use different sized bowls and platters to create visual interest. Arrange your snacks in a way that is both aesthetically pleasing and easily accessible. Consider adding small labels to identify each item. Remember, a well-crafted charcuterie board is a work of art that should be both delicious and visually stunning. Let’s delve a bit deeper into how to use these elements.
Bringing it All Together: Creating a Visually Stunning Halloween Charcuterie Board
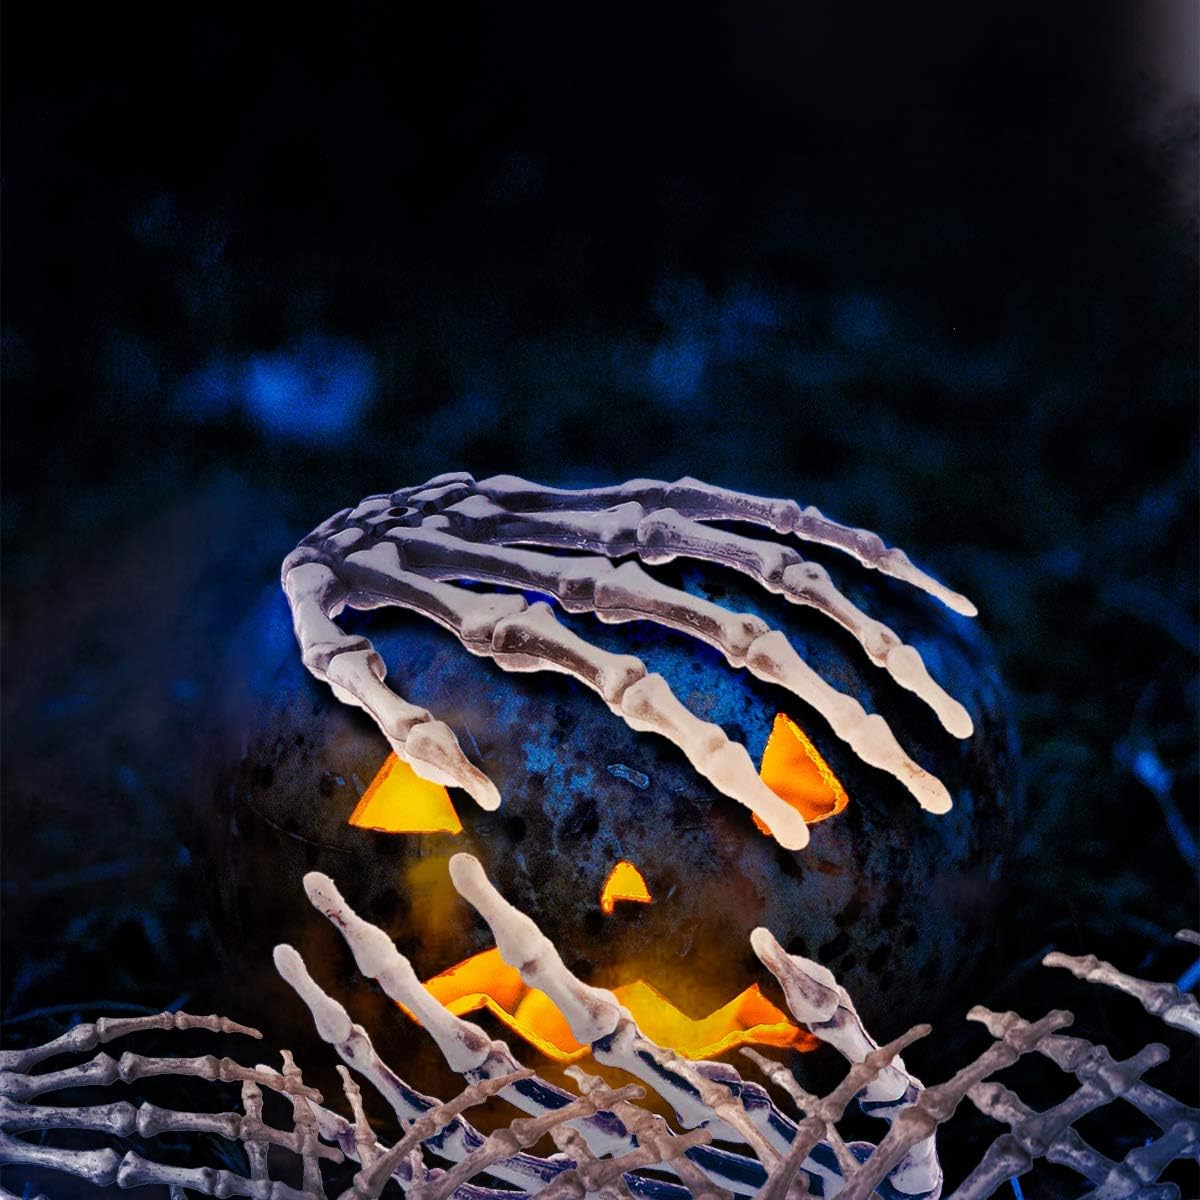
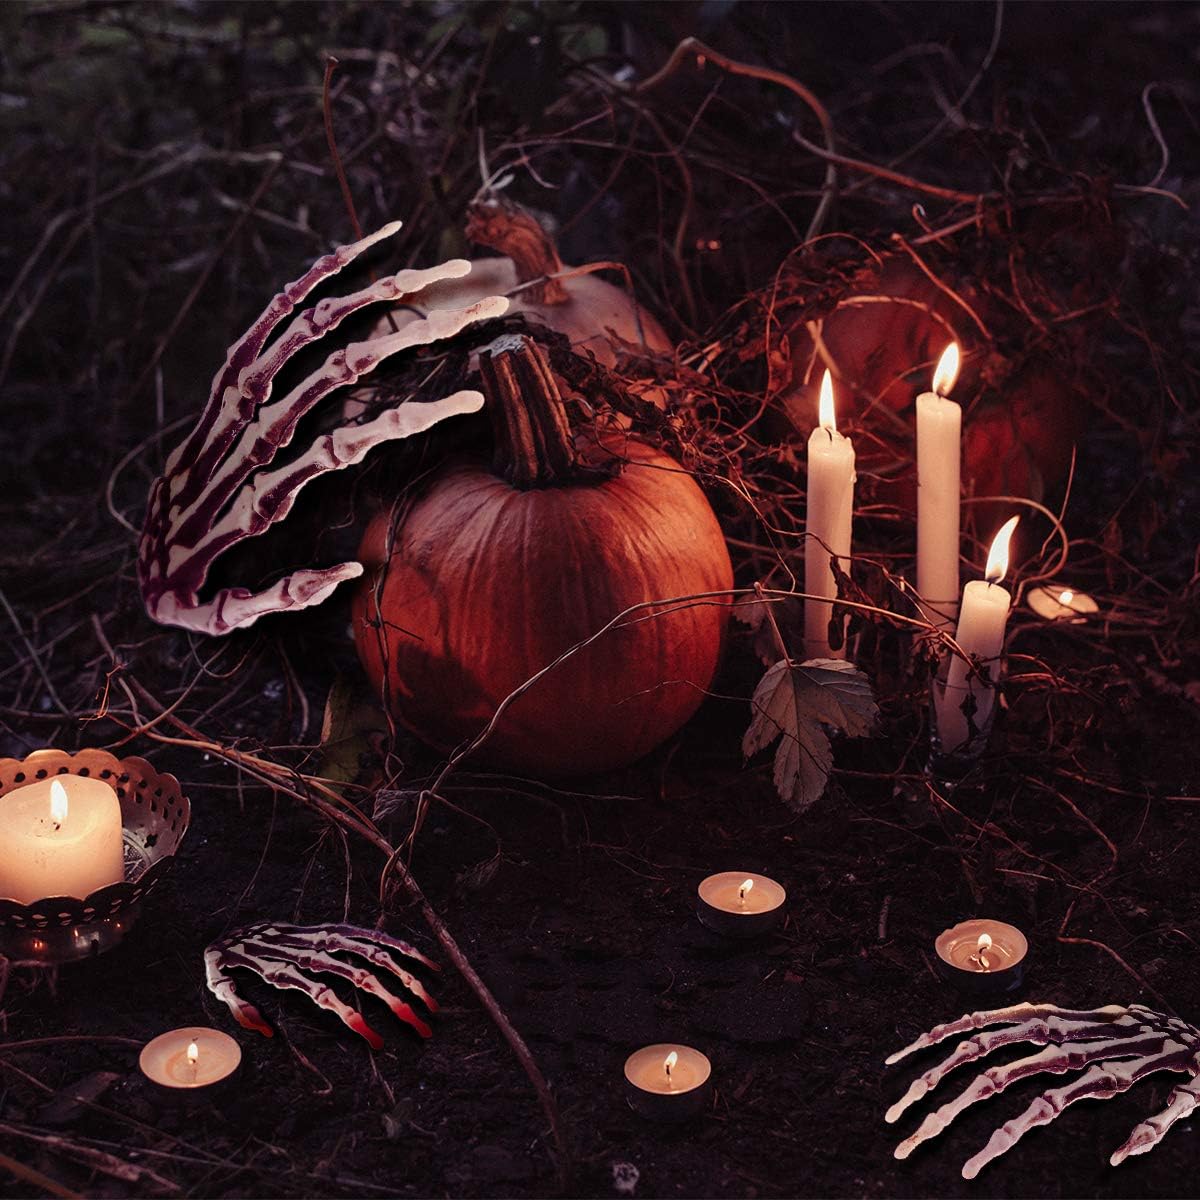
The magic of a Halloween charcuterie board lies in its visual appeal. Think of it as a canvas, and your ingredients are the paint. Start by placing larger items, such as bowls of dip and cheese blocks, strategically around the board. These will act as anchors for your arrangement. Next, fill in the gaps with smaller items, such as crackers, meats, and fruits. Don’t be afraid to overlap items to create texture and visual interest. Use color to your advantage. Contrast dark and light ingredients to create a striking visual effect. For example, pair black olives with white cheese or purple grapes with green celery. Consider using edible dyes to color your cheese or dips in Halloween-themed hues. Employ the 2 Pack Halloween Skeleton Hands to hold cheese knives or crackers, adding a touch of macabre charm. Arrange the hands in a way that appears as if they are reaching for the snacks, adding to the overall spooky effect. Add small decorative elements, such as plastic spiders, bats, or skulls, to enhance the Halloween theme. Be careful not to overcrowd the board. Leave some empty space to allow your guests to easily access the snacks. Remember, the goal is to create a visually stunning and inviting spread that will impress your guests and set the mood for a memorable Halloween gathering. The best Halloween Charcuterie board ideas combine the familiar with the unexpected. Keep it balanced and spooky!
Incorporating Skeleton Hands into Your Halloween Charcuterie Board Design
Now, let’s get to the heart of the matter: how to seamlessly integrate your 2 Pack Halloween Skeleton Hands into your Halloween charcuterie board design. The key is to use them purposefully, not just as random decorations. Think about how the hands can enhance the functionality and visual appeal of your spread. One effective approach is to use the skeleton hands as holders for serving utensils. Imagine a bony hand gripping a cheese knife, a cracker spreader, or a small spoon for dips. This not only adds a touch of macabre charm but also makes it easier for your guests to serve themselves. Another idea is to use the skeleton hands to display smaller snacks, such as olives, nuts, or candies. Arrange the hands in a way that appears as if they are offering these treats to your guests. This can create a playful and interactive element to your charcuterie board. Consider using the skeleton hands to create a focal point on your board. Position them in the center of the spread, surrounded by a ring of cheeses, meats, and fruits. This will draw the eye and create a sense of drama. Don’t be afraid to get creative with your posing. Experiment with different angles and positions to find the most visually appealing arrangement. You can even use the skeleton hands to create a narrative on your board. For example, you could arrange them as if they are reaching for a piece of cheese or attempting to escape from a bowl of gummy worms. Remember, the goal is to use the skeleton hands in a way that enhances the overall theme and visual appeal of your Halloween charcuterie board. Let your imagination run wild and have fun experimenting with different ideas. With a little creativity, you can transform your ordinary spread into a truly haunting and unforgettable masterpiece. Your Halloween Charcuterie board platter will be the talk of the party. A little bit of creativity goes a long way to make the difference.
Creative Placement and Presentation Ideas
Beyond simply placing the skeleton hands on the board, consider these creative presentation techniques:
- The Hand-Held Treat: Place a small pile of candy corn or gummy worms in the palm of the skeleton hand, as if it’s offering a spooky treat.
- The Cheese Knife Grip: Securely position the skeleton hand to hold a cheese knife, adding a touch of elegance and macabre charm.
- The Cracker Display: Arrange the skeleton hands to fan out crackers, creating a visually appealing and easily accessible display.
- The Dip Guardian: Position the skeleton hand near a bowl of dip, as if it’s guarding the delicious concoction.
- The Graveyard Scene: Create a miniature graveyard scene on your charcuterie board, using the skeleton hands as gravestones or lurking figures.
- The Reaching Hand: Position one or both hands reaching out of the board to catch the attention of the guests and invite them to partake in the feast.
These are just a few ideas to get you started. The key is to experiment and find what works best for your specific charcuterie board design and personal aesthetic. The 2 Pack Halloween Skeleton Hands are versatile decorations that can add a touch of spooky fun to any Halloween celebration. By incorporating them creatively into your charcuterie board design, you can elevate your spread from ordinary to extraordinary. The details make all the difference. A creatively designed Halloween Charcuterie board food is a great conversation starter.
Beyond the Board: Expanding the Halloween Ambiance
While the charcuterie board is the centerpiece, don’t forget to extend the Halloween ambiance to the surrounding area. Consider the lighting, music, and overall décor to create a truly immersive experience. Dim the lights and use candles or string lights to create a spooky glow. Play a playlist of Halloween-themed music, such as classic horror film scores or eerie sound effects. Decorate the surrounding area with cobwebs, spiders, and other spooky props. Consider adding a fog machine to create a mysterious and ethereal atmosphere. A well-designed Halloween ambiance can enhance the enjoyment of your charcuterie board and make your gathering even more memorable. Think about the overall theme of your Halloween celebration and choose decorations that complement your charcuterie board design. If you’re going for a classic horror theme, consider using black and white decorations, skulls, and skeletons. If you’re aiming for a more playful and whimsical theme, consider using orange and purple decorations, pumpkins, and ghosts. The key is to create a cohesive and immersive experience that will transport your guests to a world of spooky fun. Consider all the senses. Sight, sound, smell and taste are all important.
Frequently Asked Questions (FAQ)
What are the best types of cheeses to include on a Halloween charcuterie board?
When selecting cheeses for your Halloween charcuterie board, aim for a variety of textures, flavors, and colors to create visual interest and appeal to a wide range of palates. A creamy brie or camembert offers a smooth and decadent experience, pairing well with fruits and crackers. A sharp cheddar provides a classic and familiar flavor, complementing cured meats and apples. A crumbly blue cheese adds a pungent and complex note, contrasting nicely with sweet fruits and nuts. Consider including a soft goat cheese for its tangy and slightly earthy flavor. For a Halloween twist, you can dye cream cheese orange or green using food coloring. You can also use cookie cutters to create cheese slices in the shape of bats, ghosts, or pumpkins. The key is to offer a balanced selection that caters to different tastes and preferences, ensuring that there’s something for everyone to enjoy. Furthermore, consider the visual element. Cheeses with different rinds or textures can contribute to the overall aesthetic appeal of your board. Think about arranging them in contrasting ways to highlight their unique characteristics.
How can I make my Halloween charcuterie board kid-friendly?
Making your Halloween charcuterie board kid-friendly involves incorporating elements that appeal to younger palates and ensuring that all items are safe and easy to eat. Opt for milder cheeses like mozzarella, cheddar, or Colby Jack, which are generally well-received by children. Include familiar and popular snacks such as grapes, apple slices, baby carrots, and pretzel sticks. Add a variety of Halloween-themed candies, cookies, and chocolates, but be mindful of sugar content and potential allergies. Cut fruits and vegetables into fun shapes using cookie cutters. Avoid small, hard candies that could be a choking hazard. Consider adding a bowl of yogurt-covered raisins or a trail mix with nuts and seeds (if allergies are not a concern). Make sure all items are bite-sized and easy for children to handle. Arrange the snacks in a visually appealing way that will capture their attention. You can even create a separate section of the board specifically for kid-friendly items. Remember, the goal is to create a fun and engaging experience for children while ensuring their safety and well-being. It is helpful to ask if any of the children have allergies before arranging the platter.
Are there any specific dietary restrictions I should consider when creating a Halloween charcuterie board?
Yes, it’s essential to consider dietary restrictions when creating a Halloween charcuterie board to ensure that all your guests can enjoy the spread safely. Inquire about any allergies, intolerances, or dietary preferences beforehand. Common allergies include nuts, dairy, gluten, and soy. Offer gluten-free crackers and bread alternatives for those with gluten sensitivities. Include dairy-free cheese options made from nuts or soy for guests who are lactose intolerant or vegan. Clearly label all items to avoid confusion and potential allergic reactions. Provide separate serving utensils for each item to prevent cross-contamination. Consider creating a separate section of the board specifically for those with dietary restrictions. Offer a variety of fruits, vegetables, and plant-based dips to cater to vegan and vegetarian guests. Be mindful of sugar content and offer sugar-free or low-sugar alternatives for those with diabetes or other health concerns. By taking these precautions, you can create a Halloween charcuterie board that is inclusive and enjoyable for everyone.
How can I keep my Halloween charcuterie board fresh throughout the party?
Maintaining the freshness of your Halloween charcuterie board throughout the party requires careful planning and execution. Start by preparing the board as close to serving time as possible. Store perishable items, such as cheese and meats, in the refrigerator until needed. Use chilled platters or boards to help keep the ingredients cool. Cover the board with plastic wrap or a damp cloth when not in use to prevent drying out. Avoid placing the board in direct sunlight or near heat sources. Replenish items as needed, discarding any that appear wilted or stale. Consider using ice packs underneath the board to keep it cool, especially if the party is outdoors or in a warm environment. Offer smaller portions of perishable items at a time to minimize waste and ensure freshness. Encourage guests to use serving utensils to avoid contaminating the food with their hands. By following these tips, you can ensure that your Halloween charcuterie board remains fresh and appealing throughout the duration of your party.
What are some safety tips to keep in mind when using skeleton hands as decorations?
When using skeleton hands as decorations, it’s crucial to prioritize safety to prevent accidents and injuries. Ensure that the skeleton hands are made from non-toxic materials, especially if they will be in contact with food. Inspect the hands for any sharp edges or broken pieces that could pose a hazard. Position the hands in a stable and secure manner to prevent them from falling or tipping over. Avoid placing the hands near open flames or heat sources, as they may be flammable. Keep the hands out of reach of small children and pets, as they may be tempted to chew on them or use them as toys. If using articulated skeleton hands, be careful not to pinch your fingers when adjusting the joints. Clean the skeleton hands thoroughly before and after use, especially if they have been in contact with food. Store the hands in a safe and dry place when not in use. By following these safety tips, you can enjoy the spooky fun of skeleton hands without compromising your well-being.
How far in advance can I prepare a Halloween charcuterie board?
The amount of time you can prepare a Halloween charcuterie board in advance depends on the specific ingredients you’re using and how you store it. Hard cheeses and cured meats can typically be prepared up to 24 hours in advance and stored in the refrigerator. Softer cheeses, such as brie or goat cheese, are best prepared closer to serving time, as they can dry out or become discolored. Fruits and vegetables should also be prepared closer to serving time to prevent wilting or browning. Crackers and bread should be stored separately in an airtight container to maintain their crispness. Dips and spreads can be prepared up to 2 days in advance and stored in the refrigerator. When assembling the board in advance, wrap it tightly in plastic wrap to prevent drying out and cross-contamination. Add any delicate or perishable items, such as fresh herbs or edible flowers, just before serving. Ultimately, it’s best to prepare as much of the board as possible in advance while minimizing the time that perishable items are exposed to room temperature. A well-planned approach will help ensure that your Halloween charcuterie board is fresh, delicious, and visually appealing when your guests arrive.
What are some budget-friendly options for creating a stunning Halloween charcuterie board?
Creating a stunning Halloween charcuterie board doesn’t have to break the bank. There are many budget-friendly options to consider. Start by shopping at discount stores or farmer’s markets for affordable cheeses, meats, and produce. Look for seasonal fruits and vegetables, which are typically more affordable and readily available. Utilize pantry staples, such as crackers, nuts, and dried fruits, to fill out the board. Make your own dips and spreads, such as hummus or guacamole, to save money compared to store-bought options. Use cookie cutters to create festive shapes from inexpensive cheese slices or vegetables. Incorporate Halloween candies and treats that you can find on sale. Get creative with your presentation by using inexpensive decorations, such as paper bats, plastic spiders, or cobwebs. Focus on creating a visually appealing arrangement, even if the ingredients are simple and affordable. Remember, it’s the overall presentation and theme that will make your Halloween charcuterie board truly special, not necessarily the price of the ingredients. With a little creativity and resourcefulness, you can create a stunning and affordable Halloween spread that will impress your guests without emptying your wallet. Also, consider making it a potluck-style event, where guests bring a dish to share to help offset the cost.
Price: $6.99
(as of Sep 06, 2025 11:29:54 UTC – Details)


![Scary Stories To Tell In The Dark [DVD]](https://oemiu.com/wp-content/uploads/2025/09/1757427628_Scary-Stories-To-Tell-In-The-Dark-DVD-Review-Best-336x220.jpg)