Ice Cream Maker Attachment for Review ice cream churn Buying Guide – Oemiu
Ice Cream Maker Attachment Buying Guide: Churn Your Way to Frozen Bliss
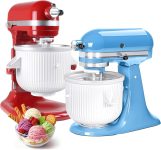
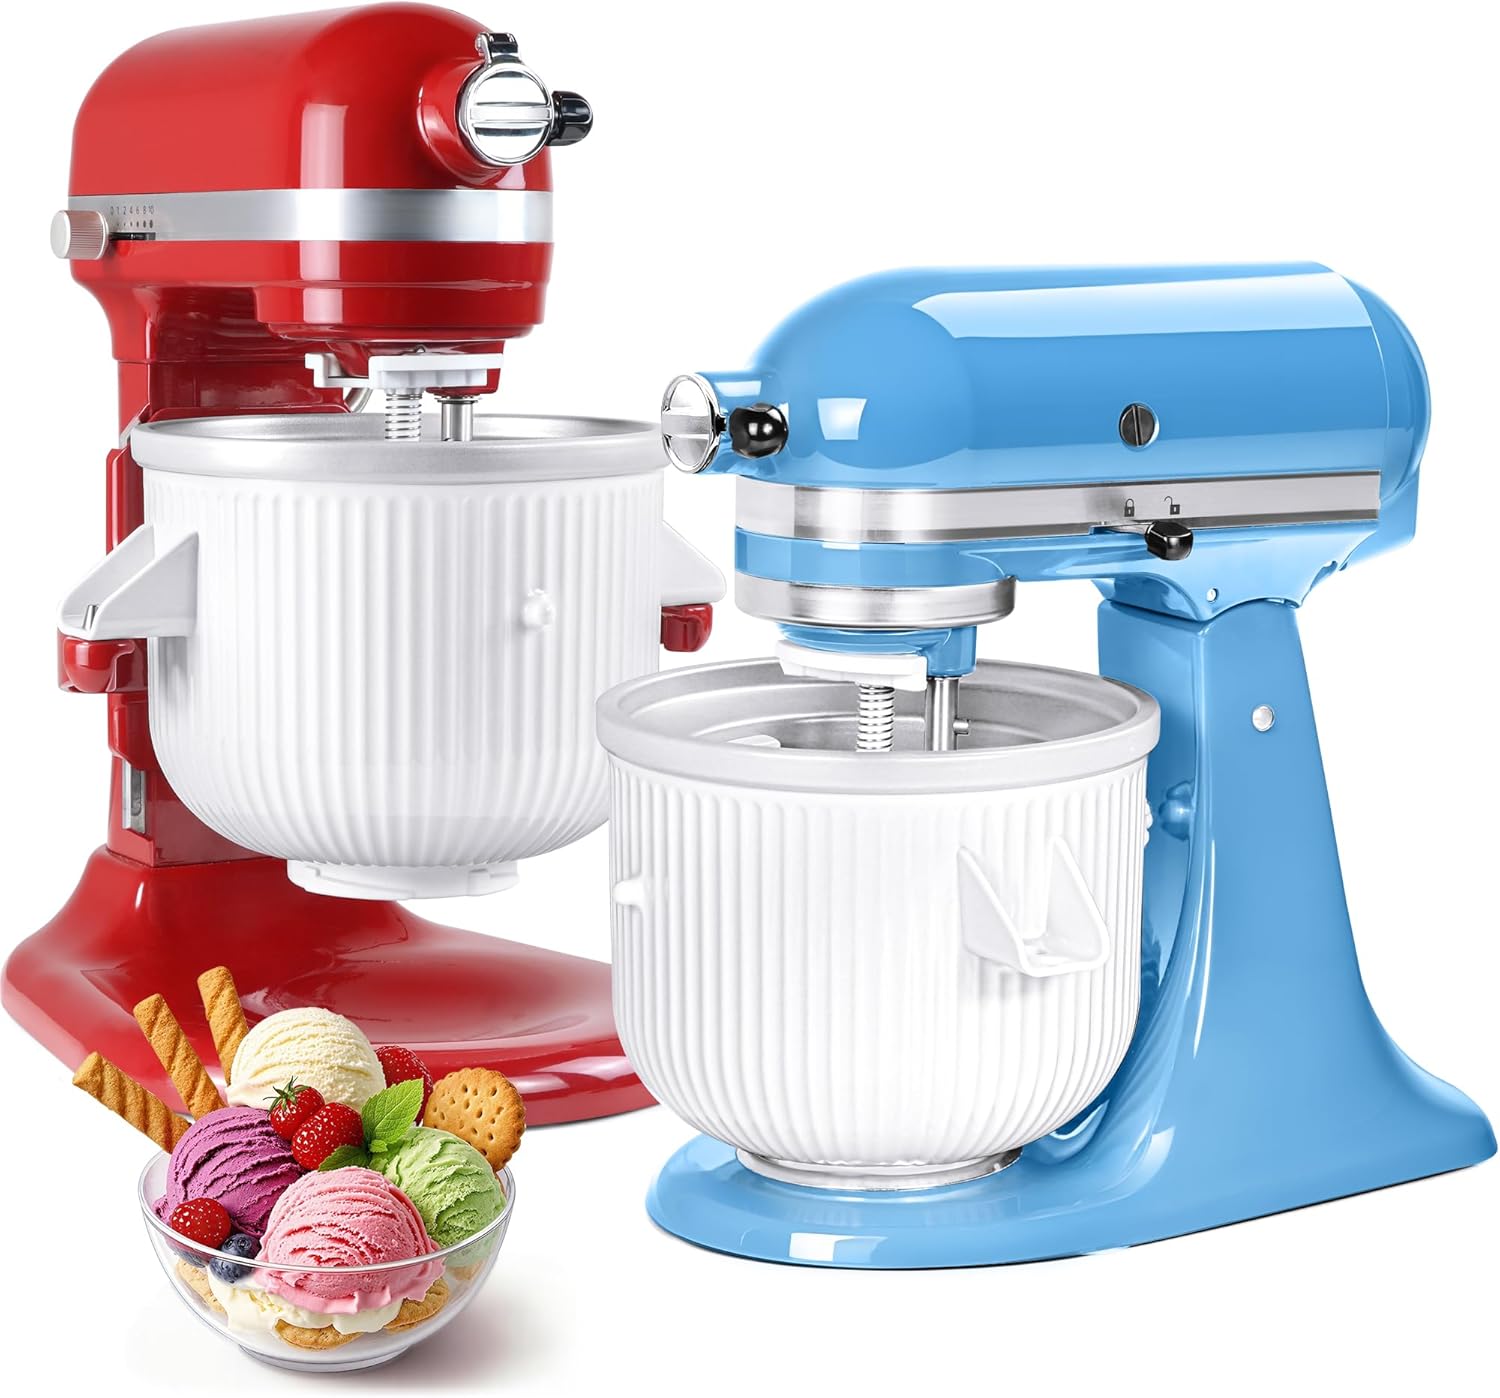
Summer’s heat demands a delicious, cooling escape, and what better way than with homemade ice cream? While standalone ice cream makers are fantastic, they can be bulky and expensive. Enter the ice cream maker attachment – a brilliant solution that leverages the power of your existing stand mixer to create creamy, dreamy frozen desserts. This guide explores the world of ice cream maker attachments, helping you navigate the options and choose the perfect one to churn your way to frozen bliss. Forget those store-bought pints filled with artificial flavors and preservatives; with the right attachment, you can craft custom creations using fresh, wholesome ingredients, tailoring every scoop to your exact preferences. Let’s dive in and discover how to transform your stand mixer into a personal ice cream parlor.
Understanding Ice Cream Maker Attachments: The Science of Frozen Delight
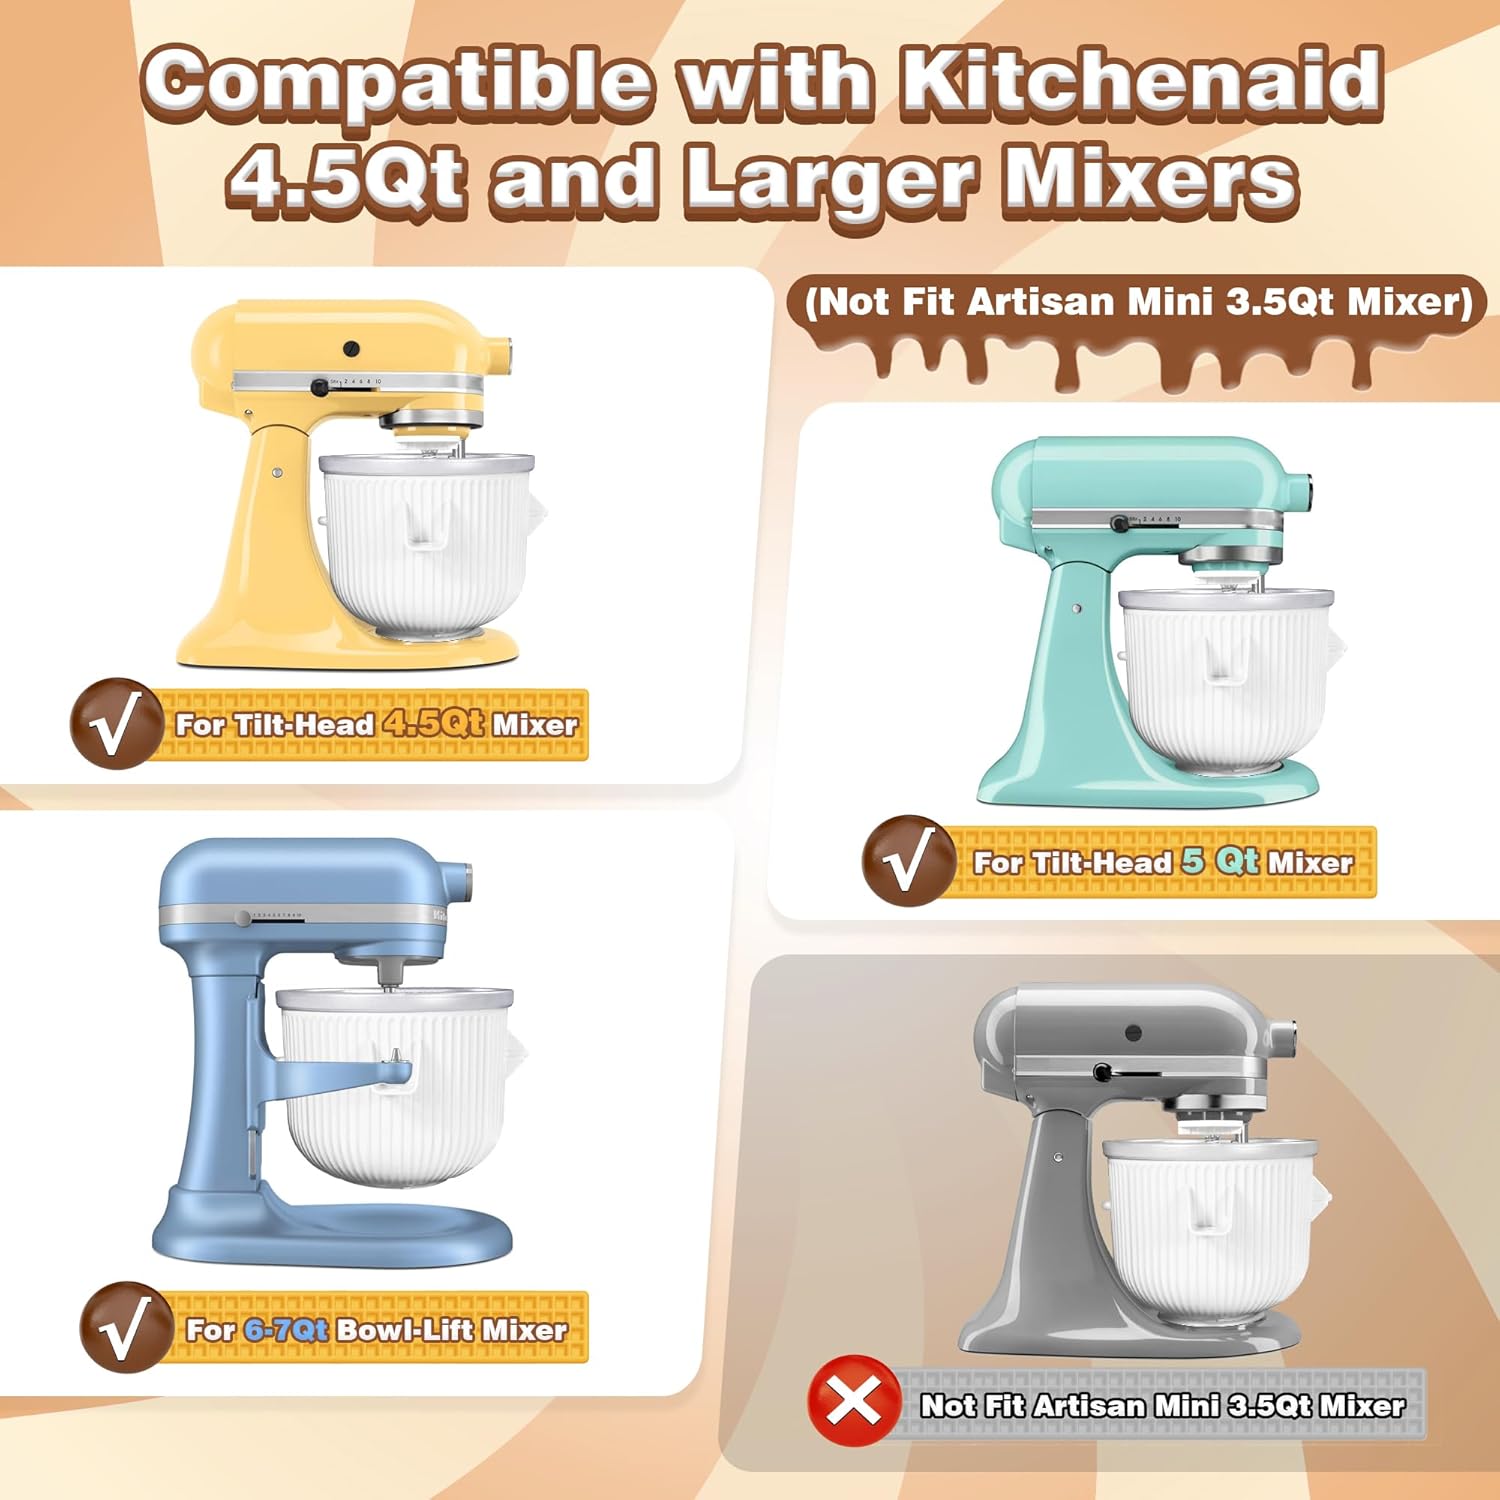
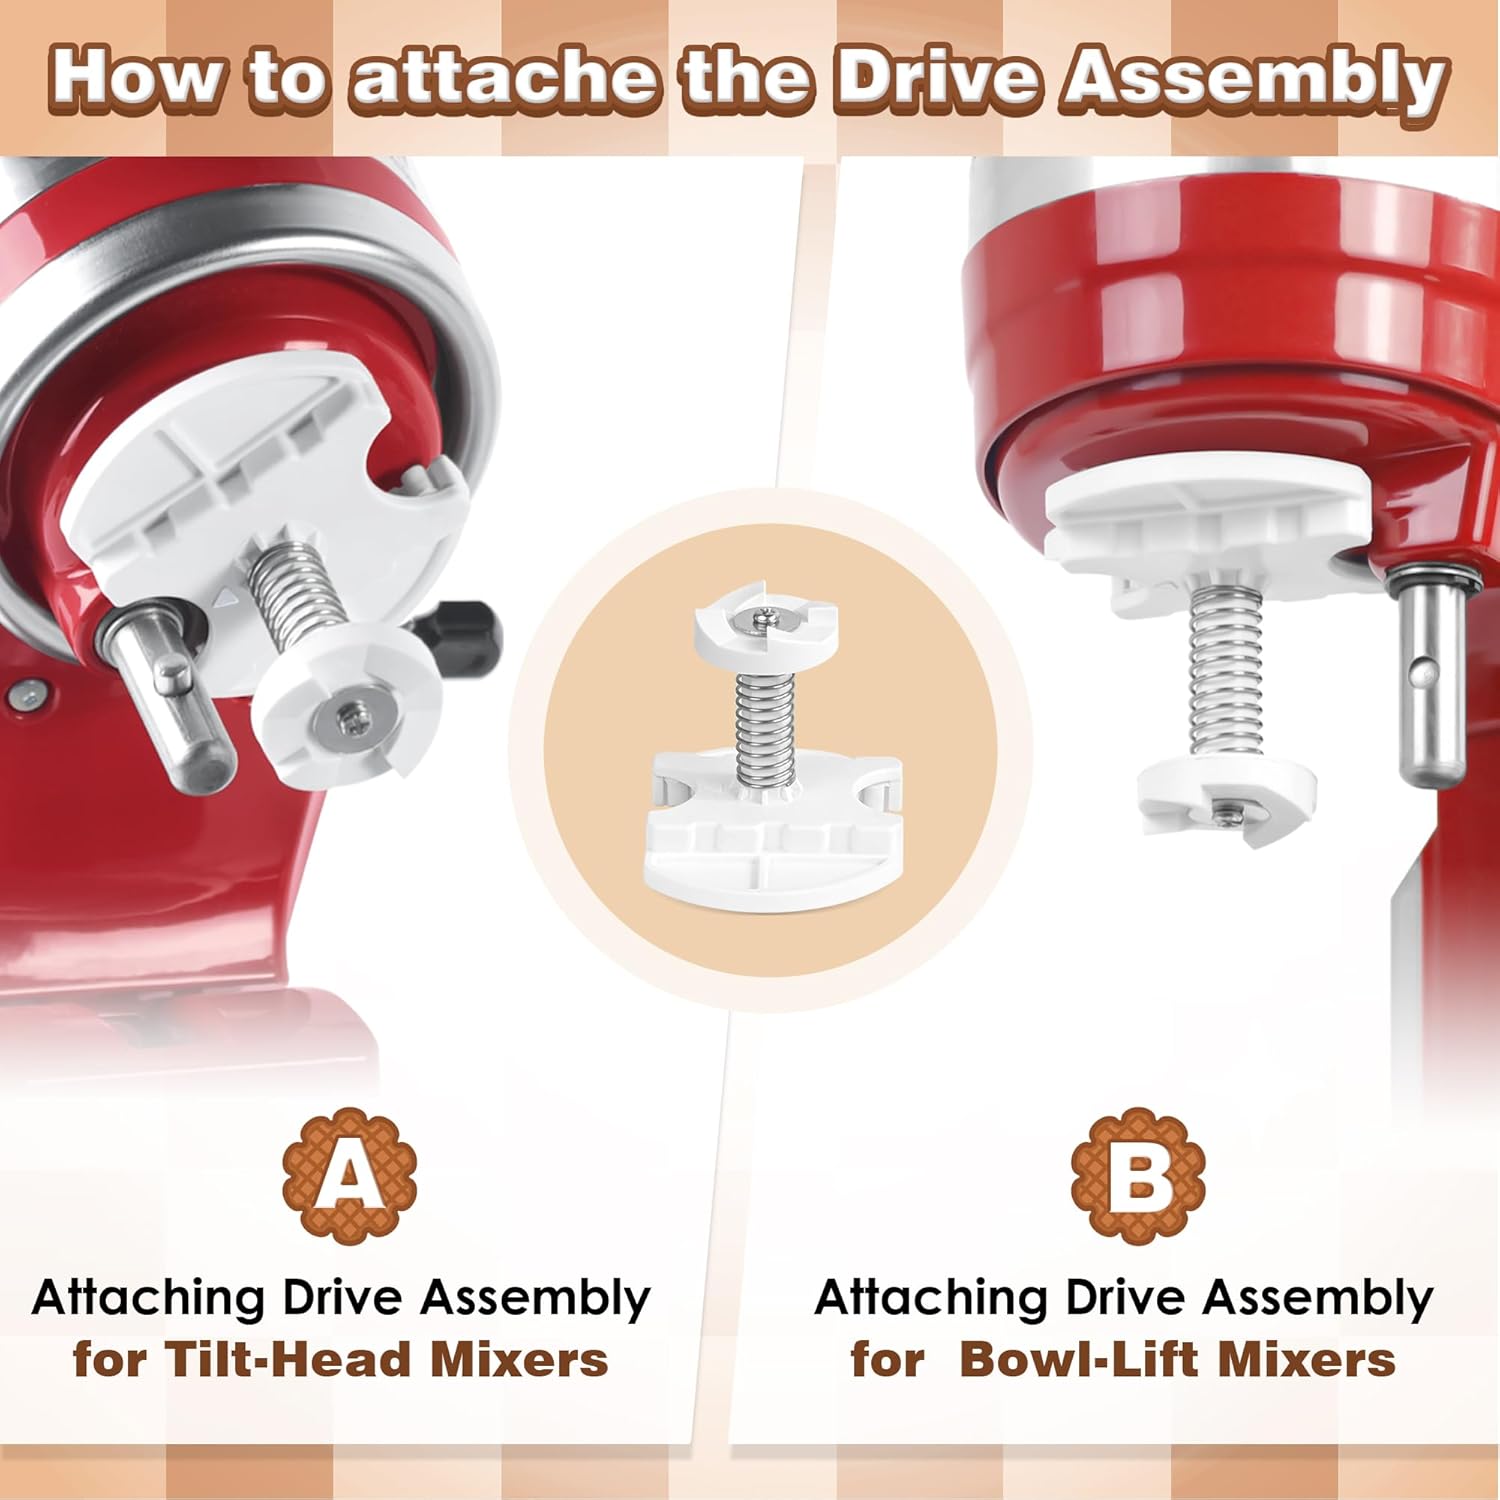
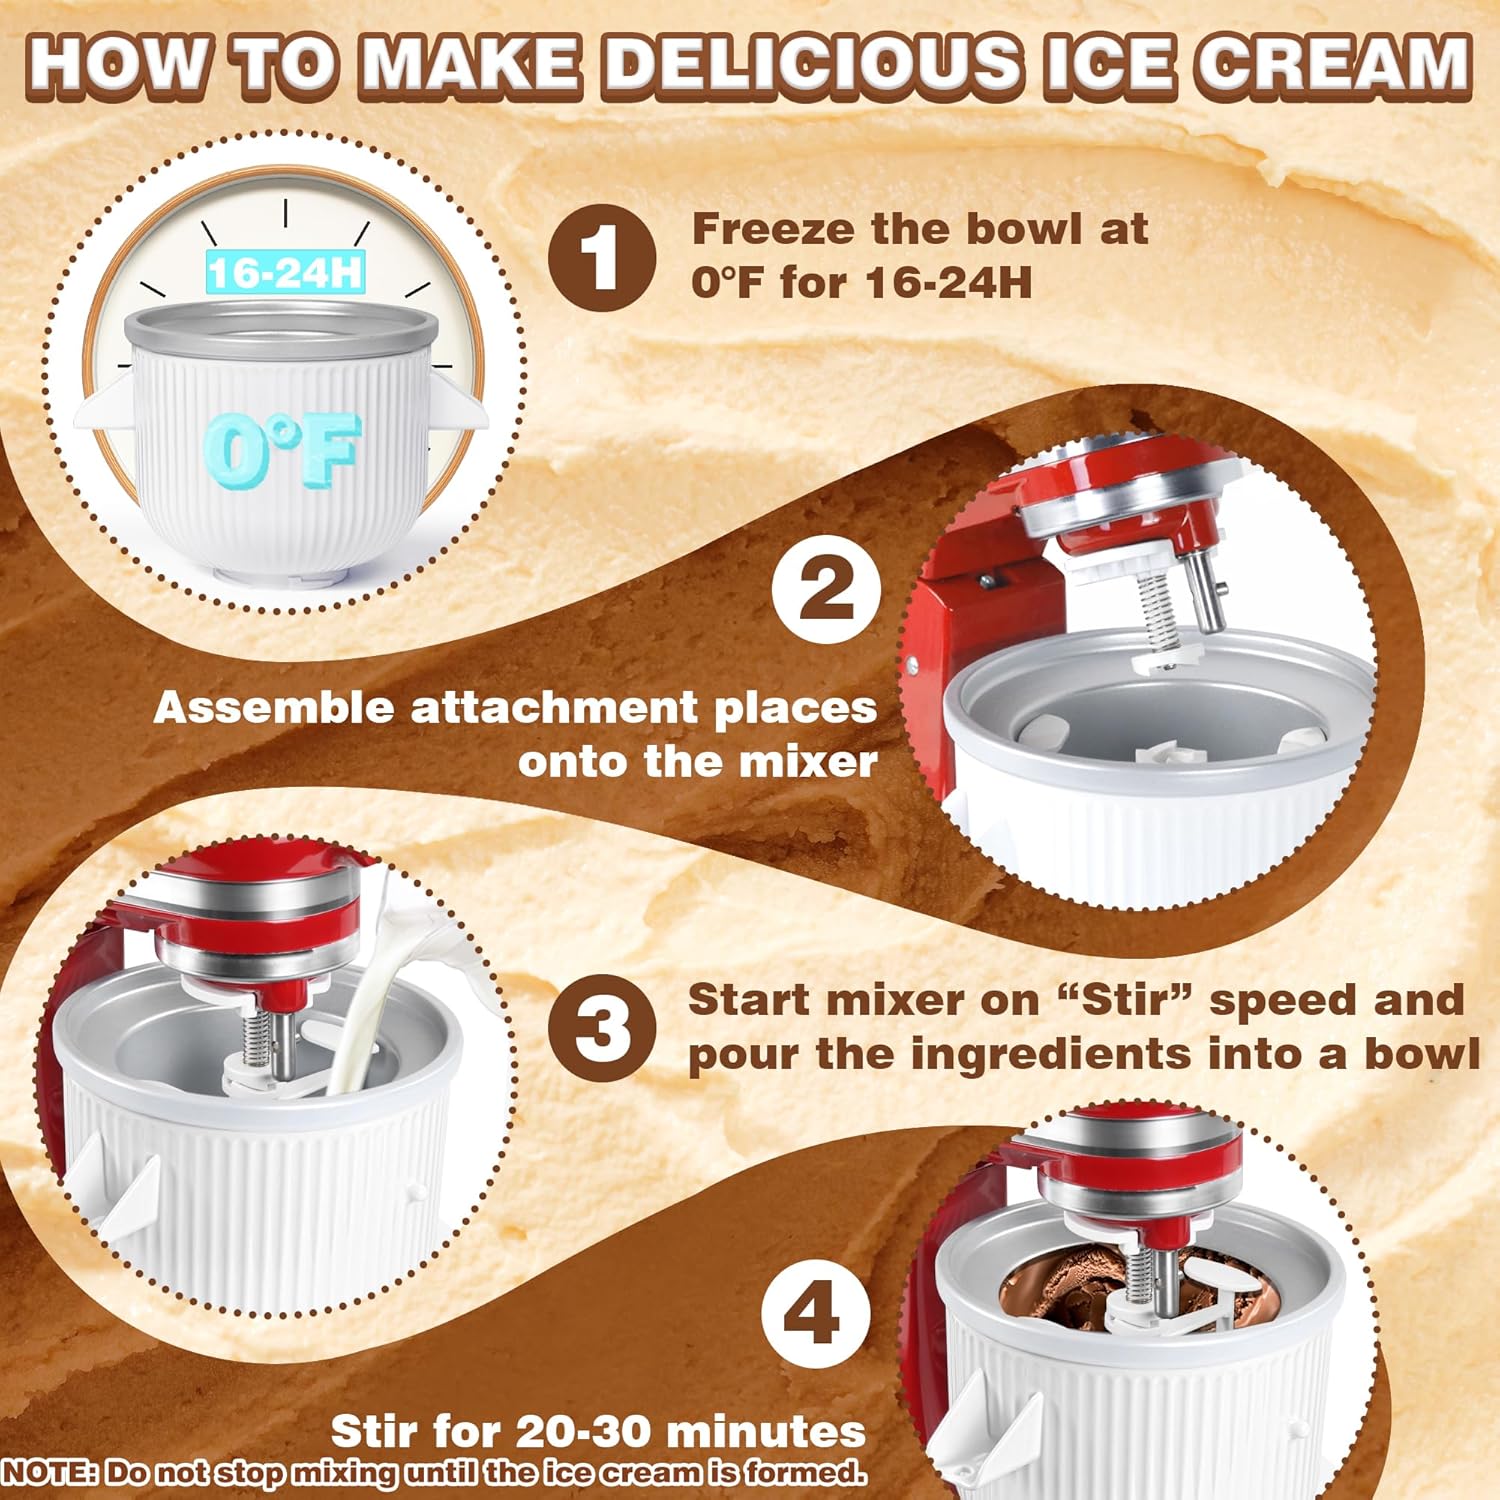
The magic behind any ice cream maker, including attachments, lies in the simultaneous process of chilling and churning. Chilling lowers the temperature of the ice cream base, while churning incorporates air and prevents the formation of large ice crystals. This results in a smooth, creamy texture rather than a hard, icy block. Ice cream maker attachments typically consist of a freezing bowl and a dasher (or paddle). The freezing bowl contains a refrigerant liquid that needs to be pre-frozen for a specific duration, usually between 15 and 24 hours, depending on the model and the ambient temperature of your freezer. Once frozen solid, the bowl is attached to the stand mixer, and the dasher is inserted. As the mixer runs, the dasher scrapes the frozen mixture from the sides of the bowl, incorporating air and preventing large ice crystals from forming. The speed and efficiency of the dasher are critical factors in achieving the desired ice cream texture. The type of stand mixer you own significantly impacts which attachments are compatible. KitchenAid stand mixers are the most common and widely supported, but other brands like Cuisinart or Breville might have compatible attachments or offer their own proprietary versions. Remember that using the right attachment for your mixer ensures optimal performance and avoids potential damage to your appliance.
Beyond the basic function, consider the bowl capacity. A smaller bowl might be ideal for single servings or small batches, while a larger bowl is better suited for families or those who love to entertain. Also, pay attention to the material of the freezing bowl. Stainless steel bowls tend to freeze faster and maintain lower temperatures compared to aluminum bowls. However, stainless steel bowls can be heavier and more expensive. The design of the dasher also matters. Some dashers are designed to incorporate more air, resulting in a lighter, fluffier ice cream, while others are designed for a denser, richer texture. Reading reviews and comparing specifications will give you a better understanding of how different attachments perform. Finally, think about the ease of cleaning. Some attachments have more intricate parts than others, making them more difficult to disassemble and clean. Look for dishwasher-safe components to simplify the cleanup process. A high-quality ice cream churn can last for years, providing endless opportunities for creating delicious frozen treats.
Choosing the Right Ice Cream Maker Attachment: Factors to Consider
Selecting the perfect ice cream maker attachment requires careful consideration of several key factors. Compatibility with your stand mixer is paramount. Before making any purchase, verify that the attachment is specifically designed for your brand and model of stand mixer. Using an incompatible attachment can damage your mixer and void its warranty. The size and capacity of the freezing bowl are also crucial. Consider how much ice cream you typically make. If you’re only making single servings or small batches for yourself, a smaller bowl might suffice. However, if you’re making ice cream for a family or for entertaining guests, opt for a larger capacity bowl to avoid multiple batches. The material of the freezing bowl affects its performance and durability. Stainless steel bowls generally freeze faster and maintain lower temperatures, resulting in smoother ice cream. However, they can be heavier and more expensive than aluminum bowls. Aluminum bowls are lighter and more affordable but may not freeze as quickly or maintain consistent temperatures. The design of the dasher (or paddle) influences the texture of the ice cream. Dashers with wider blades or angled designs tend to incorporate more air, producing a lighter, fluffier ice cream. Dashers with narrower blades or a more streamlined design create a denser, richer texture. Consider your preferred ice cream texture when choosing an attachment.
The speed and efficiency of the attachment are also important factors. A faster attachment will freeze the ice cream base more quickly, reducing the time it takes to make a batch. A more efficient attachment will use less energy and produce more consistent results. Read reviews and compare specifications to assess the speed and efficiency of different attachments. Ease of use and cleaning should also be considered. Look for attachments that are easy to assemble, disassemble, and clean. Dishwasher-safe components can greatly simplify the cleanup process. Some attachments have more intricate parts or require special cleaning tools, which can add to the overall hassle. Finally, consider your budget. Ice cream maker attachments range in price from around $50 to over $200. Determine how much you’re willing to spend and prioritize the features that are most important to you. Remember, a higher price doesn’t always guarantee better performance. Do your research and read reviews to find the best value for your money. A good tip is to look for seasonal sales or discounts, especially during the summer months or around holidays. Investing in a quality ice cream maker attachment can transform your stand mixer into a versatile kitchen tool, allowing you to create delicious homemade ice cream and other frozen desserts whenever you desire. Finding the perfect kitchen aid ice cream maker accessory is a worthwhile endeavor for any ice cream lover.
Top Ice Cream Maker Attachments on the Market: A Comparison
The market offers a wide array of ice cream maker attachments, each with its own set of features, benefits, and drawbacks. To help you narrow down your options, here’s a comparison of some of the top-rated attachments, focusing on key factors such as compatibility, capacity, material, performance, and price. Note that prices may vary depending on the retailer and any ongoing promotions.
| Attachment | Compatibility | Capacity | Bowl Material | Key Features | Approx. Price |
|---|---|---|---|---|---|
| KitchenAid Ice Cream Maker Attachment | Most KitchenAid Stand Mixers | 2 quarts | Double-Walled Freezer Bowl | Easy to use, quick freezing, wide compatibility | $99 – $129 |
| Cuisinart Ice Cream Maker Attachment | Cuisinart Stand Mixers | 1.5 quarts | Double-Insulated Freezer Bowl | Durable construction, consistent freezing, compact design | $79 – $99 |
| Whynter ICM-200LS Ice Cream Maker Attachment | Universal Fit (with adapter) | 2.1 quarts | Stainless Steel | Built-in compressor, self-refrigerating, no pre-freezing required | $250 – $300 |
| Nostalgia ICMW400 4-Quart Electric Ice Cream Maker | Stand-Alone Unit | 4 quarts | Plastic Bucket with Aluminum Canister | Large capacity, easy to operate, nostalgic design | $49 – $69 |
The KitchenAid Ice Cream Maker Attachment is a popular choice due to its wide compatibility with KitchenAid stand mixers and its ease of use. It features a double-walled freezer bowl that freezes quickly and evenly, resulting in smooth and creamy ice cream. However, it requires pre-freezing the bowl for at least 16 hours before use. The Cuisinart Ice Cream Maker Attachment is another solid option, known for its durable construction and consistent freezing performance. It’s compatible with Cuisinart stand mixers and has a slightly smaller capacity than the KitchenAid attachment. The Whynter ICM-200LS is a unique attachment that features a built-in compressor, eliminating the need to pre-freeze the bowl. This makes it a convenient option for those who frequently make ice cream. However, it’s significantly more expensive than other attachments. The Nostalgia ICMW400 is not an attachment, but a self-contained electric ice cream maker. It offers a large capacity and a nostalgic design, making it a fun option for families. However, it takes up more counter space than an attachment and may not be as versatile. When making your decision, consider your specific needs and preferences. If you prioritize convenience and don’t mind spending more, the Whynter ICM-200LS is a great choice. If you’re looking for a more affordable and versatile option, the KitchenAid or Cuisinart attachments are excellent choices. Regardless of which attachment you choose, be sure to follow the manufacturer’s instructions carefully to ensure optimal performance and longevity. Investing in the right ice cream maker attachment will open up a world of culinary possibilities, allowing you to create endless variations of delicious homemade ice cream. From classic vanilla to exotic fruit flavors, the possibilities are limited only by your imagination. A good stand mixer ice cream maker attachment is the key to homemade frozen dessert success.
Tips and Tricks for Perfect Homemade Ice Cream
Making perfect homemade ice cream with an attachment requires more than just plugging it in and pouring in the ingredients. Here are some essential tips and tricks to ensure consistently delicious results. First and foremost, make sure your freezer bowl is thoroughly frozen. Follow the manufacturer’s instructions for pre-freezing, typically requiring 15 to 24 hours. An insufficiently frozen bowl will result in icy ice cream. A simple test is to shake the bowl – if you hear any liquid sloshing around, it’s not ready. Prepare your ice cream base ahead of time. Allowing the base to chill in the refrigerator for at least 2-3 hours, or even overnight, allows the flavors to meld and the mixture to cool down completely. A cold base freezes more quickly and evenly. When pouring the base into the frozen bowl, ensure the mixer is already running. This prevents the base from freezing to the sides of the bowl before the dasher can begin churning. Avoid overfilling the bowl. Most attachments have a maximum fill line to prevent overflow during churning. Overfilling can also strain the motor of your stand mixer. Churn the ice cream until it reaches a soft-serve consistency. This usually takes around 20-30 minutes, depending on the attachment and the recipe. The ice cream should be thick and creamy but still soft enough to scoop. Don’t over-churn the ice cream, as this can result in a grainy texture. Transfer the soft-serve ice cream to an airtight container and freeze for at least 2-3 hours to harden. This allows the ice cream to firm up and develop its final texture. If you’re adding mix-ins, such as chocolate chips, nuts, or fruit, do so during the last few minutes of churning. This prevents them from sinking to the bottom of the bowl. Experiment with different flavors and ingredients. Homemade ice cream is a blank canvas for your culinary creativity. Try adding extracts, spices, liqueurs, or even savory ingredients to create unique and exciting flavor combinations. Use high-quality ingredients. The quality of your ingredients will directly impact the taste and texture of your ice cream. Use fresh, ripe fruit, good-quality chocolate, and real vanilla extract for the best results. Clean your attachment thoroughly after each use. Disassemble all the parts and wash them with warm, soapy water. Dry them completely before storing. This prevents the buildup of bacteria and ensures the longevity of your attachment. Mastering these tips and tricks will elevate your homemade ice cream game to the next level. With a little practice and experimentation, you’ll be creating frozen masterpieces that rival anything you can buy in the store. Remember, the key to great ice cream is patience and attention to detail. Find yourself a superior rated home ice cream churn to guarantee success.
Troubleshooting Common Ice Cream Maker Attachment Issues
Even with the best equipment and intentions, you might encounter a few hiccups along the way. Here’s a troubleshooting guide to help you address common issues with ice cream maker attachments. If your ice cream isn’t freezing, the most likely culprit is an insufficiently frozen bowl. Ensure the bowl has been pre-frozen for the recommended amount of time, usually 15 to 24 hours. Check your freezer temperature to make sure it’s set correctly. If your freezer is too warm, the bowl won’t freeze properly. Also, avoid placing other items in the freezer that might obstruct airflow around the bowl. If your ice cream is icy or grainy, this could be due to several factors. One possibility is that the ice cream base wasn’t chilled sufficiently before churning. Ensure the base has been refrigerated for at least 2-3 hours, or even overnight. Another possibility is that the bowl wasn’t cold enough, causing the ice cream to freeze too slowly. If your ice cream is too hard, it might be because it was frozen for too long after churning. Soft-serve ice cream tends to harden considerably in the freezer. Try letting it thaw slightly before serving. You can also add a small amount of alcohol (such as vodka or rum) to the ice cream base. Alcohol lowers the freezing point and helps prevent the ice cream from becoming too hard. If your stand mixer is struggling to churn the ice cream, it could be due to several reasons. First, make sure the bowl isn’t overfilled. Overfilling can strain the motor of your mixer. Also, ensure the ice cream base is cold enough. A warmer base will be more difficult to freeze and churn. If the problem persists, try using a lower speed setting on your mixer. If your ice cream maker attachment is leaking, check the seal between the bowl and the dasher. Make sure the seal is properly seated and not damaged. If the seal is damaged, you may need to replace it. Also, avoid overfilling the bowl, as this can put pressure on the seal and cause it to leak. If your ice cream maker attachment is making strange noises, it could be due to a loose part or a damaged component. Inspect the attachment carefully for any signs of damage. If you find a loose part, try tightening it. If the noise persists, contact the manufacturer for assistance. If you are experiencing any of these issues, checking and confirming that you have the best value ice cream churn can help you focus your troubleshooting efforts. By addressing these common issues, you can ensure a smooth and successful ice cream-making experience. Remember, patience and attention to detail are key to achieving perfect results.
Frequently Asked Questions
How long do I need to pre-freeze the ice cream maker attachment bowl?
The pre-freezing time for an ice cream maker attachment bowl typically ranges from 15 to 24 hours. However, the exact duration depends on several factors, including the model of the attachment, the ambient temperature of your freezer, and the initial temperature of the bowl. Always refer to the manufacturer’s instructions for specific recommendations. To ensure optimal performance, it’s crucial to freeze the bowl until it’s completely solid. An insufficiently frozen bowl will result in icy or grainy ice cream. A simple test is to shake the bowl – if you hear any liquid sloshing around, it’s not ready. If you’re unsure, it’s always better to err on the side of caution and freeze the bowl for a longer period. In hot weather, consider freezing the bowl for the maximum recommended time. Once the bowl is frozen, try to use it as soon as possible. Leaving it in the freezer for an extended period won’t harm it, but it’s best to use it within a day or two for optimal results.
Can I use any ice cream recipe with my attachment?
While most standard ice cream recipes will work with an ice cream maker attachment, some may yield better results than others. Recipes that are specifically designed for machine churning tend to be more successful. These recipes often have a higher fat content, which helps to create a smoother, creamier texture. Avoid recipes that are overly liquid or contain a lot of water, as these can result in icy ice cream. Also, be mindful of the ingredients you use. Fresh, high-quality ingredients will always produce the best results. When adapting a recipe for your attachment, be sure to adjust the quantities to match the capacity of your freezing bowl. Overfilling the bowl can strain the motor of your stand mixer and cause the ice cream to overflow. Start with a small batch and gradually increase the quantity as you become more comfortable with the process. Don’t be afraid to experiment with different flavors and ingredients to create your own unique ice cream recipes. Remember, the key to great homemade ice cream is patience and attention to detail.
How do I clean my ice cream maker attachment?
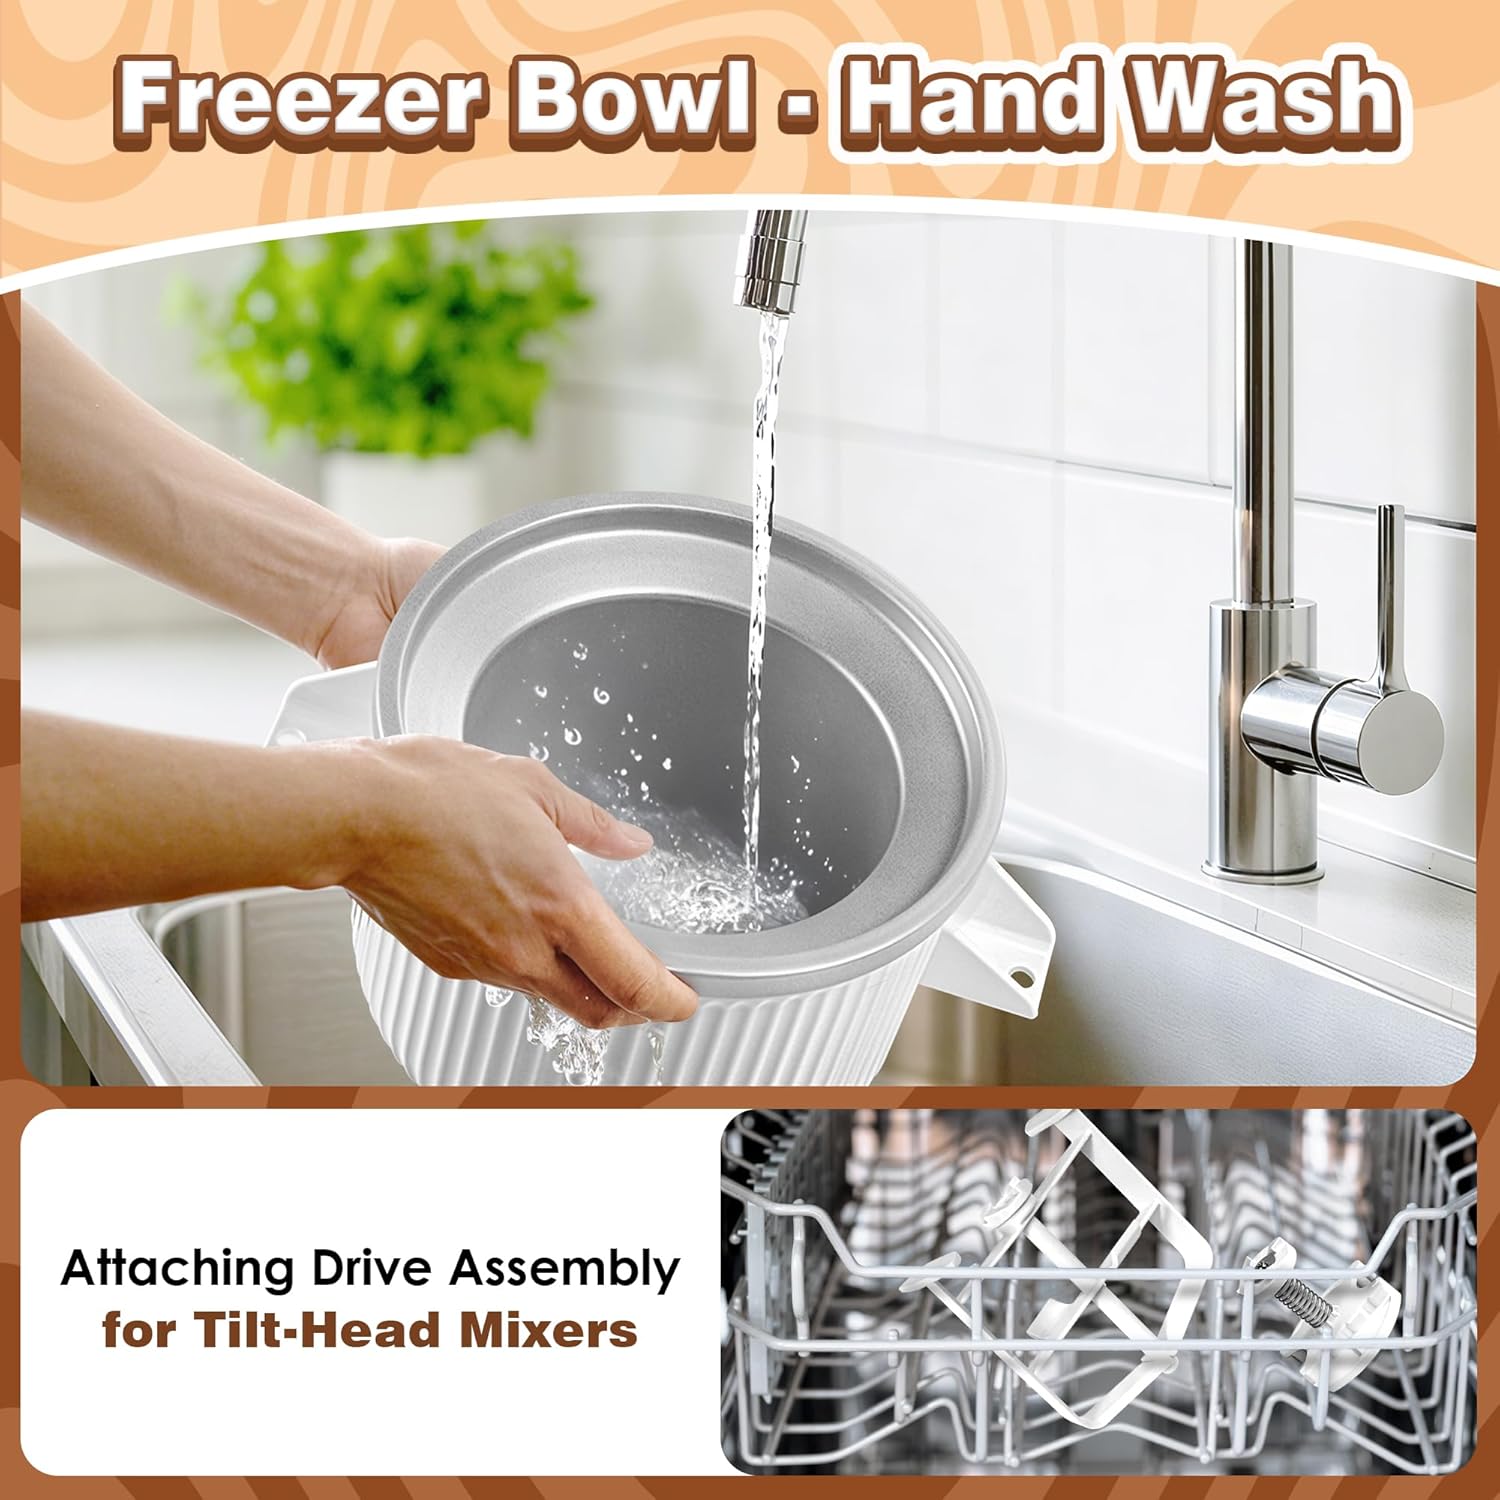
Cleaning your ice cream maker attachment properly after each use is essential for maintaining its performance and preventing the buildup of bacteria. Always unplug the attachment and allow it to come to room temperature before cleaning. Disassemble all the removable parts, such as the freezing bowl, dasher, and any other components. Wash the parts with warm, soapy water. Avoid using harsh chemicals or abrasive cleaners, as these can damage the surfaces. Rinse the parts thoroughly with clean water and dry them completely before storing. Some attachments have dishwasher-safe components. Check the manufacturer’s instructions to see which parts can be safely washed in the dishwasher. Pay special attention to cleaning the dasher, as this component comes into direct contact with the ice cream and can easily harbor bacteria. Use a soft brush or sponge to remove any remaining ice cream residue. If you notice any stubborn stains or odors, try soaking the parts in a solution of water and vinegar for a few hours. Be sure to dry all the parts completely before storing them, as moisture can lead to mold or mildew growth. Store the attachment in a clean, dry place. By following these cleaning instructions, you can ensure that your ice cream maker attachment remains in top condition for years to come.
What can I do if my ice cream is too icy?
Icy ice cream is a common problem, but it can be easily avoided with a few simple adjustments. One of the most common causes of icy ice cream is an insufficiently frozen bowl. Make sure your bowl has been pre-frozen for the recommended amount of time, usually 15 to 24 hours. Another factor is the ice cream base itself. A base with a high water content is more likely to produce icy ice cream. To reduce the water content, use full-fat milk and cream. You can also add ingredients like cornstarch or egg yolks, which help to bind the water molecules and create a smoother texture. Over-churning the ice cream can also contribute to an icy texture. Churn the ice cream until it reaches a soft-serve consistency, but avoid churning it for too long. Freezing and thawing the ice cream multiple times can also lead to ice crystal formation. To prevent this, transfer the soft-serve ice cream to an airtight container and freeze it immediately. When serving the ice cream, avoid leaving the container out at room temperature for too long. Small adjustments to the recipe and churning process can dramatically improve the texture of your homemade ice cream and prevent it from becoming icy.
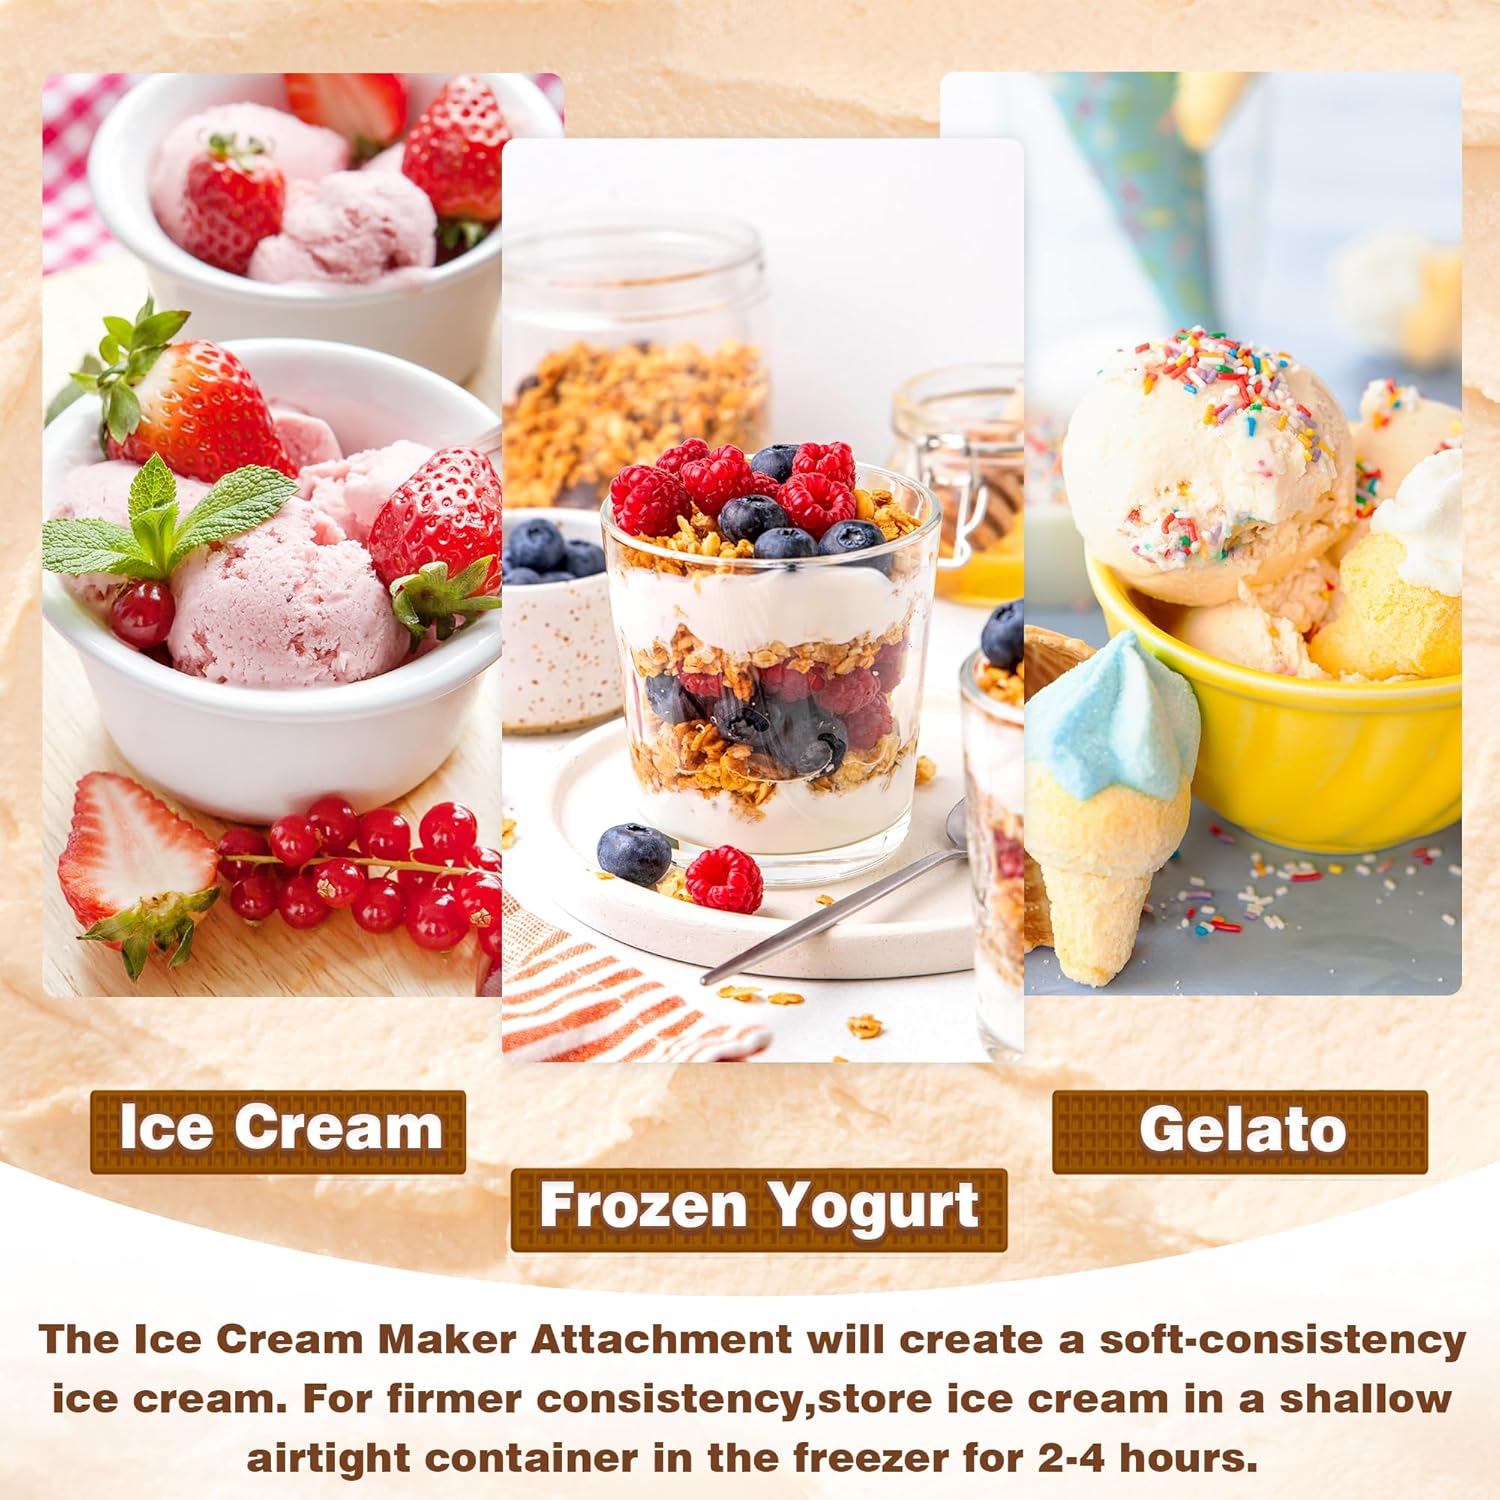
Can I use my ice cream maker attachment to make other frozen desserts?
Yes, absolutely! While ice cream maker attachments are primarily designed for making ice cream, they can also be used to create a variety of other frozen desserts, such as gelato, sorbet, and frozen yogurt. Gelato is similar to ice cream but has a lower fat content and a denser texture. To make gelato with your attachment, simply use a gelato recipe that calls for more milk than cream. Sorbet is a fruit-based frozen dessert that contains no dairy. To make sorbet, combine fruit puree, sugar, and water, and churn it in your attachment until it reaches a soft-serve consistency. Frozen yogurt is a healthier alternative to ice cream that is made with yogurt instead of cream. To make frozen yogurt, use a recipe that calls for Greek yogurt or another type of thick yogurt. The possibilities are endless! Experiment with different flavors and ingredients to create your own unique frozen dessert creations. Remember to adjust the churning time and freezing time as needed to achieve the desired texture.
What is the best way to store homemade ice cream?
Proper storage is crucial for maintaining the quality and texture of your homemade ice cream. The best way to store homemade ice cream is in an airtight container in the freezer. Avoid using containers with a lot of headspace, as this can lead to freezer burn. You can also place a piece of plastic wrap directly on the surface of the ice cream to prevent ice crystal formation. Make sure the container is tightly sealed to prevent air from entering. Label the container with the date it was made so you know how long it’s been in the freezer. Homemade ice cream is best consumed within a few weeks of making it. Avoid freezing and thawing the ice cream multiple times, as this can lead to ice crystal formation and a grainy texture. When serving the ice cream, scoop it out with a pre-warmed ice cream scoop. This will make it easier to scoop and prevent the ice cream from melting too quickly. After scooping, return the container to the freezer immediately to maintain its temperature. With proper storage, you can enjoy delicious homemade ice cream for weeks to come.
What are some unique flavor combinations I can try?
The possibilities for unique ice cream flavor combinations are truly endless! Get creative and experiment with different ingredients and flavor profiles. Some popular and exciting combinations include: Lavender Honey, a floral and sweet combination with a calming aroma; Salted Caramel Pretzel, a sweet and salty mix with a satisfying crunch; Brown Butter Pecan, a rich and nutty classic with a warm, comforting flavor; Strawberry Balsamic, a sweet and tangy combination with a sophisticated twist; Chocolate Avocado, a surprisingly creamy and decadent dessert with a subtle green hue; Earl Grey Tea, a fragrant and refreshing flavor inspired by the classic tea; Rosemary Olive Oil, a savory and herbaceous combination with a unique Mediterranean flair. Don’t be afraid to think outside the box and try unusual flavor pairings. Consider your personal preferences and the ingredients you have on hand. Start with a small batch to test out your creation and adjust the recipe as needed. You can also find inspiration from cookbooks, food blogs, and online resources. The most important thing is to have fun and let your culinary creativity shine!

Price: $49.99
(as of Sep 06, 2025 10:45:02 UTC – Details)


