
Best DIYASY Bats Wall Decor, 120 Pcs 3D Bat Idea Halloween Bats – Oemiu
Unleash Spooky Charm: A Deep Dive into DIYASY Bats Wall Decor
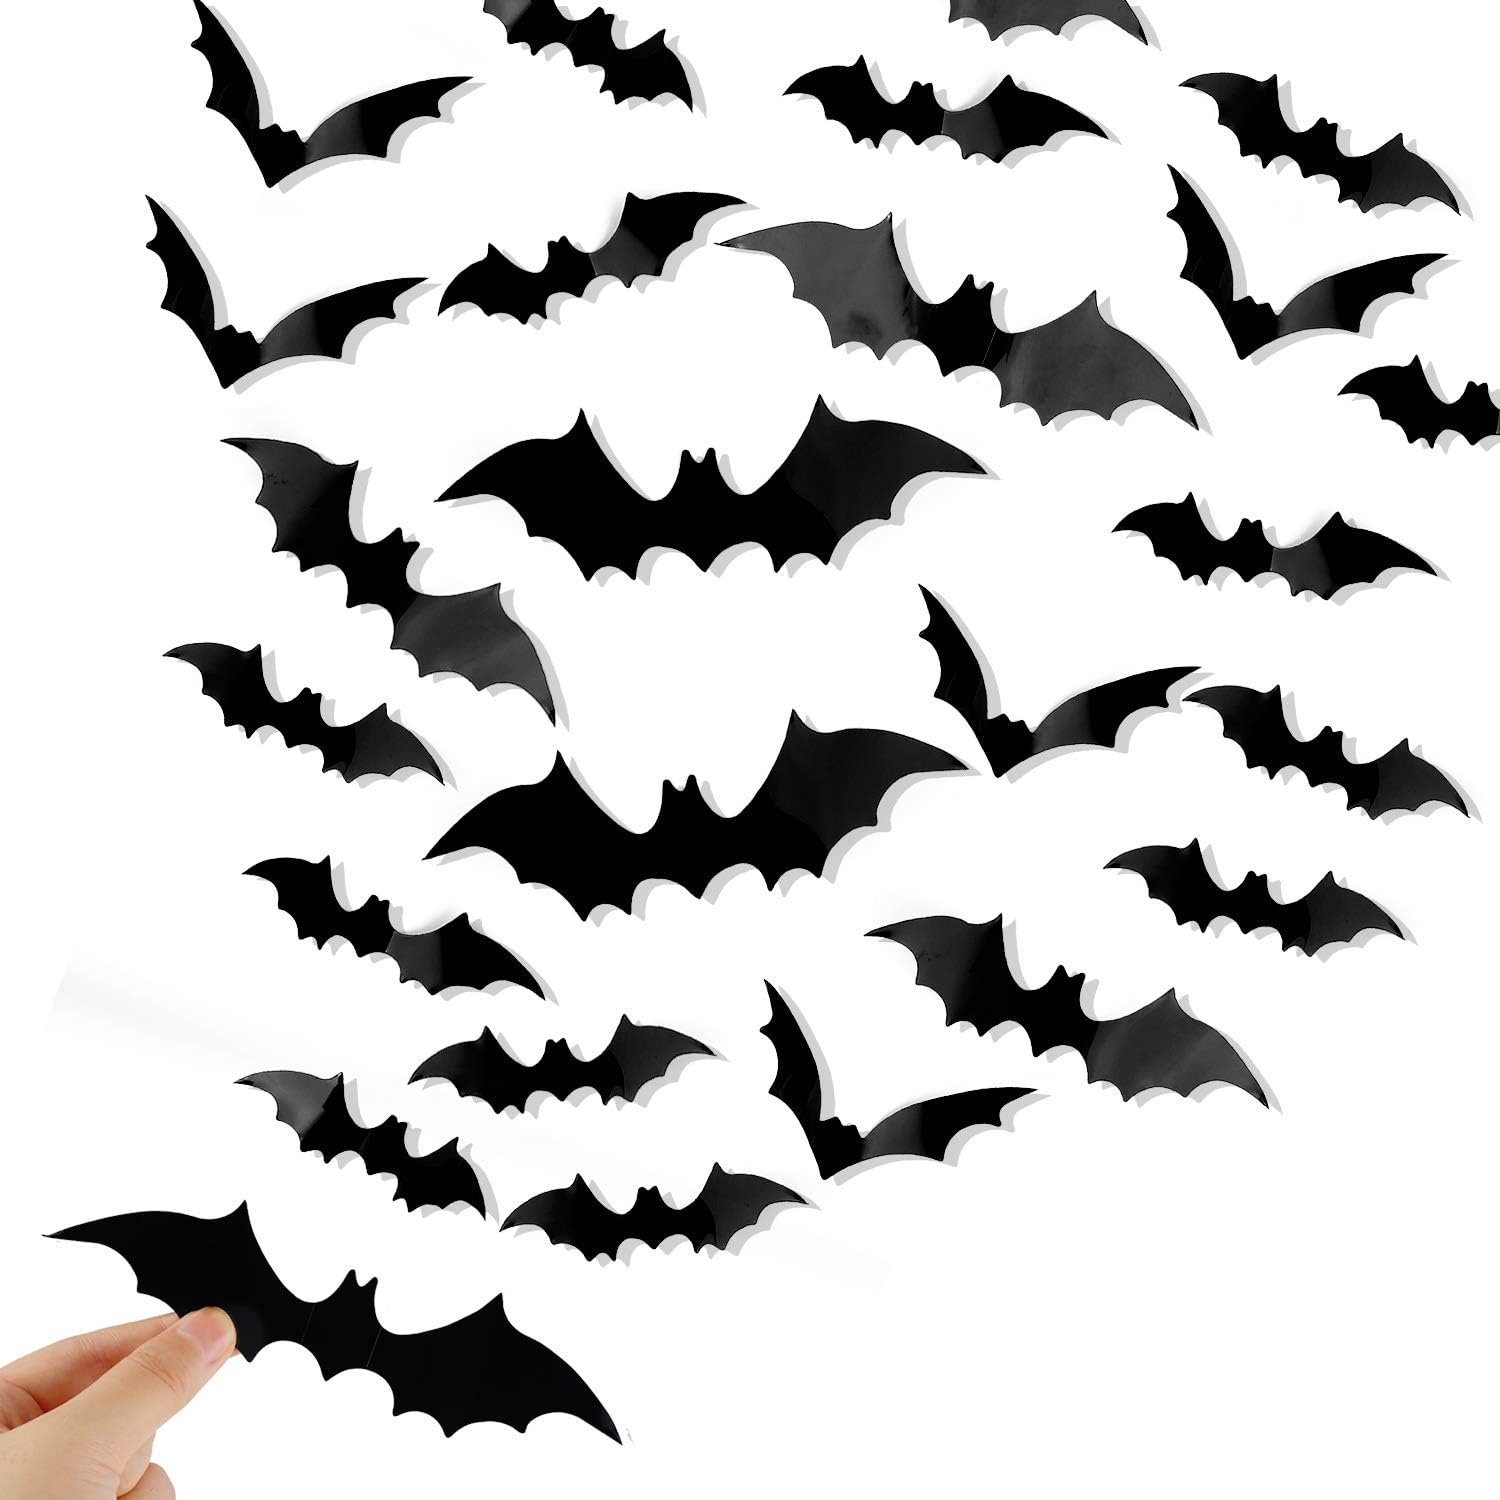
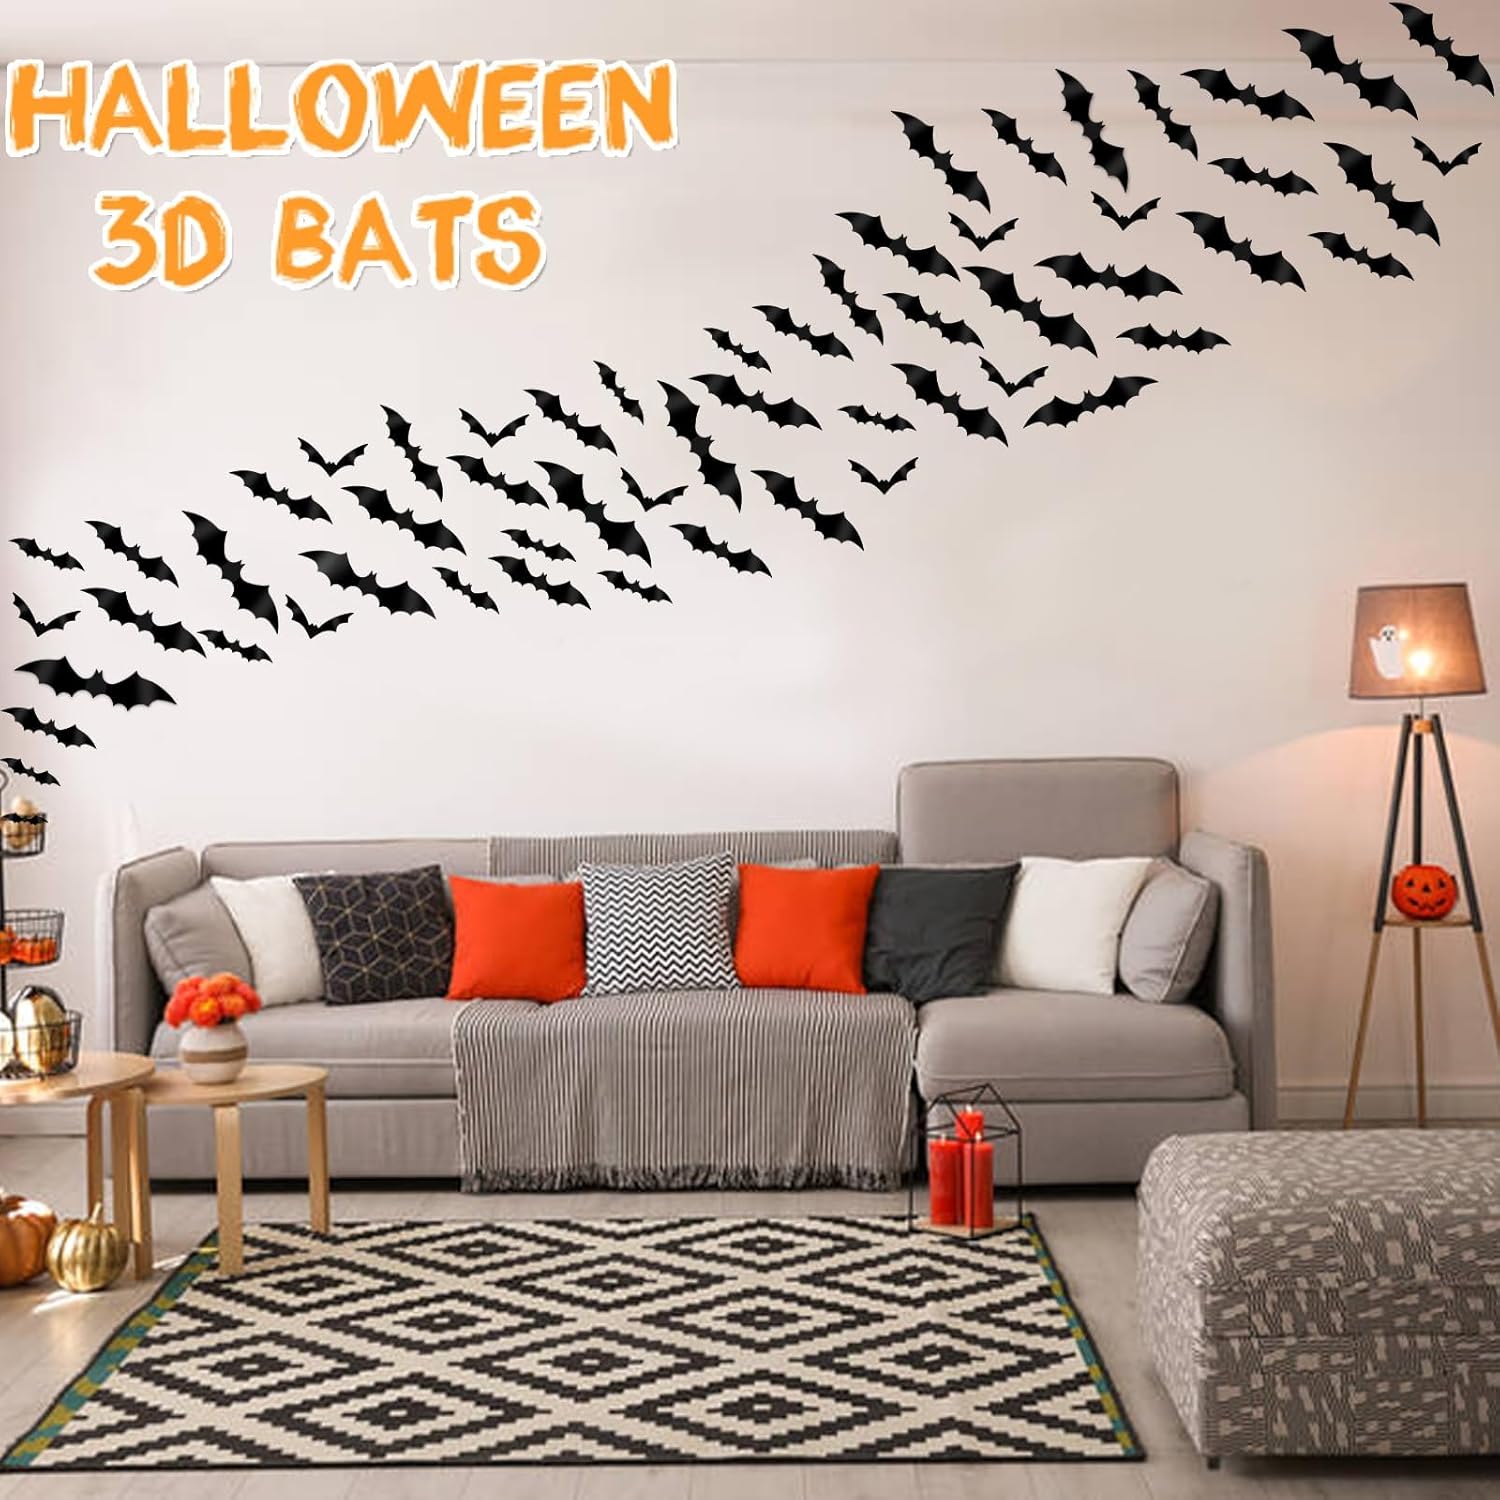
The allure of Halloween lies in its ability to transform the familiar into the fantastical, to momentarily suspend our everyday realities and embrace the eerie and the whimsical. Decorations are the cornerstone of this transformation, and among the myriad of options, bats have long held a prominent place in Halloween iconography. They symbolize the mysterious, the nocturnal, and the touch of the macabre that defines the holiday. But beyond mere symbolism, bats offer an incredible canvas for creativity. DIYASY Bats Wall Decor, specifically the 120 Pcs 3D Bat Idea Halloween Bats, provides precisely that canvas, empowering you to craft a truly unique and captivating Halloween ambiance. This isn’t just about sticking a few bat cutouts on a wall; it’s about orchestrating an entire visual experience, a swarm of shadowy creatures taking flight within your own home. The DIYASY set goes beyond simple flat designs, offering a textured, three-dimensional effect that breathes life into your decorations. This added dimension is crucial for creating a realistic and engaging display that truly captures the spirit of Halloween. From subtle accents to full-blown bat infestations (the fun kind, of course!), these decorations offer limitless possibilities for personalization. Let’s delve into the features, benefits, and creative potential of these DIYASY bat decorations, exploring how you can transform your space into a Halloween haven that’s both spooky and stylish.
Why Choose DIYASY Bats for Your Halloween Decor?
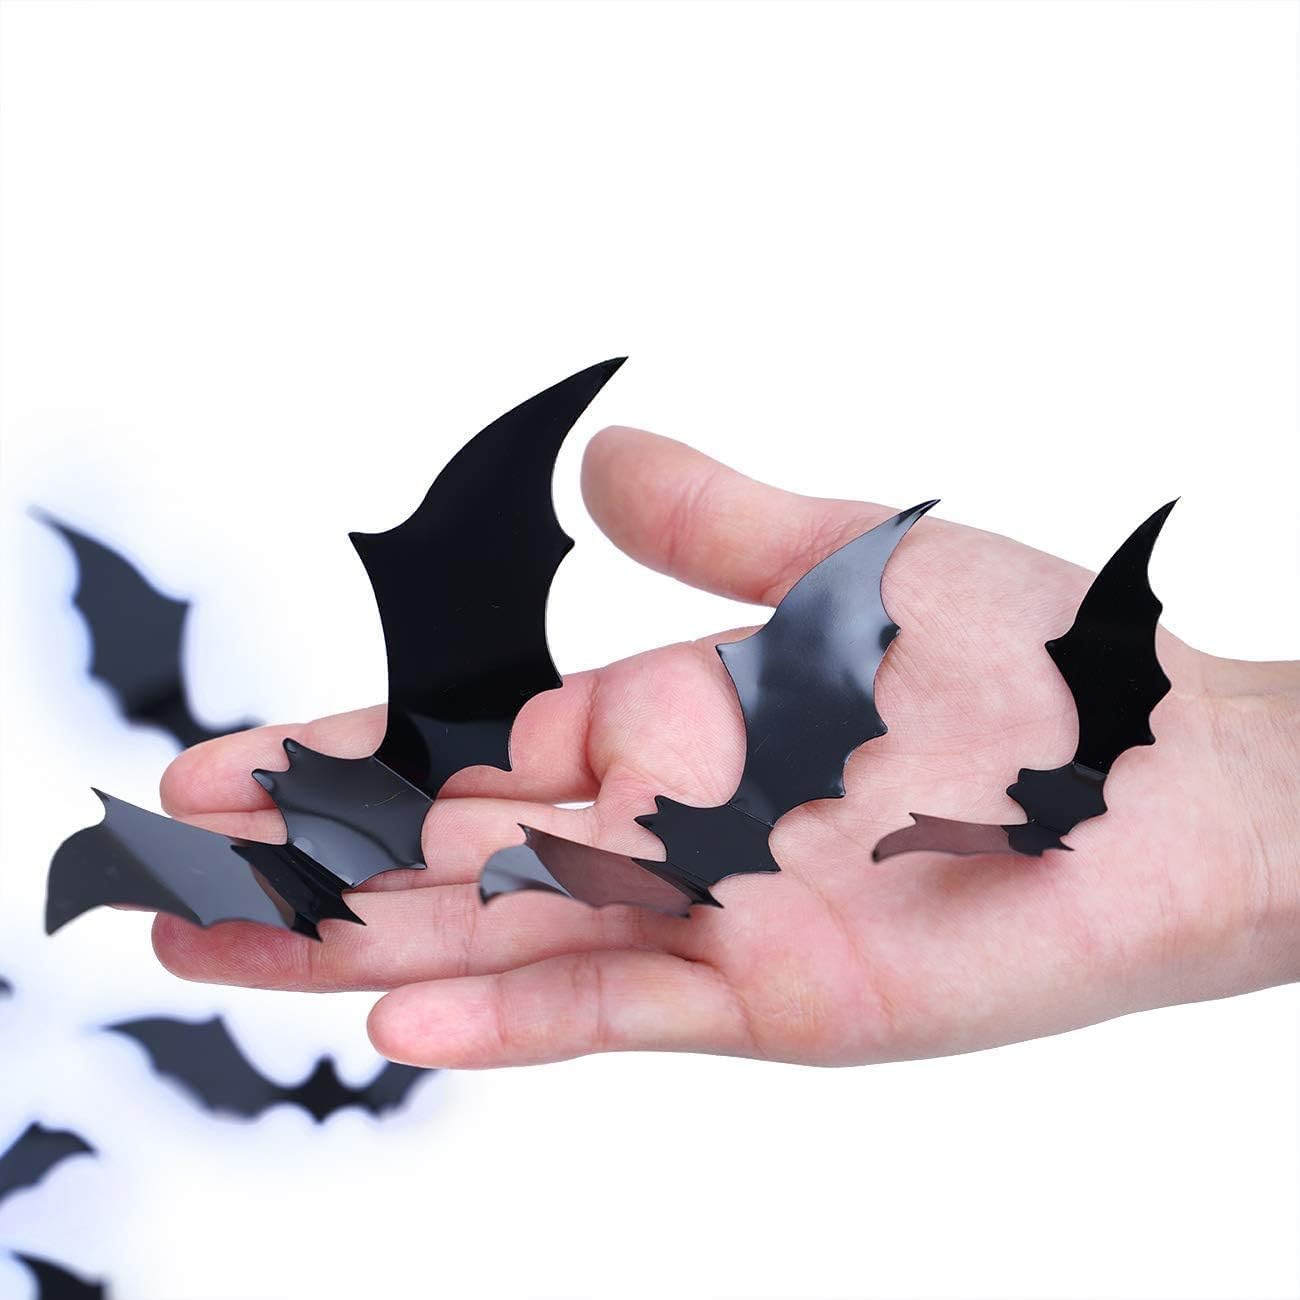
Selecting the right Halloween decorations involves balancing aesthetics, ease of use, and overall impact. The DIYASY 120 Pcs 3D Bat Idea Halloween Bats stand out from the crowd for several compelling reasons. First and foremost, the sheer quantity of bats provided in the set is a significant advantage. With 120 individual pieces, you have the freedom to create a truly immersive and expansive display. Compare this to smaller sets that might leave you feeling limited in your creative options. Imagine a grand staircase adorned with a cascading swarm of bats, or a living room wall transformed into a shadowy cave. The possibilities are truly endless. Secondly, the 3D design adds a layer of realism and visual interest that flat decorations simply can’t match. The subtle curves and contours of each bat catch the light and create depth, making them appear as though they are actually taking flight. This enhances the overall spooky atmosphere and elevates your decorations from simple cutouts to eye-catching focal points. Furthermore, the material used in the DIYASY bats is designed for easy application and removal. The adhesive dots provided are typically non-marking, meaning you can attach the bats to your walls without worrying about damaging the paint. This is particularly important for renters or anyone who wants to avoid the hassle of repairing walls after the Halloween season is over. Beyond these practical considerations, the DIYASY bats also offer a high degree of versatility. They can be used on a variety of surfaces, including walls, windows, doors, and even furniture. This allows you to extend your Halloween decorations beyond the traditional areas and create a truly immersive experience throughout your entire home. In conclusion, choosing DIYASY Halloween bats means choosing quantity, realism, ease of use, and versatility, all combined into one convenient and affordable package. Whether you’re a seasoned Halloween decorator or a novice looking to add a touch of spooky charm to your home, these bats are an excellent choice.
Unboxing and Initial Impressions
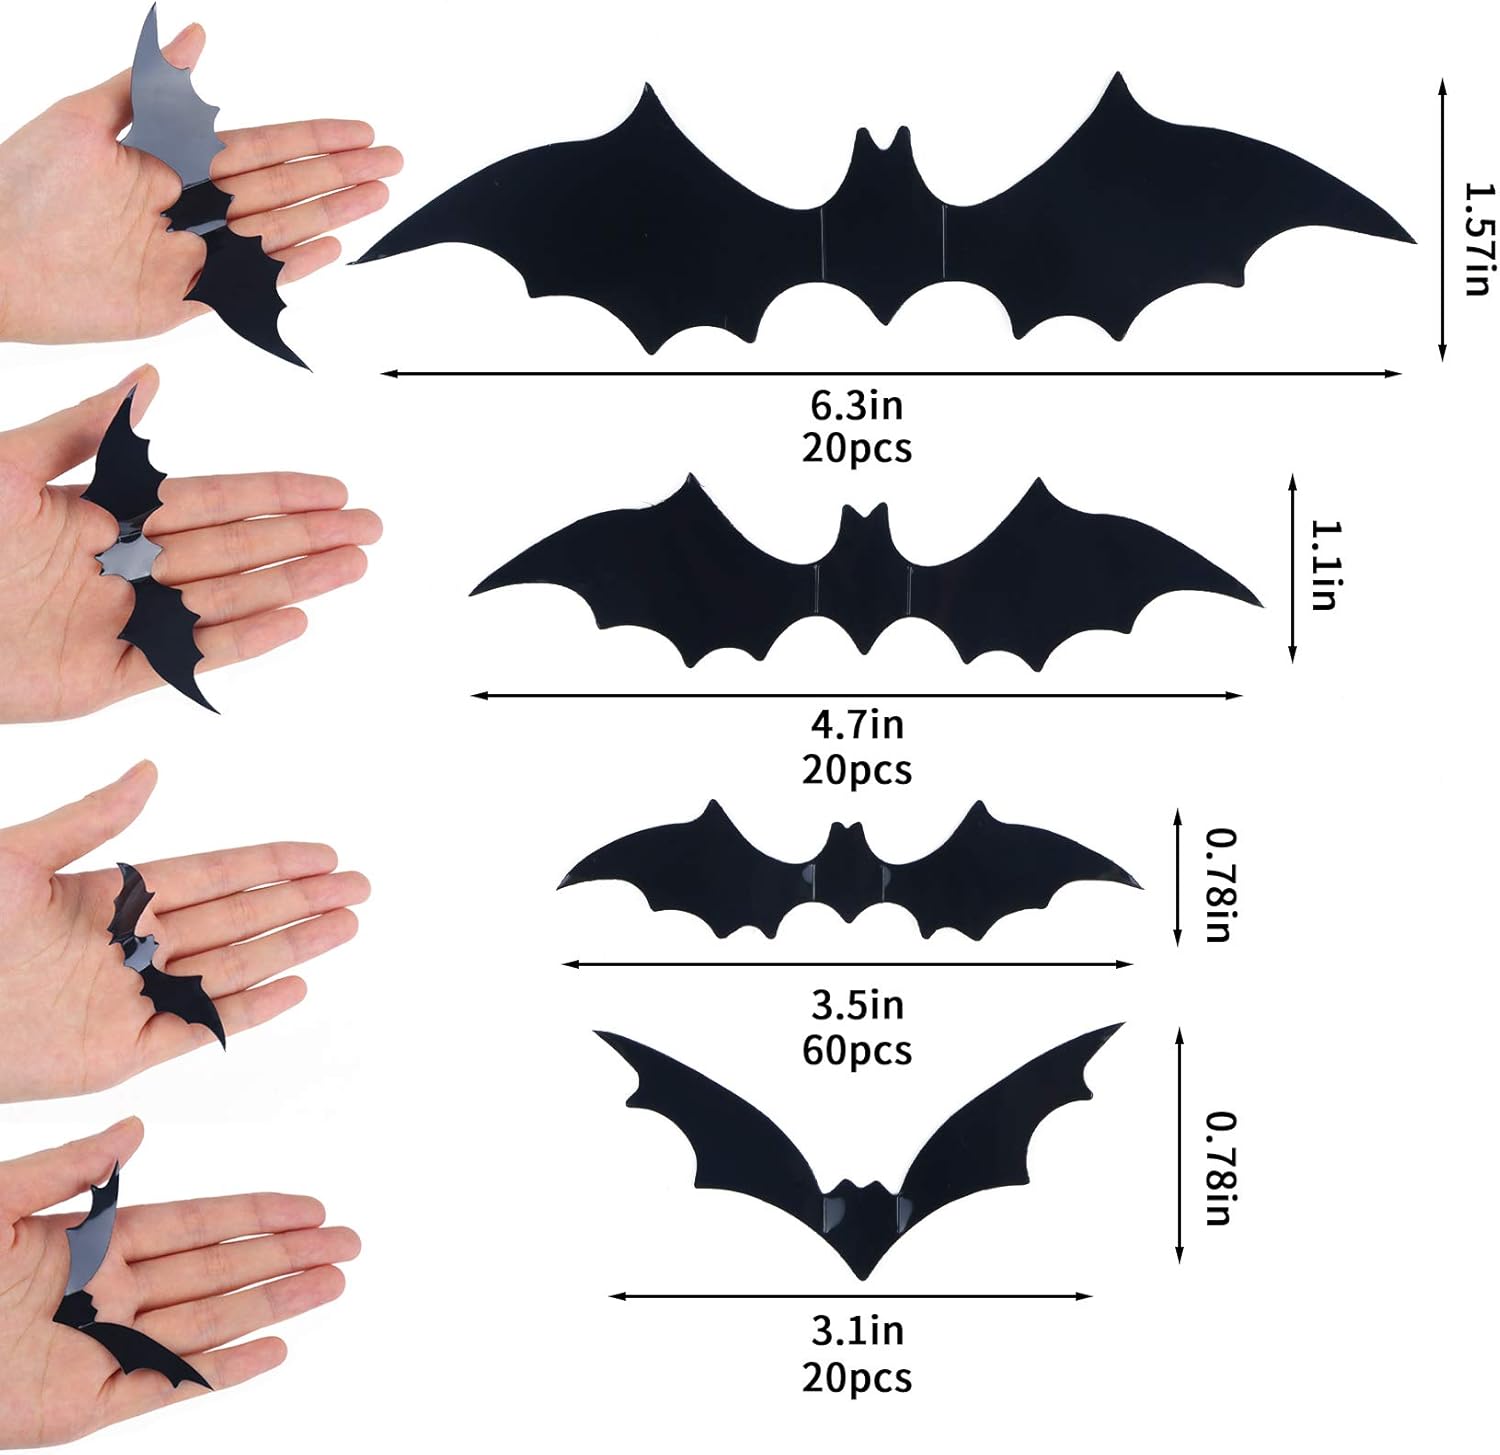
The anticipation of Halloween decorations is almost as exciting as the holiday itself. When you receive your DIYASY Bats Wall Decor set, the first thing you’ll notice is the sheer volume of bats. 120 pieces might seem like a lot (and it is!), but it’s this abundance that allows for truly creative and dynamic displays. Upon closer inspection, you’ll appreciate the varying sizes and shapes of the bats. This variety adds to the realism of the display, preventing it from looking too uniform or artificial. The set typically includes a mix of larger and smaller bats, as well as different wing positions, mimicking the natural movement of a bat swarm. The material itself is usually a durable, yet lightweight PVC or similar plastic. This ensures that the bats are sturdy enough to withstand handling and stay securely attached to your walls, while also being light enough to prevent any damage to the paint. The adhesive dots included in the set are generally small and discreet, designed to blend in with the background and not detract from the overall aesthetic. It’s always a good idea to test the adhesive on an inconspicuous area of your wall before applying the bats to ensure that it doesn’t leave any residue or damage the paint. One initial concern that some users might have is the flatness of the bats when they first arrive. Because they are packaged flat for shipping, they might not immediately exhibit their 3D form. However, this is easily remedied by gently bending the wings of each bat to create a more pronounced curve. This simple step is crucial for achieving the desired 3D effect and bringing the bats to life. Remember, patience is key during this process. It might take some time to bend the wings of all 120 bats, but the end result is well worth the effort. Taking the time to shape each bat individually will ensure a more realistic and visually appealing display.
| Feature | Description |
|---|---|
| Quantity | 120 pieces |
| Material | Durable PVC or similar plastic |
| Design | 3D with varying sizes and wing positions |
| Adhesive | Non-marking adhesive dots |
| Versatility | Suitable for walls, windows, doors, and furniture |
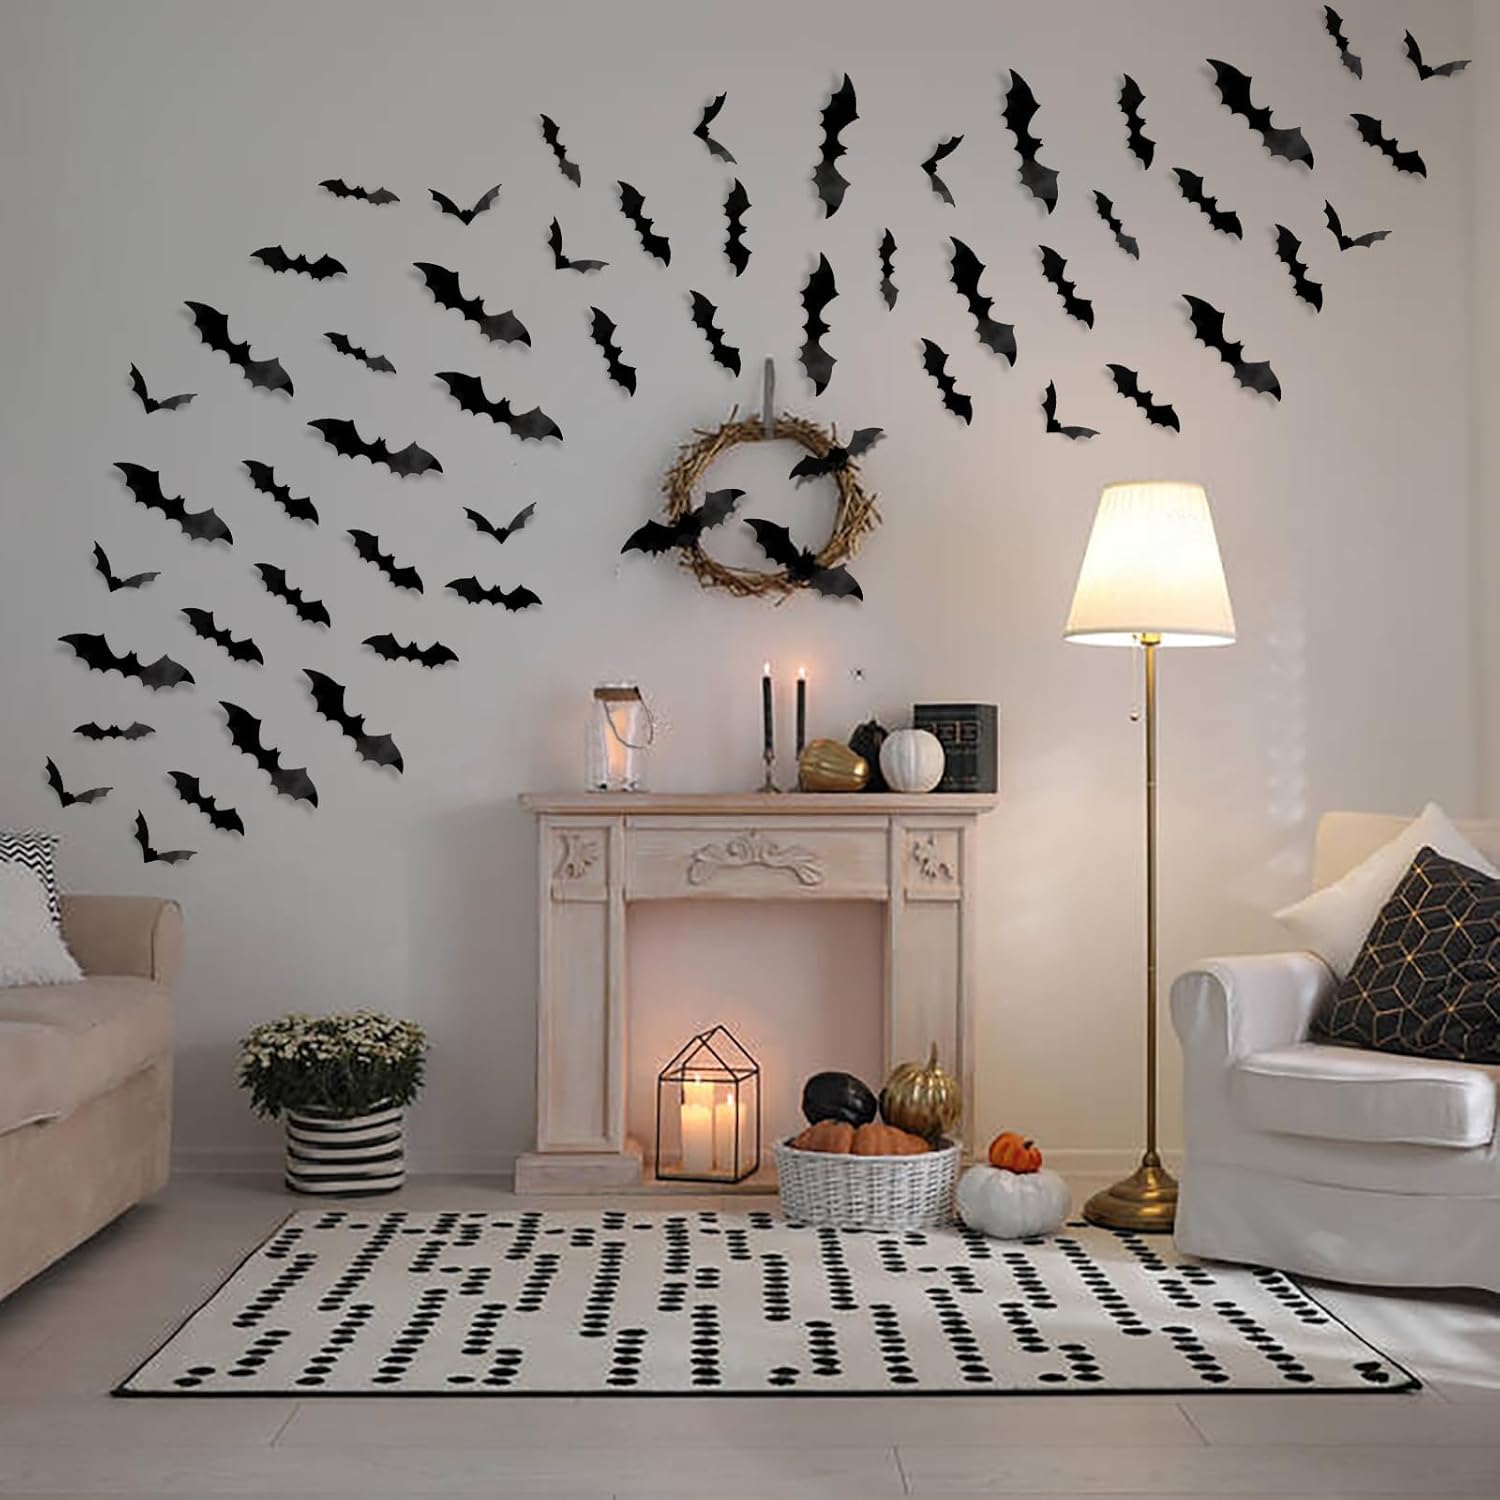
Creative Installation Ideas for Maximum Impact
The true beauty of the DIYASY Bats Wall Decor lies in its adaptability and the endless creative possibilities it unlocks. While simply sticking the bats randomly on a wall will certainly create a Halloween effect, taking the time to plan and execute a more thoughtful design can elevate your decorations to a whole new level. One popular approach is to create a “bat swarm” effect, where the bats appear to be emerging from a single point, such as a doorway or a corner of the room. To achieve this, start by placing the larger bats closer to the focal point and gradually decrease the size as the swarm spreads outwards. This creates a sense of depth and movement, making the display feel more dynamic and realistic. Another effective technique is to use the bats to frame existing architectural features, such as windows or mirrors. By strategically placing the bats around these elements, you can draw attention to them and create a visually striking Halloween accent. Consider arranging the bats in a symmetrical pattern for a more formal and elegant look, or opting for a more asymmetrical and organic arrangement for a more whimsical and playful feel. For those who are particularly ambitious, consider creating a full-blown bat-themed room. This might involve covering an entire wall with bats, or even extending the decorations onto the ceiling. This is a great way to create a truly immersive and unforgettable Halloween experience. The key is to experiment with different arrangements and see what works best for your space and personal style. Don’t be afraid to try new things and get creative! Remember to consider the lighting in your room when planning your bat decorations. Backlighting the bats can create dramatic shadows and enhance the spooky atmosphere. You can also use colored lights to add a pop of visual interest and create a more festive mood. Ultimately, the best way to install DIYASY Halloween bats is to have fun with it and let your creativity shine.
Step-by-Step Guide to Flawless Application
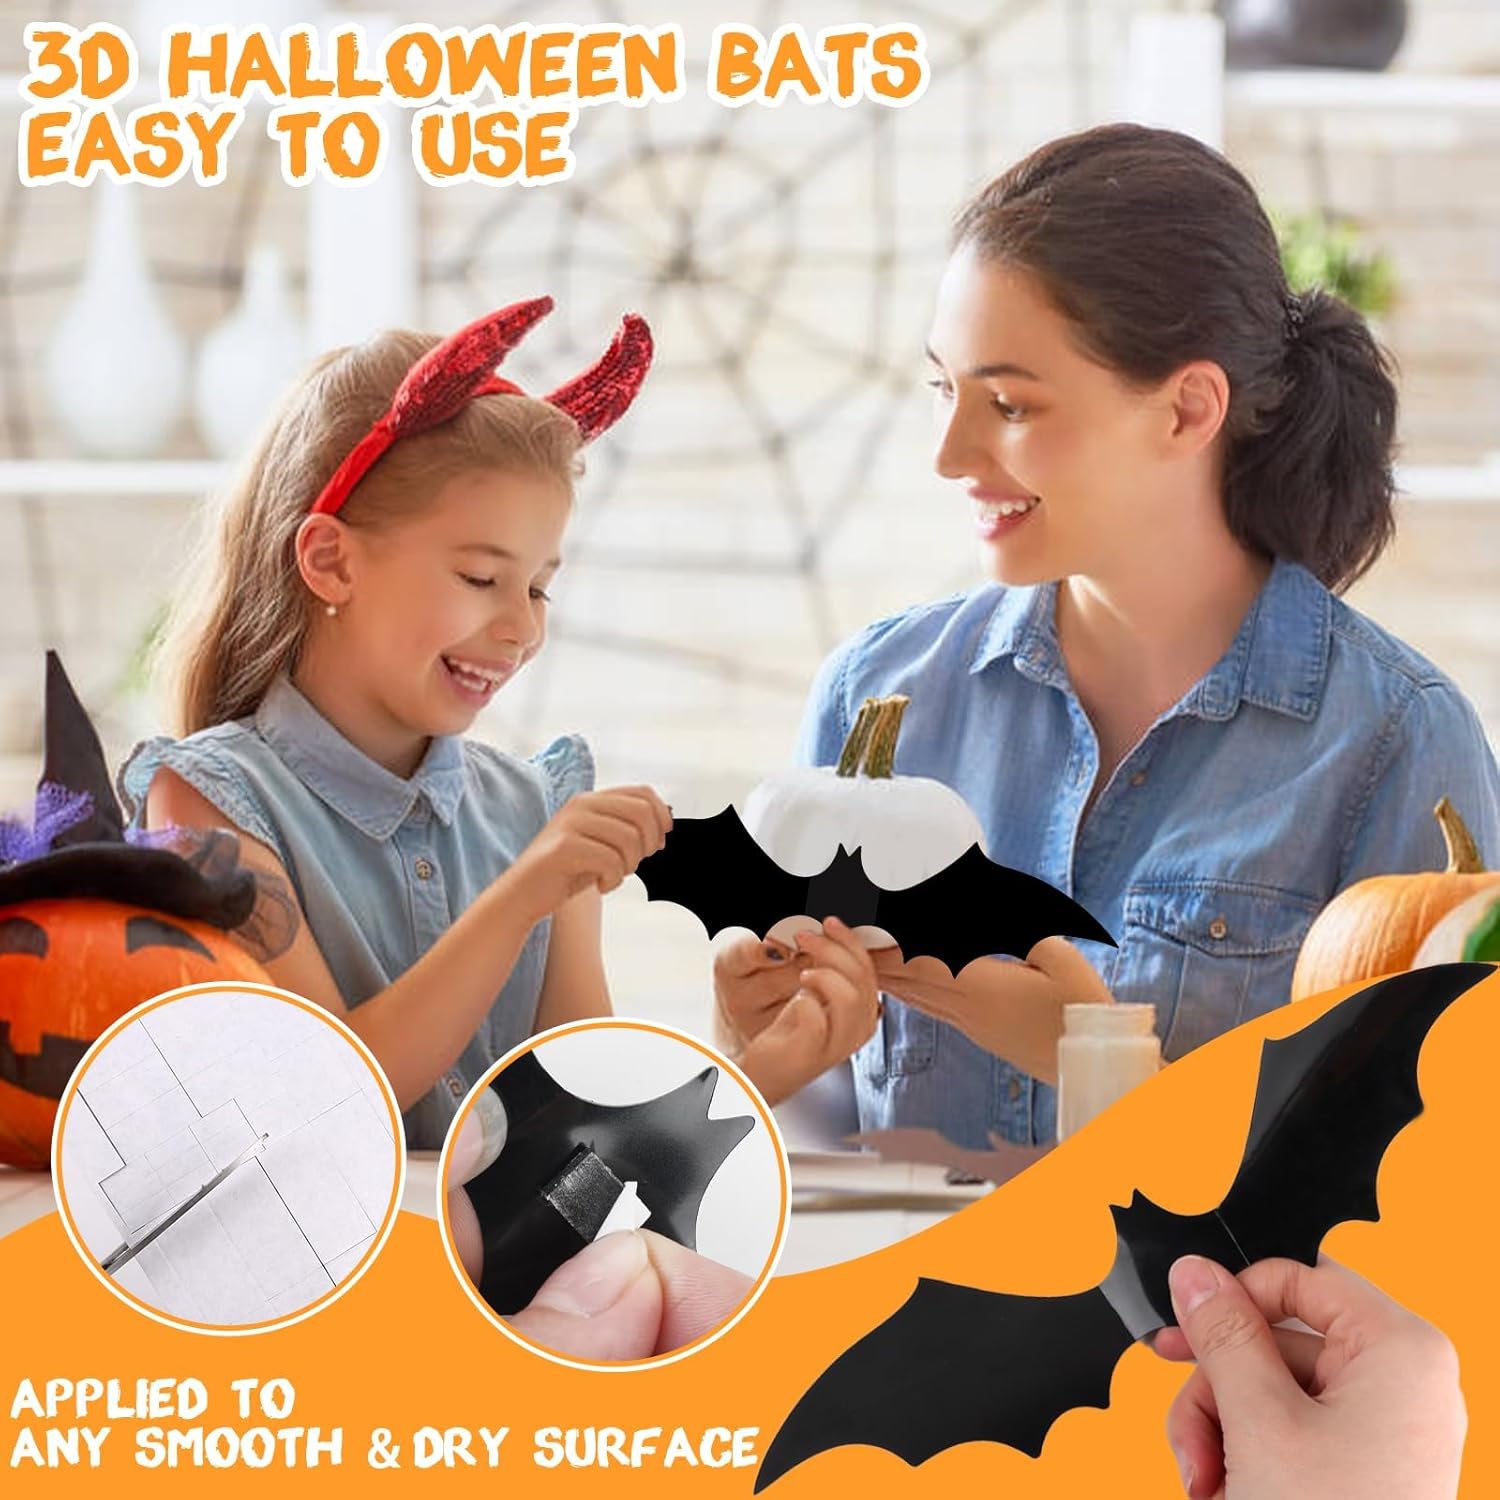
Applying the DIYASY 3D Bat Idea Halloween Bats is a straightforward process, but following a few key steps can ensure a flawless and long-lasting display. Before you even open the package, take a moment to plan your design. Sketch out your desired arrangement on paper, or even use painter’s tape to mark out the boundaries of your bat swarm on the wall. This will help you visualize the final result and avoid any last-minute adjustments. Next, clean the surface where you plan to apply the bats. Use a damp cloth to remove any dust or dirt, and then dry the surface thoroughly. This will ensure that the adhesive dots adhere properly and prevent the bats from falling off later. Once the surface is clean and dry, gently bend the wings of each bat to create a more pronounced 3D effect. This is a crucial step for achieving the desired realism and visual impact. Now, carefully peel off one adhesive dot from the sheet and attach it to the back of the bat. Position the adhesive dot in the center of the bat’s body, ensuring that it is evenly distributed. Press firmly on the adhesive dot to secure it in place. Finally, position the bat on the wall according to your planned design and press firmly for several seconds. This will ensure that the adhesive dot adheres properly to the wall. Repeat these steps for all 120 bats, taking your time and paying attention to detail. If you make a mistake and need to reposition a bat, gently peel it off the wall and reapply the adhesive dot. Avoid pulling too hard, as this could damage the bat or the wall. After you’ve finished applying all the bats, take a step back and admire your handiwork. Make any necessary adjustments to the arrangement, and then enjoy your spooky and stylish Halloween decorations. To remove the bats after Halloween, gently peel them off the wall. If any adhesive residue remains, you can usually remove it with a damp cloth or a mild adhesive remover. Store the bats in a safe place for future use, and get ready to unleash their spooky charm again next year! Don’t forget to explore different Halloween Bats arrangements each year to keep your decorations fresh and exciting.
Maximizing the Spooky Ambiance: Beyond the Bats
While the DIYASY Bats Wall Decor serves as a fantastic focal point for your Halloween decorations, it’s important to remember that they are just one piece of the puzzle. To truly maximize the spooky ambiance, you need to consider the overall context and incorporate other complementary elements. Lighting plays a crucial role in setting the mood. Dim the lights and use candles, string lights, or colored bulbs to create a more eerie and atmospheric setting. Flickering candles can cast dancing shadows that enhance the sense of mystery, while colored bulbs can add a touch of whimsy and festivity. Consider using a combination of different lighting techniques to create a layered and dynamic effect. Sound effects are another powerful tool for creating a spooky ambiance. Play recordings of howling winds, creaking doors, or ghostly whispers to heighten the sense of dread and unease. You can even create your own custom sound effects using a sound editing program or a simple microphone. Combine the sound effects with visual elements to create a truly immersive and unforgettable experience. Don’t underestimate the power of props. Scatter spider webs, skulls, pumpkins, and other Halloween-themed items throughout your space to add texture and visual interest. You can find a wide variety of Halloween props at most party supply stores, or you can even make your own DIY props using inexpensive materials. The key is to choose props that complement the overall theme of your decorations and create a cohesive and visually appealing display. Consider incorporating natural elements into your Halloween decorations. Gather fallen leaves, branches, and pine cones from your yard and use them to create a rustic and autumnal feel. You can also use live plants, such as ferns or ivy, to add a touch of greenery and create a more organic and natural ambiance. Combining natural elements with spooky decorations can create a unique and visually striking contrast. Ultimately, the key to maximizing the spooky ambiance is to create a multi-sensory experience that engages all of the senses. Combine visual elements, sound effects, lighting, and even scents to create a truly immersive and unforgettable Halloween experience for yourself and your guests. The more layers you add, the richer and more compelling the atmosphere will be.
Maintaining and Storing Your Halloween Bats
Proper care and storage are essential for ensuring that your DIYASY Bats Wall Decor lasts for many Halloween seasons to come. After Halloween is over, the first step is to carefully remove the bats from the wall. Gently peel them off, avoiding any sudden or forceful movements that could damage the bats or the wall. If any adhesive residue remains on the wall, you can usually remove it with a damp cloth or a mild adhesive remover. Be sure to test the adhesive remover on an inconspicuous area of the wall first to ensure that it doesn’t damage the paint. Once you’ve removed all the bats, inspect them for any damage. If any of the bats are torn or broken, you can try to repair them with glue or tape. However, if the damage is too severe, it might be necessary to replace the damaged bats. Clean the bats with a damp cloth to remove any dust or dirt. Avoid using harsh chemicals or abrasive cleaners, as these could damage the finish of the bats. Allow the bats to dry completely before storing them. Store the bats in a cool, dry place, away from direct sunlight. Exposure to sunlight can cause the bats to fade or become brittle over time. Avoid storing the bats in a place where they could be crushed or damaged. Consider storing the bats in a plastic container or a sturdy cardboard box. This will protect them from dust, dirt, and physical damage. If you have a lot of bats, you might want to store them in separate containers to prevent them from getting tangled or damaged. When storing the bats, try to keep them as flat as possible. This will prevent them from becoming bent or deformed over time. You can also place a piece of cardboard or foam between each layer of bats to provide extra protection. Finally, label the container with the contents and the date of storage. This will make it easier to find the bats when you need them next year. By following these simple steps, you can ensure that your DIYASY bats wall stickers will last for many Halloween seasons to come, providing you with years of spooky enjoyment.
| Aspect | Recommendation |
|---|---|
| Removal | Gently peel off; avoid forceful movements. |
| Residue Removal | Use damp cloth or mild adhesive remover. Test remover first. |
| Cleaning | Clean with damp cloth; avoid harsh chemicals. |
| Drying | Allow bats to dry completely before storing. |
| Storage Location | Cool, dry place away from direct sunlight. |
| Container | Plastic container or sturdy cardboard box. |
| Arrangement | Store flat, with cardboard or foam between layers. |
| Labeling | Label container with contents and storage date. |
Frequently Asked Questions (FAQ)
Are the adhesive dots safe for all wall types?
The adhesive dots included with the DIYASY Bats Wall Decor are generally considered safe for most wall types, including painted walls, wallpaper, and smooth surfaces. However, it’s always a good idea to test the adhesive on an inconspicuous area of your wall before applying the bats to the entire surface. This will help you determine if the adhesive is compatible with your wall type and prevent any potential damage. If you’re concerned about damaging your walls, you can also consider using alternative adhesive methods, such as painter’s tape or removable wall putty. These options are generally less likely to cause damage to delicate surfaces. It’s also important to note that the effectiveness of the adhesive can vary depending on the surface texture and the amount of weight being supported. If you’re applying the bats to a textured wall or a surface that is frequently exposed to moisture, you might need to use a stronger adhesive to ensure that they stay in place. Always follow the manufacturer’s instructions for any adhesive products you use, and be sure to remove the bats carefully when you’re finished with them to avoid damaging the walls.
How easy is it to remove the bats after Halloween?
Removing the bats after Halloween is typically a straightforward process, but it’s important to do it carefully to avoid damaging your walls. The adhesive dots are designed to be removable, but they can sometimes leave behind a small amount of residue. To remove the bats, gently peel them off the wall, starting at one corner. Avoid pulling too hard, as this could tear the bat or damage the paint. If the adhesive dots are particularly stubborn, you can try using a hairdryer to warm them up. This will soften the adhesive and make it easier to remove. If any adhesive residue remains on the wall, you can usually remove it with a damp cloth or a mild adhesive remover. Be sure to test the adhesive remover on an inconspicuous area of the wall first to ensure that it doesn’t damage the paint. For wallpaper, it’s best to use a very gentle approach to avoid tearing the paper. In some cases, using a steamer can help loosen the adhesive without damaging the wallpaper. As with any removal process, patience is key. Taking your time and being gentle will help ensure that you remove the bats without causing any damage to your walls.
What if some of the bats fall off?
If some of the bats fall off the wall, it’s usually due to one of a few common reasons. The most likely cause is that the surface wasn’t properly cleaned before applying the adhesive dots. Dust, dirt, or grease can prevent the adhesive from bonding properly to the wall. Another possibility is that the adhesive dots are not strong enough to support the weight of the bats. This is more likely to occur on textured walls or surfaces that are frequently exposed to moisture. To fix this, try cleaning the wall with a damp cloth and allowing it to dry completely before reapplying the bats. You can also try using a stronger adhesive dot or a small piece of removable wall putty to secure the bats in place. If the bats continue to fall off, it might be necessary to reposition them to a different location on the wall. Choose a location that is smoother and less textured, and be sure to clean the surface thoroughly before applying the bats. In some cases, the bats might simply be too heavy for the adhesive dots to support. If this is the case, you can try using a smaller number of bats or opting for lighter-weight decorations.
Are the bats reusable?
Yes, the DIYASY Bats Wall Decor is generally reusable, as long as you take good care of them during removal and storage. The key is to remove the bats carefully, avoiding any tearing or damage to the material. If the adhesive dots are still sticky, you can reuse them. However, if they have lost their stickiness, you’ll need to replace them with new adhesive dots. You can purchase replacement adhesive dots at most craft stores or online retailers. When storing the bats, be sure to keep them in a cool, dry place, away from direct sunlight. Exposure to sunlight can cause the bats to fade or become brittle over time. Avoid storing the bats in a place where they could be crushed or damaged. Consider storing the bats in a plastic container or a sturdy cardboard box to protect them from dust, dirt, and physical damage. By following these simple steps, you can ensure that your DIYASY Bats Wall Decor will last for many Halloween seasons to come.
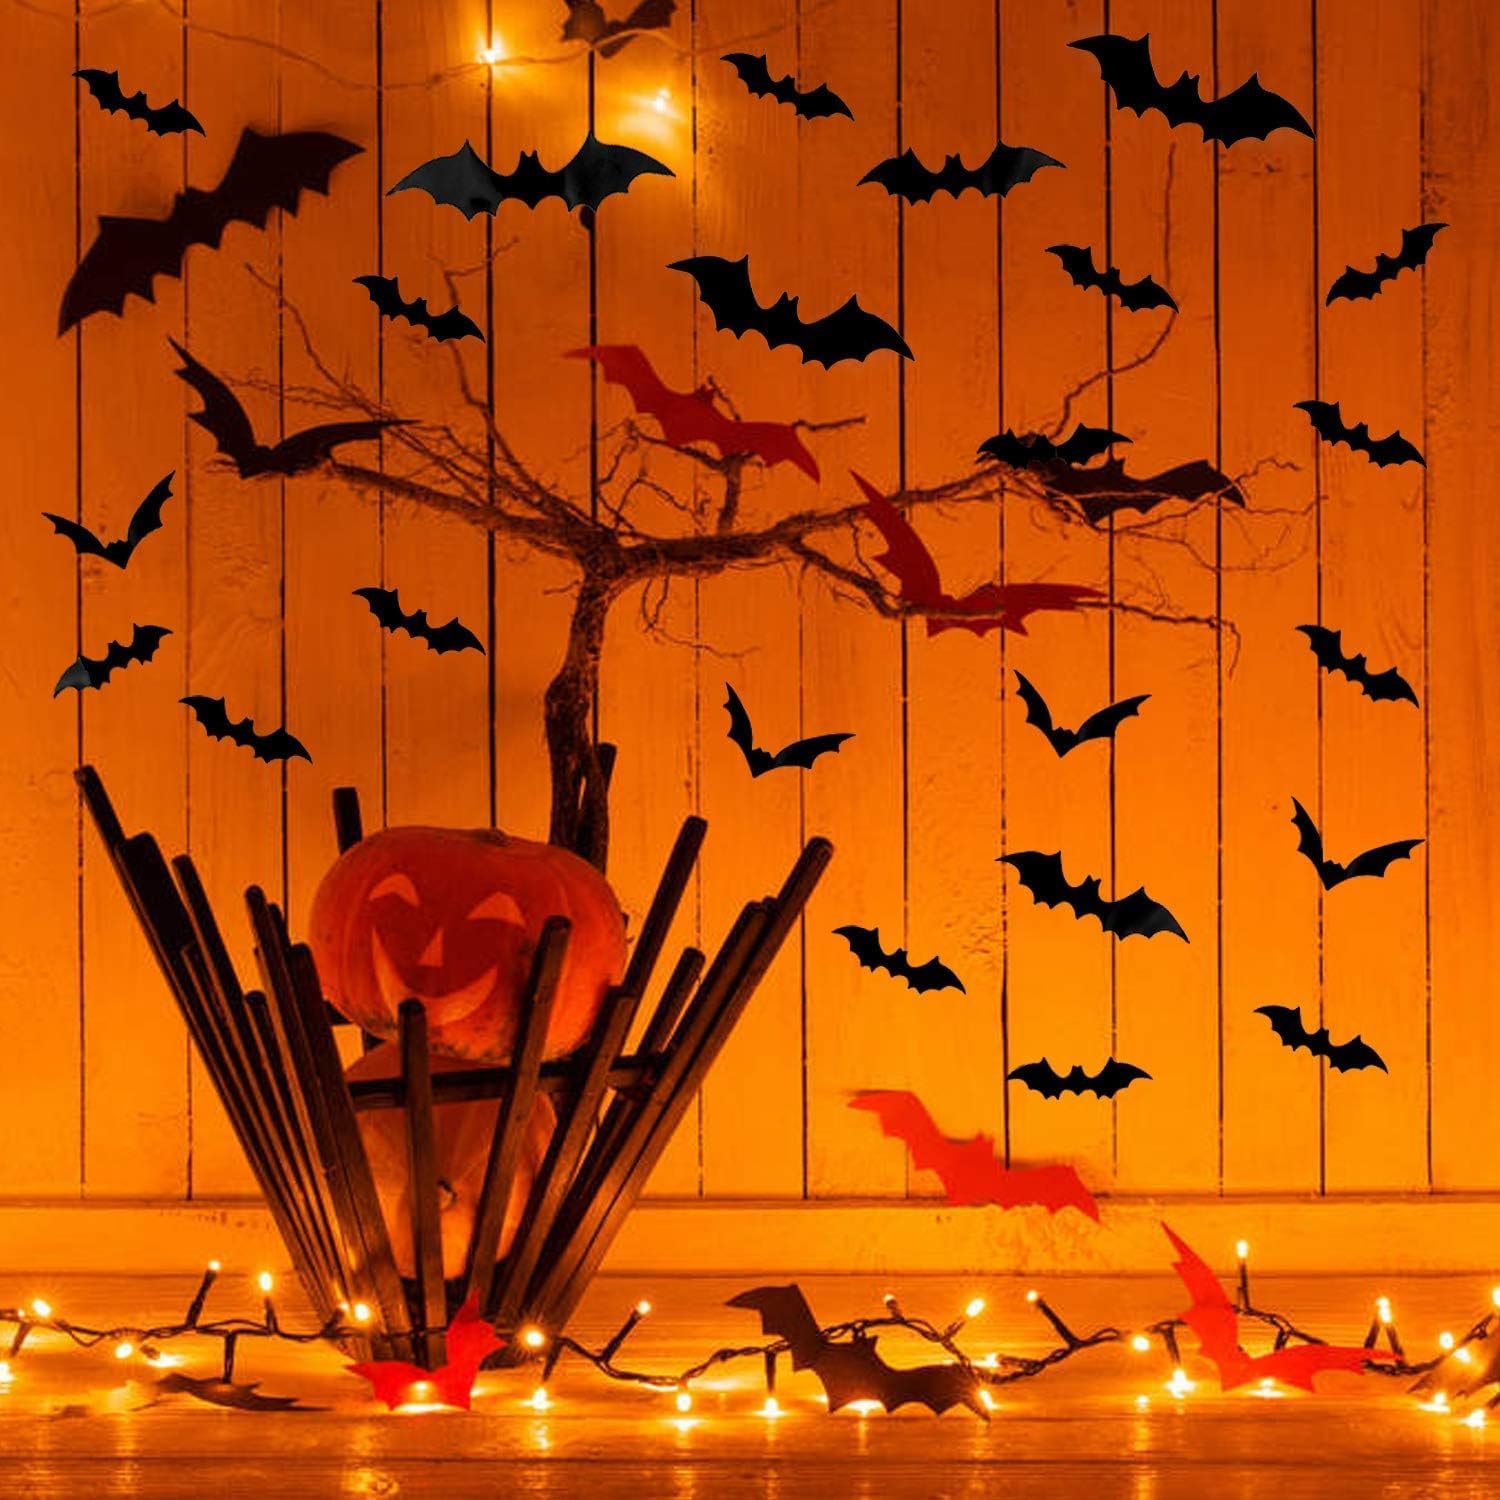
Can I use these bats outdoors?
While the DIYASY Bats Wall Decor is primarily designed for indoor use, you can potentially use them outdoors, but with some important considerations. The biggest challenge is the weather. Rain, wind, and extreme temperatures can damage the bats and cause them to fall off the wall. If you choose to use the bats outdoors, it’s best to do so in a sheltered area, such as a porch or a covered patio. You’ll also need to use a stronger adhesive to ensure that the bats stay in place in windy conditions. Outdoor-rated double-sided tape or construction adhesive are good options. However, be aware that these adhesives can be more difficult to remove and might damage the surface of your house. It’s also important to choose a location that is not exposed to direct sunlight, as this can cause the bats to fade or become brittle over time. Finally, keep in mind that the bats are not waterproof, so they will eventually be damaged if they are exposed to rain or moisture. If you live in an area with frequent rain, it’s best to avoid using the bats outdoors altogether.
What are the different sizes of bats included?
The DIYASY Bats Wall Decor set typically includes a variety of bat sizes to create a more realistic and dynamic display. The exact sizes can vary depending on the specific set you purchase, but generally, you can expect to find a mix of small, medium, and large bats. Small bats might be around 3-4 inches in width, medium bats around 5-6 inches, and large bats around 7-8 inches. Having different sizes allows you to create a more natural-looking bat swarm, with the larger bats closer to the focal point and the smaller bats further away. This creates a sense of depth and perspective. Be sure to check the product description or packaging to confirm the exact sizes of the bats included in your set.
Are these bats suitable for kids’ rooms?
Yes, the DIYASY Bats Wall Decor is generally suitable for kids’ rooms, as long as you take a few safety precautions. The bats themselves are made of a lightweight plastic material that is not likely to cause any harm if accidentally ingested. However, the adhesive dots could be a choking hazard for young children, so it’s important to keep them out of reach. When applying the bats to the wall, make sure they are securely attached and that there is no risk of them falling down and injuring a child. It’s also a good idea to avoid placing the bats near cribs or beds, where a child could easily reach them. If you’re concerned about the spooky nature of the bats, you can choose a more whimsical and playful arrangement, rather than a truly terrifying one. You can also pair the bats with other Halloween decorations that are more kid-friendly, such as pumpkins, ghosts, or friendly monsters. Ultimately, the decision of whether or not to use these bats in a kid’s room is a personal one. Consider your child’s age, temperament, and any potential safety hazards before making a decision.

Price: $9.98 - $5.68
(as of Sep 03, 2025 15:16:47 UTC – Details)


![Scary Stories To Tell In The Dark [DVD]](https://oemiu.com/wp-content/uploads/2025/09/1757427628_Scary-Stories-To-Tell-In-The-Dark-DVD-Review-Best-336x220.jpg)