Best Halloween Pumpkin Decorations Review Halloween Pumpkin – Oemiu
Best Halloween Pumpkin Decorations: A Comprehensive Review
Halloween is a time for spooky fun, creative costumes, and, of course, intricately decorated pumpkins. Whether you’re aiming for a terrifyingly traditional jack-o’-lantern or a whimsical display of painted gourds, the world of Halloween pumpkin decorations offers something for everyone. But with such a vast array of options available, from carving kits to elaborate lighting systems, how do you choose the best approach to creating a pumpkin masterpiece? This article dives deep into the most popular, innovative, and practical methods for transforming ordinary pumpkins into extraordinary Halloween showstoppers. We’ll explore traditional carving, painting techniques, decorating with stencils, and utilizing alternative materials for a unique and personalized spooky season.
Traditional Carving: The Timeless Halloween Pumpkin
Carving a pumpkin into a jack-o’-lantern is a quintessential Halloween tradition. The process itself, from scooping out the seeds to meticulously sawing out the desired design, is a cherished ritual for many families. But achieving a truly impressive carved pumpkin requires more than just enthusiasm; it demands the right tools, a well-thought-out design, and a touch of patience. First and foremost, the selection of the pumpkin is crucial. Look for a pumpkin that is sturdy, with a flat bottom to prevent it from tipping over. The skin should be relatively smooth, free from blemishes or soft spots, and a vibrant orange hue signals a healthy and ripe pumpkin. Size matters, too – a larger pumpkin offers more surface area for intricate designs, while a smaller pumpkin might be easier to handle, especially for younger children.
Once you’ve secured your perfect pumpkin, the next step is to gather the necessary tools. A carving kit is a worthwhile investment, as it typically includes a variety of saws, scoops, and pokes specifically designed for pumpkin carving. These tools are generally safer and more effective than using kitchen knives, which can be unwieldy and prone to slipping. A sturdy scoop is essential for removing the pumpkin’s innards, and several saws of varying sizes allow for both broad cuts and intricate detailing. Stencils are invaluable for creating complex designs, and many free templates are available online. Consider transferring the stencil onto the pumpkin’s surface using tracing paper or a poking tool before you begin carving. Remember to work in a well-lit area and take frequent breaks to avoid fatigue. Carving can be a time-consuming process, so don’t rush it. The key to a successful jack-o’-lantern is precision and attention to detail. When the carving is complete, remove any excess pulp or seeds from the inside of the pumpkin. To preserve your creation for as long as possible, consider applying a thin layer of petroleum jelly to the cut edges. This will help to prevent the pumpkin from drying out and rotting prematurely. Finally, illuminate your jack-o’-lantern with a flickering candle or a battery-operated light for a truly spooky effect. And you will have the best Halloween pumpkin.
Beyond the Basics: Advanced Carving Techniques
For those seeking to elevate their carving skills beyond the basic jack-o’-lantern, several advanced techniques can be employed. One popular method is to use power tools, such as a rotary tool with various attachments, to create intricate patterns and textures. This allows for greater precision and detail than traditional carving tools, but it also requires a steady hand and a high degree of caution. Another advanced technique is to carve the pumpkin in layers, creating a three-dimensional effect. This involves carving different depths into the pumpkin’s skin to create shadows and highlights, adding depth and realism to the design. Layered carving can be particularly effective for portraits or complex scenes. Furthermore, consider incorporating sculpting techniques to create more organic and fluid designs. This involves using a variety of tools, such as wire loops and clay sculpting tools, to shape and refine the pumpkin’s surface. Sculpting can be used to create realistic features, such as wrinkles and textures, or to add a touch of whimsy to your design. No matter what advanced technique you choose, remember to prioritize safety. Wear appropriate safety gear, such as gloves and eye protection, and work in a well-ventilated area. Take your time and don’t be afraid to experiment. The key to mastering advanced carving techniques is practice and patience. With a little effort, you can create a truly stunning and unique Halloween pumpkin.
Painting Pumpkins: A Colorful and Creative Alternative
For those who prefer a less messy and more artistic approach, painting pumpkins offers a fantastic alternative to carving. Painting allows for endless creative possibilities, from simple geometric patterns to intricate portraits and elaborate scenes. It’s also a great option for younger children who may not be ready to handle sharp carving tools. The key to successful pumpkin painting is to use the right type of paint and to prepare the pumpkin’s surface properly. Acrylic paints are generally the best choice for pumpkins, as they are durable, water-resistant, and come in a wide range of colors. Before you begin painting, wipe down the pumpkin with a damp cloth to remove any dirt or debris. Allow the pumpkin to dry completely before applying the paint. If you want to create a smooth and even surface, you can apply a primer coat of white or light-colored paint. This will also help the colors of your design to pop. When painting your design, use a variety of brushes to achieve different effects. Small, fine-tipped brushes are ideal for intricate details, while larger brushes are better for covering broad areas. You can also use sponges, stencils, and other tools to create unique textures and patterns. Let each layer of paint dry completely before applying the next. This will prevent the colors from bleeding or smudging. Once your design is complete, you can seal it with a clear coat of varnish or sealant to protect the paint and make it more durable. This will also give your painted pumpkin a glossy finish. Consider using glow-in-the-dark paint for an extra spooky effect. This can be used to highlight certain elements of your design or to create a ghostly glow in the dark. Remember to have fun and let your creativity flow. Pumpkin painting is a great way to express yourself and to create a unique and personalized Halloween decoration. It’s also another way to get the best Halloween pumpkin.
Exploring Different Painting Styles and Techniques
The world of pumpkin painting is vast and diverse, offering a multitude of styles and techniques to explore. One popular style is to paint the pumpkin with a solid color and then add intricate details using fine-tipped brushes. This can be used to create elegant and sophisticated designs, such as floral patterns, geometric shapes, or intricate mandalas. Another popular technique is to use stencils to create repeating patterns or to transfer complex designs onto the pumpkin’s surface. Stencils can be purchased at craft stores or created at home using cardstock or acetate sheets. Simply tape the stencil onto the pumpkin and then paint over it using a sponge or brush. For a more textured effect, consider using sponge painting techniques. Dip a sponge into paint and then dab it onto the pumpkin’s surface. This can be used to create a variety of textures, from a subtle stippled effect to a bold and abstract design. Another interesting technique is to use masking tape to create stripes or geometric patterns. Apply the tape to the pumpkin in the desired pattern and then paint over it. Once the paint is dry, carefully remove the tape to reveal the underlying pumpkin color. This can be used to create clean and crisp lines. Furthermore, consider using different types of paint to achieve unique effects. For example, metallic paints can add a touch of glamour and sophistication, while chalkboard paint allows you to create a reusable surface that can be written on with chalk. Glitter paints can add a sparkle and shine to your design. No matter what style or technique you choose, remember to experiment and have fun. Pumpkin painting is a great way to unleash your creativity and to create a one-of-a-kind Halloween decoration. When you decide to paint your pumpkin, think about using long-tail variations of Halloween pumpkin to make your piece stand out.
Decorating with Stencils: Precision and Simplicity
Stencils offer a user-friendly way to achieve precise and intricate designs on your Halloween pumpkin without the need for advanced carving skills. They provide a template for creating clean lines and shapes, making it easy to replicate complex patterns and images. Stencils can be used for both carving and painting pumpkins, providing versatility and adaptability to different artistic preferences. The use of stencils simplifies the decorating process, particularly for those who are new to pumpkin carving or painting. By providing a clear outline to follow, stencils eliminate the guesswork and reduce the risk of errors. This makes them an ideal choice for beginners and children who want to create impressive designs without the frustration of freehand drawing or carving.
There are numerous ways to acquire stencils for your Halloween pumpkin decorating endeavors. Craft stores and online retailers offer a wide variety of pre-made stencils featuring popular Halloween themes, such as ghosts, bats, spiders, and witches. Alternatively, you can create your own custom stencils using cardstock, acetate sheets, or even sturdy paper. To make your own stencil, simply draw or print out your desired design onto the material, then carefully cut out the shapes using a craft knife or scissors. When using stencils for carving, secure the stencil to the pumpkin’s surface using tape or pins. Then, carefully trace the outline of the stencil onto the pumpkin’s skin using a poking tool or marker. Once the outline is complete, use carving tools to remove the pumpkin flesh within the traced lines. For painting with stencils, attach the stencil to the pumpkin’s surface using tape or adhesive spray. Then, use a sponge or brush to apply paint over the stencil. Be sure to use a light touch to prevent the paint from bleeding underneath the stencil. Once the paint is dry, carefully remove the stencil to reveal the finished design. Stencils are a fantastic way to achieve professional-looking results with minimal effort. They offer a wide range of design possibilities and are suitable for both carving and painting pumpkins. With a little creativity and the help of stencils, you can create stunning Halloween pumpkin decorations that will impress your friends and neighbors. Also, think about painting your pumpkins with glow in the dark paint and applying it in layers to make your best Halloween pumpkin really come to life.
Choosing the Right Stencil for Your Project
Selecting the right stencil is crucial for achieving the desired outcome in your Halloween pumpkin decorating project. Consider the complexity of the design and your skill level when choosing a stencil. For beginners, simpler designs with larger, more open areas are easier to work with. As you gain experience, you can gradually move on to more intricate designs with finer details. The size of the stencil should also be appropriate for the size of the pumpkin. A stencil that is too small will appear lost on a large pumpkin, while a stencil that is too large will be difficult to apply to a small pumpkin. Think about the overall theme and style of your Halloween decorations when selecting a stencil. Do you want to create a spooky and scary pumpkin, or a cute and whimsical one? Choose stencils that reflect your desired aesthetic. The material of the stencil also matters. Stencils made from durable materials like acetate sheets are reusable and can withstand repeated use. Stencils made from paper or cardstock are less durable but are often more affordable. Before using a stencil, make sure it is clean and free from any debris. This will prevent the paint from smudging or bleeding. If you are using a stencil for carving, ensure the stencil is securely attached to the pumpkin’s surface to prevent it from shifting during the carving process. Experiment with different stencil techniques to create unique effects. For example, you can use multiple stencils to layer designs or create intricate patterns. You can also use different colors of paint to add dimension and depth to your stencil designs. With careful consideration and the right stencil, you can transform an ordinary pumpkin into an extraordinary Halloween masterpiece. The best Halloween pumpkin is the one that expresses your unique style and creativity.
Beyond Pumpkins: Alternative Materials for Halloween Decorations
While pumpkins are the traditional choice for Halloween decorations, exploring alternative materials can lead to unique and eye-catching displays. Gourds, for instance, come in a variety of shapes and sizes, offering a different canvas for your creative expressions. They can be painted, carved, or adorned with various embellishments to create whimsical or spooky characters. Consider painting gourds with metallic paints or adding glitter for a touch of glamour. Alternatively, you can create miniature scenes inside hollowed-out gourds, such as a tiny haunted house or a spooky forest. Another option is to use foam pumpkins, which are lightweight, durable, and easy to work with. Foam pumpkins can be painted, decorated with fabric scraps, or even covered in sequins or beads. They are also a great choice for outdoor decorations, as they are resistant to weather damage. For a more eco-friendly approach, consider using recycled materials to create your Halloween decorations. Old newspapers, cardboard boxes, and plastic bottles can be transformed into spooky ghosts, creepy spiders, or eerie tombstones. Get creative with paint, glue, and other craft supplies to bring your recycled creations to life. You can also use natural materials like branches, leaves, and pinecones to create rustic and organic Halloween decorations. These materials can be arranged into wreaths, garlands, or centerpieces for a natural and spooky touch. For a truly unique and unexpected Halloween decoration, consider using fabric or yarn to create whimsical characters or spooky creatures. Sew or knit fabric scraps together to create stuffed ghosts, bats, or pumpkins. Alternatively, you can wrap yarn around balloons or foam balls to create fuzzy and textured Halloween decorations. By exploring alternative materials, you can create a diverse and personalized Halloween display that reflects your unique style and creativity. The possibilities are endless, so let your imagination run wild and see what spooky creations you can come up with. If you use alternative materials you could find that you have the best Halloween pumpkin because it would be original and innovative.
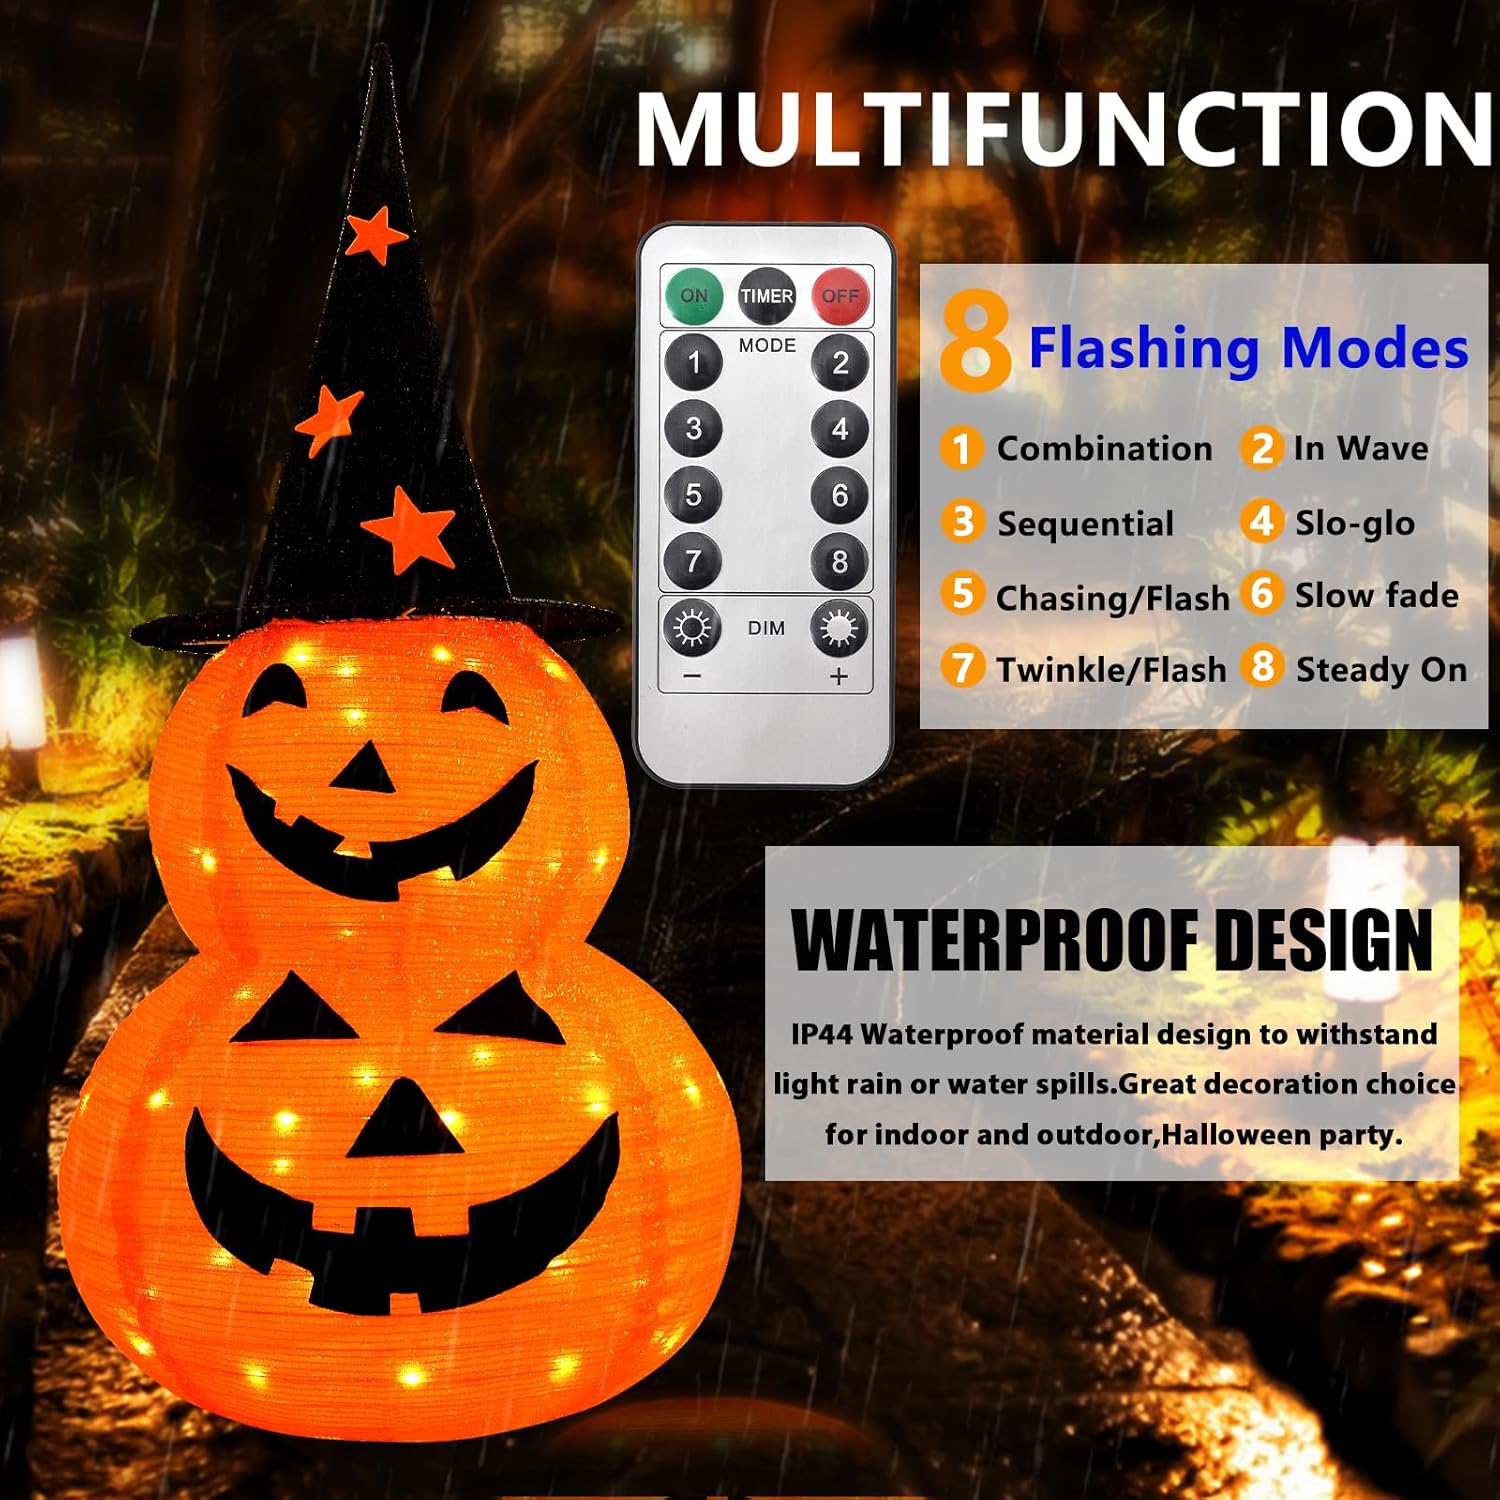
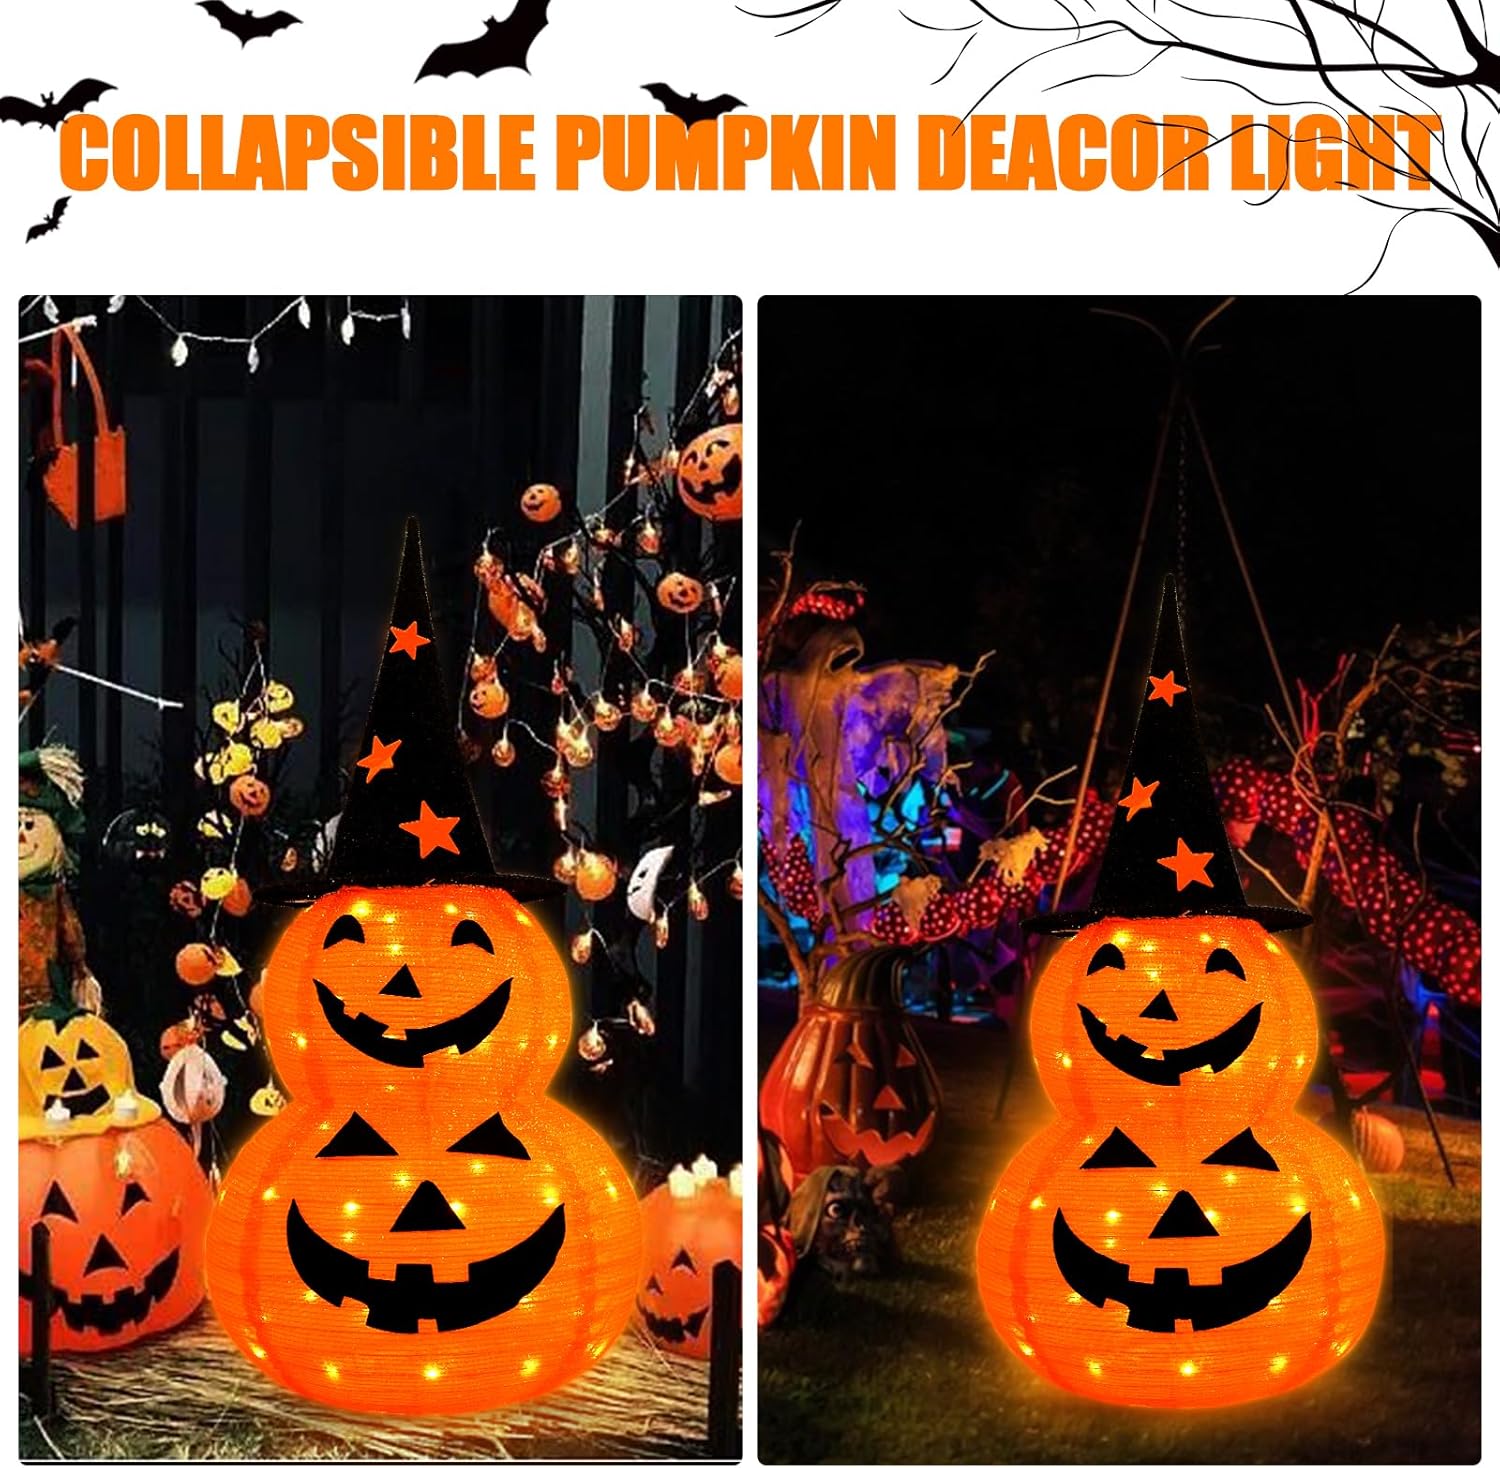
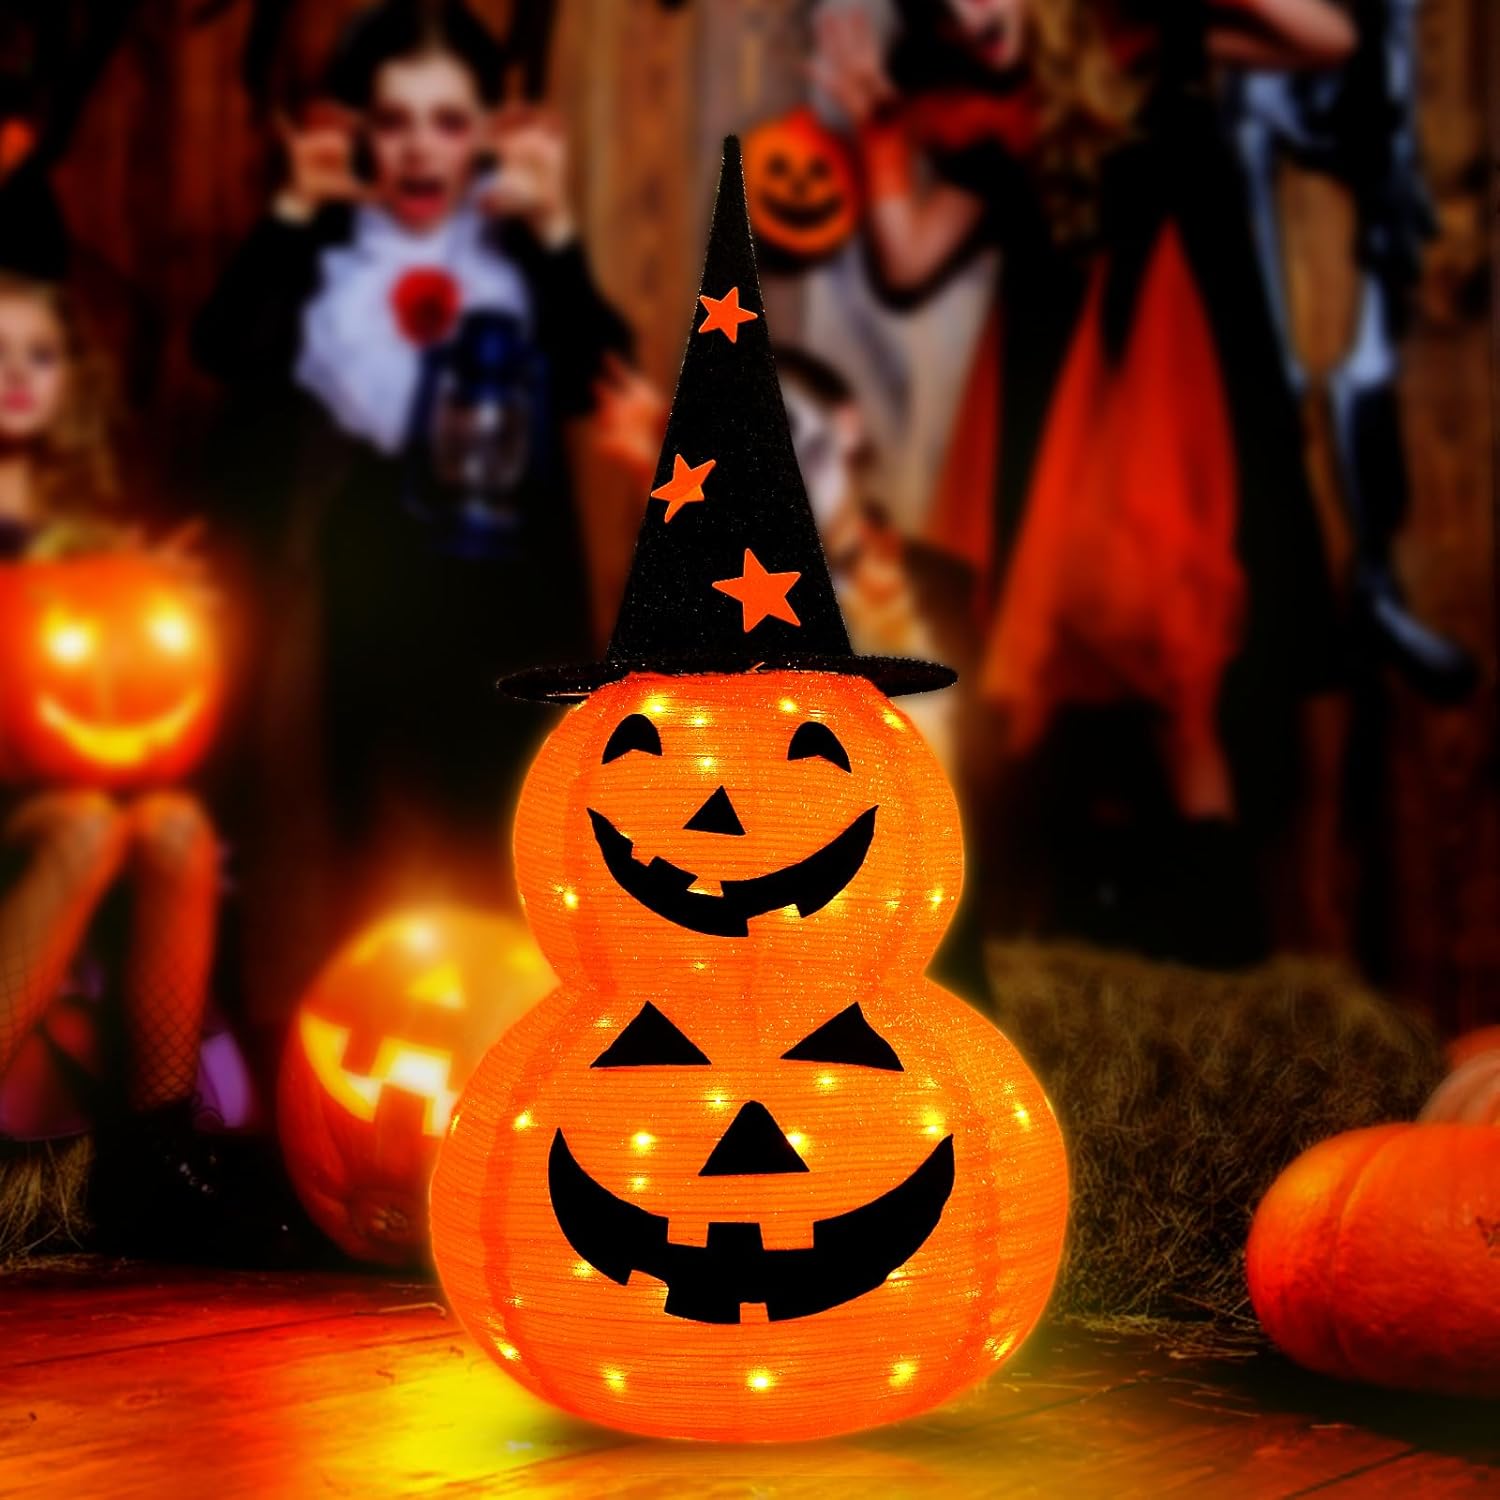
Enhancing the Ambiance: Lighting and Display Techniques
The way you light and display your Halloween decorations can significantly impact the overall ambiance and visual appeal. Proper lighting can enhance the spooky atmosphere, highlight intricate details, and create a captivating focal point. Consider using a combination of different lighting techniques to achieve the desired effect. Candles are a classic choice for illuminating jack-o’-lanterns, providing a warm and flickering glow. However, candles can be a fire hazard, so it’s important to exercise caution and never leave them unattended. Battery-operated candles are a safer alternative, offering the same flickering effect without the risk of fire. String lights are versatile and can be used to decorate a variety of Halloween displays. They can be draped around trees, wrapped around pumpkins, or strung along fences to create a festive and spooky atmosphere. Choose string lights with different colors or patterns to add visual interest. Spotlights can be used to highlight specific decorations or to create dramatic shadows. Place spotlights strategically to draw attention to your most impressive creations. Colored spotlights can be used to create a more eerie and mysterious effect. Projector lights are a fun and easy way to add animation to your Halloween display. Projector lights project images or patterns onto your house or yard, creating a dynamic and eye-catching effect. Consider using projector lights with Halloween-themed images like ghosts, bats, or spiders. When displaying your Halloween decorations, think about creating a cohesive and visually appealing arrangement. Group similar decorations together to create a focal point. Use different heights and textures to add visual interest. Consider the overall layout of your yard or home and arrange your decorations in a way that complements the existing architecture and landscaping. With careful lighting and thoughtful display techniques, you can transform your Halloween decorations into a truly immersive and captivating experience. The best Halloween pumpkin display is the one that creates a memorable and spooky atmosphere for your guests and trick-or-treaters.
| Decoration Method | Pros | Cons | Cost |
|---|---|---|---|
| Traditional Carving | Classic Halloween tradition, allows for intricate designs. | Can be messy and time-consuming, requires sharp tools, pumpkins rot quickly. | Low to Medium (depending on tools and pumpkin size) |
| Pumpkin Painting | Less messy than carving, allows for endless creative possibilities, safe for children. | Requires paint and brushes, designs may not be as permanent as carvings. | Low to Medium (depending on paint quality and embellishments) |
| Stencil Decorations | Easy to create precise designs, versatile for carving and painting, suitable for beginners. | May require purchasing stencils or creating custom ones. | Low to Medium (depending on stencil source and materials) |
| Alternative Materials | Unique and eye-catching, allows for creativity with different textures and colors, eco-friendly options available. | May require more time and effort to assemble, materials may not be as durable as pumpkins. | Low to High (depending on materials used) |
Frequently Asked Questions (FAQ)
How do I choose the perfect pumpkin for carving?
Selecting the right pumpkin is the first crucial step in creating a stunning jack-o’-lantern. Look for a pumpkin that is symmetrical in shape, with a flat bottom to ensure it sits securely. Avoid pumpkins with soft spots, bruises, or blemishes on the skin, as these indicate potential decay. The stem should be sturdy and intact, as this will help the pumpkin stay fresh longer. Tap the pumpkin to listen for a hollow sound, which indicates that the inside is ripe and ready for carving. Consider the size of the pumpkin in relation to the complexity of your desired design. A larger pumpkin provides more surface area for intricate details, while a smaller pumpkin may be easier to handle and carve, especially for younger children. Finally, choose a pumpkin with a smooth, even surface, as this will make it easier to carve and paint.
What are some tips for preserving my carved pumpkin?
Unfortunately, carved pumpkins don’t last forever, but there are several steps you can take to extend their lifespan. First, thoroughly clean the inside of the pumpkin after carving, removing all seeds and pulp. This will help to prevent mold growth. Apply a thin layer of petroleum jelly to the cut edges to help seal in moisture and prevent the pumpkin from drying out. You can also soak the pumpkin in a bleach solution (1 tablespoon of bleach per gallon of water) for a few hours to kill any bacteria or mold spores. Avoid placing your carved pumpkin in direct sunlight or warm temperatures, as this will accelerate its decay. Store it in a cool, dry place, such as a garage or basement, when it’s not on display. If you notice any signs of mold growth, you can try spraying the pumpkin with a fungicide or using a dehumidifier to reduce moisture in the air. Consider using a battery-operated candle or light instead of a traditional candle, as the heat from the candle can also contribute to the pumpkin’s decay.
How can I make my pumpkin painting last longer?
To ensure your painted pumpkin remains vibrant and beautiful for as long as possible, start by preparing the surface properly. Clean the pumpkin with a damp cloth to remove any dirt or debris, and allow it to dry completely. Apply a primer coat of white or light-colored paint to create a smooth and even surface for your design. Use high-quality acrylic paints, as they are durable, water-resistant, and come in a wide range of colors. Apply thin, even coats of paint, allowing each layer to dry completely before applying the next. This will prevent the colors from bleeding or smudging. Once your design is complete, seal it with a clear coat of varnish or sealant to protect the paint and make it more durable. This will also give your painted pumpkin a glossy finish. Avoid placing your painted pumpkin in direct sunlight or extreme temperatures, as this can cause the paint to fade or crack. Store it in a cool, dry place when it’s not on display.
What are some alternative lighting options for jack-o’-lanterns besides candles?
While candles provide a classic flickering glow, they can also be a fire hazard, especially around children and pets. Fortunately, there are several safe and effective alternative lighting options for jack-o’-lanterns. Battery-operated candles are a popular choice, offering the same flickering effect without the risk of fire. They come in a variety of sizes and styles, and some even have timers that automatically turn them on and off. LED lights are another great option, providing a bright and long-lasting light source. They are energy-efficient and come in a variety of colors, allowing you to customize the look of your jack-o’-lantern. String lights can be used to create a more festive and whimsical effect. Simply string the lights inside the pumpkin, leaving enough slack for the cord to reach an outlet. For a more dramatic effect, consider using a spotlight to illuminate your jack-o’-lantern from the outside.
Are there any safety precautions I should take when carving pumpkins?
Pumpkin carving can be a fun and rewarding activity, but it’s important to take safety precautions to avoid injuries. Always use carving tools specifically designed for pumpkins, as these are generally safer and more effective than kitchen knives. Work in a well-lit area and on a stable surface. Supervise children closely when they are carving pumpkins, and consider having them use stencils or painting instead of carving. When using a carving knife, cut away from yourself and keep your fingers out of the path of the blade. Avoid using excessive force, as this can cause the knife to slip. If you are using power tools for carving, wear appropriate safety gear, such as gloves and eye protection. If you are using candles to illuminate your jack-o’-lantern, never leave them unattended and keep them away from flammable materials.
What are some creative ideas for decorating pumpkins without carving?
For those who prefer a less messy or dangerous approach, there are countless creative ways to decorate pumpkins without carving. Painting pumpkins is a popular option, allowing for endless design possibilities. Use acrylic paints, markers, or even spray paint to create intricate patterns, whimsical characters, or abstract designs. Decorate pumpkins with decoupage techniques, using fabric scraps, paper cutouts, or even dried flowers. Glue the materials onto the pumpkin’s surface using Mod Podge or a similar adhesive. Embellish pumpkins with glitter, sequins, beads, or other craft supplies. These can be glued onto the pumpkin’s surface to add sparkle and texture. Wrap pumpkins with yarn, ribbon, or lace to create a cozy and textured look. Use hot glue to secure the materials to the pumpkin’s surface. Create a pumpkin planter by hollowing out the top of the pumpkin and filling it with soil and plants. This is a great way to add a touch of nature to your Halloween decorations. These alternatives will help you make the best Halloween pumpkin.
How can I involve children in pumpkin decorating?
Pumpkin decorating can be a fun and engaging activity for children of all ages. For younger children, focus on simpler activities like painting pumpkins with non-toxic paints or decorating them with stickers, glitter, or googly eyes. Provide them with stencils or templates to guide their designs. Supervise children closely when they are using scissors, glue, or other craft supplies. For older children, allow them to participate in more complex activities like carving pumpkins with age-appropriate tools or creating their own stencils. Encourage their creativity and allow them to express their own ideas. Consider turning pumpkin decorating into a family activity, where everyone works together to create a unique and memorable Halloween display. Remember that getting kids involved in the decision-making process will not only help them be more creative, but it might just help you find the best Halloween pumpkin.

Price: $29.99
(as of Sep 11, 2025 09:20:31 UTC – Details)


