Best Nestle Toll House Chocolate Chip and Review Halloween Cookies – Oemiu
The Ultimate Guide to Nestle Toll House Chocolate Chip Cookies and Spooktacular Halloween Cookies
Few treats are as universally comforting and satisfying as a freshly baked chocolate chip cookie. And when it comes to chocolate chip cookies, the Nestle Toll House recipe stands as a benchmark, a classic that generations have grown up with. But beyond the timeless appeal of the original, the world of cookies expands into a vibrant tapestry of flavors and decorations, especially when Halloween rolls around. This guide delves into the heart of the Nestle Toll House chocolate chip cookie, exploring its variations, baking tips, and troubleshooting advice. Then, we’ll jump into the creative world of Halloween cookies, examining various recipes, decorating techniques, and some seriously spooky and delicious options for your Halloween celebrations.
The Enduring Appeal of the Nestle Toll House Chocolate Chip Cookie
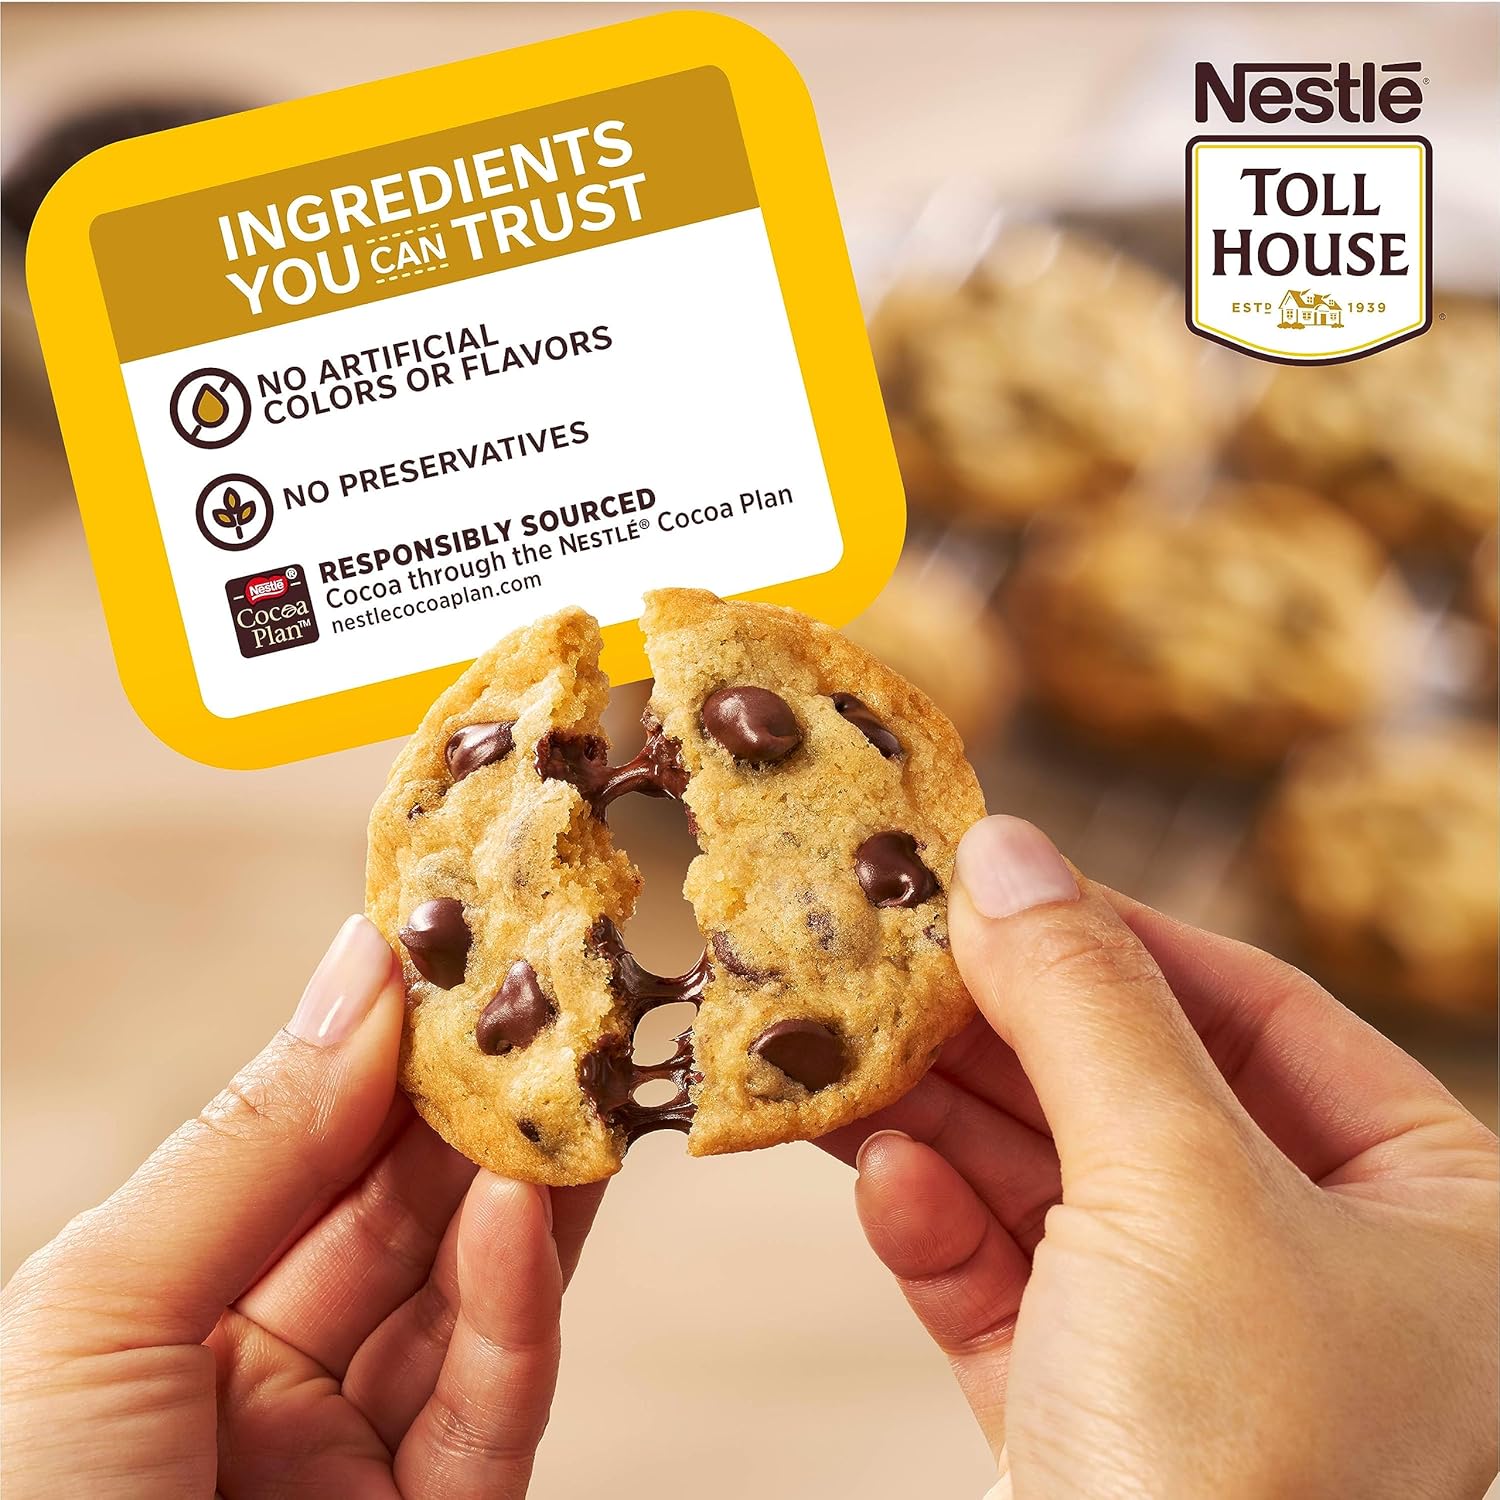
The story of the Nestle Toll House chocolate chip cookie is a heartwarming tale of accidental invention and enduring culinary success. Ruth Wakefield, the owner of the Toll House Inn in Whitman, Massachusetts, is credited with creating this iconic treat in the 1930s. As the story goes, she was making chocolate butterscotch nut cookies and realized she was out of baker’s chocolate. Instead of melting some, she broke up a Nestle semi-sweet chocolate bar into small pieces, expecting them to melt and blend into the batter. They didn’t. Instead, the chocolate pieces retained their form, creating a delightful and unexpected textural contrast. The rest, as they say, is history. The cookies became an instant hit at the Toll House Inn, and Wakefield eventually struck a deal with Nestle to print her recipe on the back of their chocolate bar packaging. That clever marketing move secured the cookie’s place in American culinary culture. Beyond its historical significance, the Nestle Toll House cookie maintains its popularity for its simplicity and versatility. The recipe is straightforward, using readily available ingredients, making it accessible to bakers of all skill levels. The basic formula can be easily adapted to suit different tastes and preferences, with variations including the addition of nuts, different types of chocolate, or even spices. The cookie’s comforting aroma and satisfying flavor profile—sweet, buttery, with a hint of vanilla and the delightful bite of chocolate—make it a perennial favorite. It’s a cookie that evokes feelings of nostalgia, warmth, and home. For many, baking Nestle Toll House cookies is a cherished family tradition, passed down through generations. The act of measuring, mixing, and baking together creates lasting memories and strengthens family bonds. And let’s not forget the sheer joy of that first warm, gooey bite straight from the oven. The perfect balance of crisp edges and a soft, chewy center is a textural masterpiece that continues to delight cookie lovers worldwide. The sheer volume of variations available shows its enduring popularity. From using dark chocolate for a richer flavour, to adding chopped pecans for a nutty crunch, the possibilities are endless.
Mastering the Classic Recipe: Tips and Techniques
While the Nestle Toll House recipe appears simple, achieving cookie perfection requires attention to detail and a few key techniques. One of the most critical factors is the quality of your ingredients. Using good-quality butter, fresh eggs, and premium chocolate will significantly impact the final result. Room temperature butter is crucial for creaming properly with the sugar, creating a light and airy batter. Be careful not to overmix the dough after adding the flour, as this can lead to tough cookies. A gentle hand ensures a tender crumb. Chilling the dough before baking is another essential step. This allows the flavors to meld together, prevents the cookies from spreading too thin, and enhances their overall texture. I recommend chilling the dough for at least 30 minutes, but longer chilling times (even overnight) can yield even better results. When it comes to baking, precise temperature control is vital. An oven thermometer is your best friend. Over-baking is a common mistake that results in dry, hard cookies. Look for slightly golden edges and a soft center when determining doneness. It’s better to err on the side of under-baking, as the cookies will continue to set as they cool on the baking sheet. Properly lining your baking sheet with parchment paper is essential for easy removal and prevents the cookies from sticking. Using a cookie scoop ensures uniform size and consistent baking. Once the cookies are out of the oven, let them cool on the baking sheet for a few minutes before transferring them to a wire rack to cool completely. This prevents them from breaking and allows them to firm up. Remember, baking is a science, but it’s also an art. Don’t be afraid to experiment with different variations and techniques to find what works best for you. Ultimately, the most important ingredient is love. Baking with care and attention will always result in the most delicious and satisfying cookies. If you’re looking for an extra kick, consider adding a pinch of sea salt to the top of each cookie before baking. The salt enhances the sweetness of the chocolate and creates a delightful flavor contrast. Another option is to use brown butter for a richer, more complex flavor. Simply melt the butter in a saucepan over medium heat until it turns a nutty brown color. Let it cool slightly before adding it to the recipe. The brown butter adds depth and complexity to the cookie’s flavor profile, elevating it to another level. Consider also playing with different extracts. While vanilla extract is the standard, almond extract or even a hint of orange extract can add a unique twist to the classic recipe.
Troubleshooting Common Chocolate Chip Cookie Baking Issues
Even with the best intentions and the most carefully followed recipe, baking mishaps can occur. Understanding common cookie problems and their solutions can save you from baking disasters. One frequent issue is flat, thin cookies. This can be caused by several factors, including using melted butter instead of room temperature butter, overmixing the dough, or not chilling the dough sufficiently. To avoid flat cookies, ensure your butter is softened but not melted, avoid overmixing the dough, and chill the dough for at least 30 minutes. Another common problem is hard, dry cookies. This is often the result of over-baking. Keep a close eye on the cookies while they’re in the oven and remove them when the edges are golden brown and the center is still slightly soft. Avoid over-measuring the flour, as too much flour can lead to dry cookies. Using a kitchen scale to measure the flour accurately is the best way to ensure consistency. If your cookies are too cakey, it could be due to using too much flour or not enough butter. Carefully measure your ingredients and adjust the ratios as needed. Adding a tablespoon or two of melted butter to the dough can help create a chewier texture. Burnt cookies are a clear sign of an oven that’s too hot or cookies that are baking for too long. Invest in an oven thermometer to ensure your oven is accurately calibrated. Reduce the baking time by a minute or two and check the cookies frequently. Uneven baking can be caused by hot spots in your oven. Rotating the baking sheet halfway through baking can help ensure that the cookies bake evenly. If you’re still experiencing uneven baking, consider using a different baking sheet or adjusting your oven temperature. By understanding these common cookie problems and their solutions, you can become a more confident and successful baker. Remember, practice makes perfect. Don’t be discouraged by occasional mishaps. Learn from your mistakes and keep experimenting until you achieve cookie perfection. And even if your cookies aren’t perfect, they’re still delicious! Sharing your creations with friends and family is one of the greatest joys of baking. After all, it’s important to enjoy the process and the results, regardless of imperfections. Baking a batch of cookies to share with loved ones is a simple and meaningful gesture that will be appreciated. Consider gifting a batch of homemade cookies to a neighbor or friend. It’s a thoughtful way to brighten someone’s day. You can also package the cookies attractively in a decorative tin or box. A handwritten note adds a personal touch.
Embracing the Spooky Season: Halloween Cookie Creations
As the leaves change color and a crispness fills the air, it’s time to embrace the spooky season with a delectable array of Halloween cookies. These aren’t just any cookies; they’re edible works of art, designed to thrill and delight both young and old. From ghoulish ghosts to creepy crawlies, the possibilities are endless when it comes to Halloween cookie designs. The key to creating memorable Halloween cookies lies in a combination of a great cookie recipe and imaginative decorating techniques. A good sugar cookie recipe provides a sturdy base for intricate designs and holds its shape well during baking. Royal icing is the preferred choice for decorating, as it dries smooth and hard, allowing for detailed work. But beyond the basic recipe and icing, it’s the creativity and attention to detail that truly elevate Halloween cookies to the next level. Think beyond the traditional pumpkin and ghost shapes. Consider creating cookies shaped like bats, spiders, eyeballs, or even miniature tombstones. Use a variety of decorating techniques, such as flooding, outlining, and wet-on-wet designs, to add depth and dimension to your cookies. Experiment with different colors and textures to create a truly spooky effect. Black food coloring is a must-have for Halloween cookies, but don’t be afraid to use other colors like orange, purple, green, and red to add variety and visual interest. Edible glitter, sprinkles, and candy decorations can also be used to enhance the overall look of your cookies. When decorating, start with the outline and then flood the cookie with a thinner consistency of icing. Allow the base layer to dry completely before adding any additional details. Use a toothpick or scribe tool to smooth out any imperfections and create clean lines. If you’re new to cookie decorating, start with simple designs and gradually work your way up to more complex patterns. There are countless tutorials and resources available online to help you learn new techniques and get inspired. Don’t be afraid to experiment and have fun with it! The most important thing is to let your creativity shine through. Involve your family and friends in the cookie-decorating process for a fun and memorable Halloween activity. Creating Halloween cookies is a great way to get into the spirit of the season and share some delicious treats with loved ones. These cookies are perfect for Halloween parties, trick-or-treating, or simply enjoying as a spooky snack. Consider making a variety of different cookie designs to create a festive and visually appealing display. You can also package the cookies in individual bags or boxes for easy gifting. No matter how you choose to enjoy them, Halloween cookies are sure to bring a smile to everyone’s face. You can find Halloween cookies near me by searching for local bakeries that specialize in holiday-themed treats.
Spooktacular Cookie Designs: Ideas and Inspiration
The world of Halloween cookie designs is a boundless realm of spooky creativity. Here are some ideas to spark your imagination and inspire your own cookie masterpieces:
* **Ghostly Delights:** Classic ghost-shaped cookies are always a hit. Use white royal icing to flood the cookies and add simple black eyes for a minimalist yet effective design. For a more detailed approach, add subtle shading to create a three-dimensional effect.
* **Creepy Crawly Spiders:** Turn your cookies into creepy crawlies by creating spider-shaped cookies. Use black royal icing to flood the cookies and add eight spindly legs. You can also add edible candy eyes for an extra touch of realism.
* **Wicked Witches:** Capture the essence of Halloween with wicked witch-themed cookies. Use green royal icing for the face and black icing for the hat. Add details like a crooked nose and a mischievous grin for a truly sinister look.
* **Eerie Eyeballs:** Create a chilling effect with eyeball-shaped cookies. Use white royal icing for the base and add a colored iris and a black pupil. For added realism, use red icing to create bloodshot veins.
* **Petrifying Pumpkins:** No Halloween cookie collection is complete without pumpkins. Use orange royal icing to flood the cookies and add green icing for the stem. You can also add details like a carved face or a spooky smile.
* **Batty Treats:** Embrace the nocturnal creatures of Halloween with bat-shaped cookies. Use black royal icing to flood the cookies and add white icing for the eyes. You can also add small fangs for a menacing touch.
* **Mummy Mayhem:** Wrap your cookies in layers of white royal icing to create mummy-themed treats. Leave small gaps to reveal the cookie underneath and add edible candy eyes for a spooky finish.
Beyond these classic designs, consider incorporating more complex techniques like airbrushing, stenciling, and piping to create truly unique and impressive Halloween cookies. Experiment with different color combinations and textures to add depth and dimension to your designs. Don’t be afraid to try new things and push your creative boundaries. The most important thing is to have fun and let your imagination run wild. Look for inspiration in Halloween decorations, movies, and even nature. The possibilities are endless when it comes to Halloween cookie designs. One specific example is to create “spiderweb” cookies. First, flood the cookie with black icing. While the icing is still wet, pipe concentric circles of white icing on top. Then, use a toothpick or scribe tool to drag lines from the center of the cookie to the outer edge, creating a spiderweb effect. This is a simple yet effective technique that adds a touch of elegance to your Halloween cookies. Another idea is to create “skeleton” cookies. Use a gingerbread cookie recipe and cut out skeleton shapes. After baking, use white royal icing to pipe the bones onto the cookies. This is a fun and educational activity for kids, as they can learn about the different bones in the human body while decorating. You could even sell them as themed Halloween cookies for sale. Or if you’re feeling lazy, you could always grab already-made Halloween cookies from your local grocery store.
Recipe Ideas and Halloween Cookie Recipe Variations
While sugar cookies are the traditional choice for Halloween decorating, don’t be afraid to experiment with different cookie recipes to create a variety of flavors and textures. Here are some recipe ideas and Halloween cookie recipe variations to try:
* **Gingerbread Skulls:** Add a spooky twist to classic gingerbread cookies by using skull-shaped cookie cutters. Decorate with white royal icing to create intricate bone details.
* **Chocolate Monster Cookies:** These soft and chewy cookies are packed with chocolate chips, pretzels, and candy eyes, making them a fun and festive treat. Add green food coloring to the dough for an extra monstrous effect.
* **Peanut Butter Spider Cookies:** These peanut butter cookies are decorated with chocolate spiderwebs and candy spiders, making them a creepy and delicious treat. Use a fork to create a crosshatch pattern on the cookies before baking to resemble a spiderweb.
* **Oatmeal Raisin Bats:** These wholesome oatmeal raisin cookies are transformed into bat-shaped treats with the help of a cookie cutter. Add chocolate chips for the eyes and use almond slices for the wings.
* **Shortbread Tombstones:** These buttery shortbread cookies are cut into tombstone shapes and decorated with gray royal icing and edible black writing. Add spooky messages like “RIP” or “Beware.”
* **Red Velvet Brains:** These vibrant red velvet cookies are shaped like brains and decorated with cream cheese frosting to resemble the folds of the brain. This is a truly gruesome and unforgettable treat.
In addition to these recipe ideas, consider adding Halloween-themed ingredients to your favorite cookie recipes. For example, you could add pumpkin puree to your sugar cookie dough for a pumpkin spice flavor. Or you could add black cocoa powder to your chocolate chip cookie dough for a darker, more intense chocolate flavor. You can also use Halloween-themed sprinkles, candies, and chocolate chips to decorate your cookies. The possibilities are endless when it comes to creating unique and delicious Halloween cookies. No matter what recipe you choose, be sure to have fun and let your creativity shine through. Halloween is a time for spooky fun, so don’t be afraid to experiment and try new things. Get the whole family involved in the baking and decorating process for a memorable Halloween activity. Enjoy the process of creating these spooky treats and sharing them with loved ones. Some people may also search for Halloween cookies online in order to purchase a special design or a unique flavour. If you need some inspiration, just search for pictures of cute Halloween cookies and let the Halloween spirit inspire you!
| Cookie Type | Key Ingredients | Decoration Style | Spookiness Level |
|---|---|---|---|
| Sugar Cookies | Flour, Butter, Sugar, Eggs | Royal Icing, Sprinkles | Mild to Moderate |
| Gingerbread Skulls | Flour, Molasses, Spices | White Royal Icing | Moderate to High |
| Chocolate Monster Cookies | Chocolate Chips, Pretzels, Candy Eyes | Candy Decorations | Mild to Moderate |
| Peanut Butter Spider Cookies | Peanut Butter, Chocolate, Candy Spiders | Chocolate Spiderwebs | Moderate |
| Red Velvet Brains | Red Velvet Cake Mix, Cream Cheese Frosting | Cream Cheese Frosting | High |
FAQ
What is the best way to store Nestle Toll House chocolate chip cookies to keep them fresh?
Storing your Nestle Toll House chocolate chip cookies properly is essential to maintaining their deliciousness and texture. The best method depends on how long you plan to keep them. For short-term storage (1-2 days), an airtight container at room temperature is ideal. This prevents the cookies from drying out and maintains their soft, chewy texture. Ensure the cookies are completely cool before placing them in the container; otherwise, condensation can form and make them soggy. Layer the cookies in a single layer or separate them with parchment paper to prevent them from sticking together. For longer storage (up to a week), you can still use an airtight container at room temperature, but consider adding a slice of bread to the container. The bread will absorb excess moisture, keeping the cookies softer for longer. Remember to replace the bread every couple of days. If you want to store the cookies for even longer (up to a month or two), freezing is the best option. Allow the cookies to cool completely, then wrap them individually in plastic wrap or place them in a freezer-safe bag. Squeeze out as much air as possible to prevent freezer burn. When you’re ready to enjoy them, thaw the cookies at room temperature for about 30 minutes. You can also reheat them briefly in the oven or microwave for a warm, freshly baked experience. Avoid storing cookies in the refrigerator, as this can dry them out and make them stale. The cold temperature alters the texture and flavor of the cookies, making them less enjoyable. Proper storage is key to preserving the quality and taste of your homemade cookies, ensuring you can savor their deliciousness for days or even weeks to come. The airtight container is your best friend in this situation.
How can I prevent my Halloween cookies from spreading too much in the oven?
Preventing Halloween cookies from spreading excessively in the oven is crucial for maintaining their desired shape and intricate designs. Several factors contribute to cookie spreading, and addressing these issues can significantly improve your baking results. First and foremost, the temperature of your butter plays a vital role. Ensure that your butter is softened but not melted. Melted butter will cause the cookies to spread more easily. Creaming the softened butter with sugar until light and fluffy is also important for incorporating air into the dough, which helps to prevent excessive spreading. Secondly, chilling the dough before baking is essential. Chilling allows the fat in the dough to solidify, which slows down the spreading process during baking. I recommend chilling the dough for at least 30 minutes, but longer chilling times (even overnight) can yield even better results. Wrapping the dough tightly in plastic wrap will prevent it from drying out in the refrigerator. Thirdly, the amount of flour in your recipe can also affect cookie spreading. Too little flour will result in cookies that spread too thin. Accurately measure your flour using a kitchen scale or the spoon-and-level method. Avoid scooping flour directly from the bag, as this can compact the flour and result in too much flour in your recipe. Fourthly, baking on a cool baking sheet is important. If your baking sheet is warm, the cookies will start to spread before they even go into the oven. Use a clean baking sheet for each batch of cookies and allow it to cool completely between batches. You can also line the baking sheet with parchment paper or a silicone baking mat to prevent sticking and promote even baking. Finally, avoid overbaking the cookies. Overbaked cookies tend to be thinner and crispier. Remove the cookies from the oven when the edges are set and the centers are still slightly soft. They will continue to bake as they cool on the baking sheet. By addressing these factors, you can significantly reduce cookie spreading and create beautifully shaped Halloween cookies that are perfect for decorating.
What is the best type of icing to use for decorating Halloween cookies?
The best type of icing for decorating Halloween cookies is royal icing. Royal icing is a smooth, hard-drying icing that’s perfect for creating intricate designs and details on cookies. It’s made from powdered sugar, meringue powder (or egg whites), and water. The meringue powder provides stability and helps the icing to dry hard, while the powdered sugar adds sweetness and creates a smooth consistency. The water is used to adjust the consistency of the icing, allowing you to create different consistencies for outlining, flooding, and adding details. Royal icing is highly versatile and can be easily colored with gel food coloring. Gel food coloring is preferred over liquid food coloring because it doesn’t add extra liquid to the icing, which can affect its consistency. You can create a wide range of colors by mixing different gel food colorings together. For Halloween cookies, black, orange, purple, green, and red are popular choices. When decorating with royal icing, it’s important to have different consistencies of icing for different purposes. A thicker consistency icing is used for outlining the cookies, creating a dam that prevents the thinner flooding icing from running over the edges. A thinner consistency icing is used for flooding the cookies, filling in the outlined areas with a smooth, even layer of icing. You can also use a very thin consistency icing for creating wet-on-wet designs, where you pipe different colors of icing onto the wet base layer and swirl them together to create patterns. Royal icing can be stored in an airtight container at room temperature for several days. Before using, stir the icing to redistribute the moisture and adjust the consistency as needed by adding a small amount of water or powdered sugar. When decorating, use piping bags and decorating tips to create different shapes and designs. Practice your piping skills on parchment paper before decorating the cookies to get a feel for the icing consistency and the decorating tips. With a little practice and patience, you can create stunning Halloween cookies decorated with beautiful and intricate royal icing designs. Royal icing will also maintain its color over time, perfect for Halloween treats.
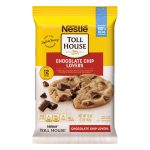
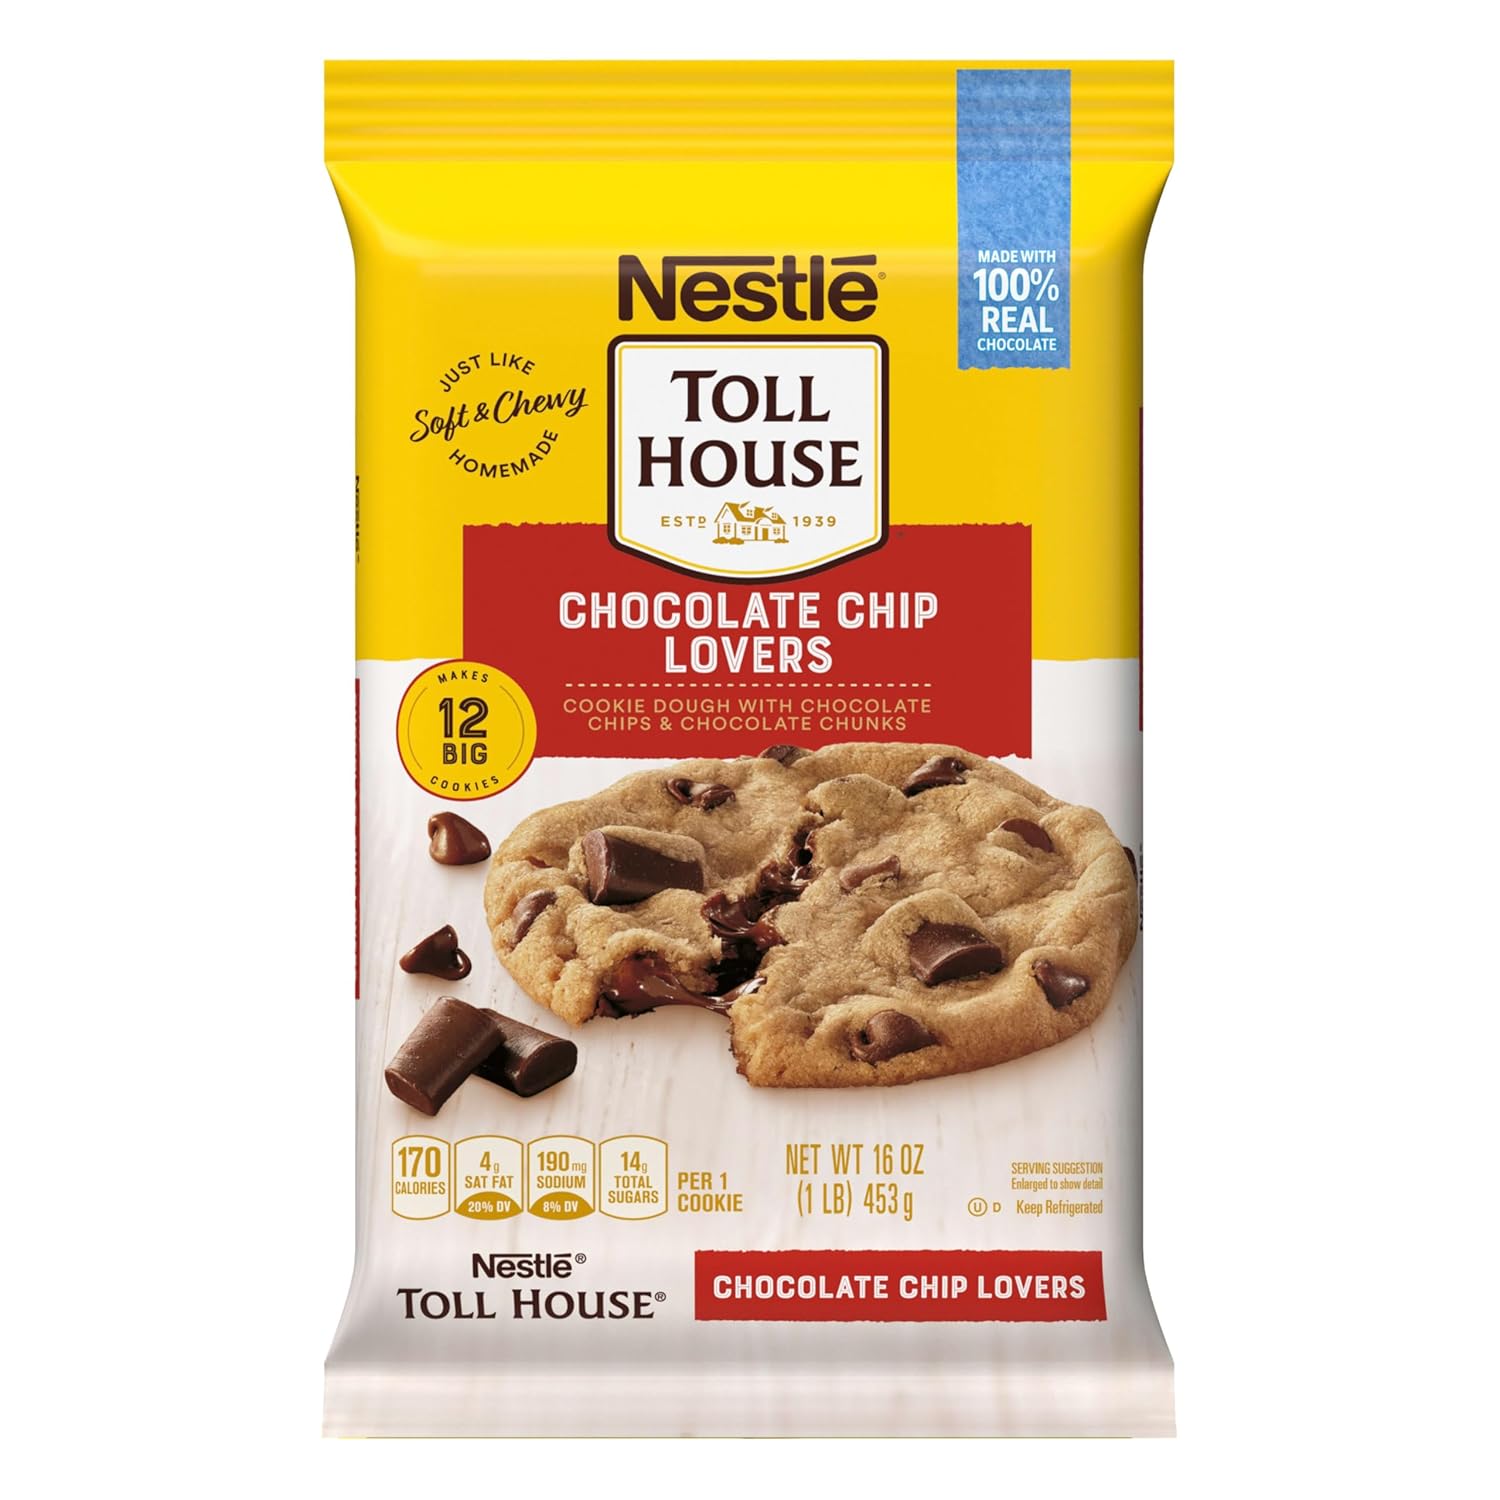
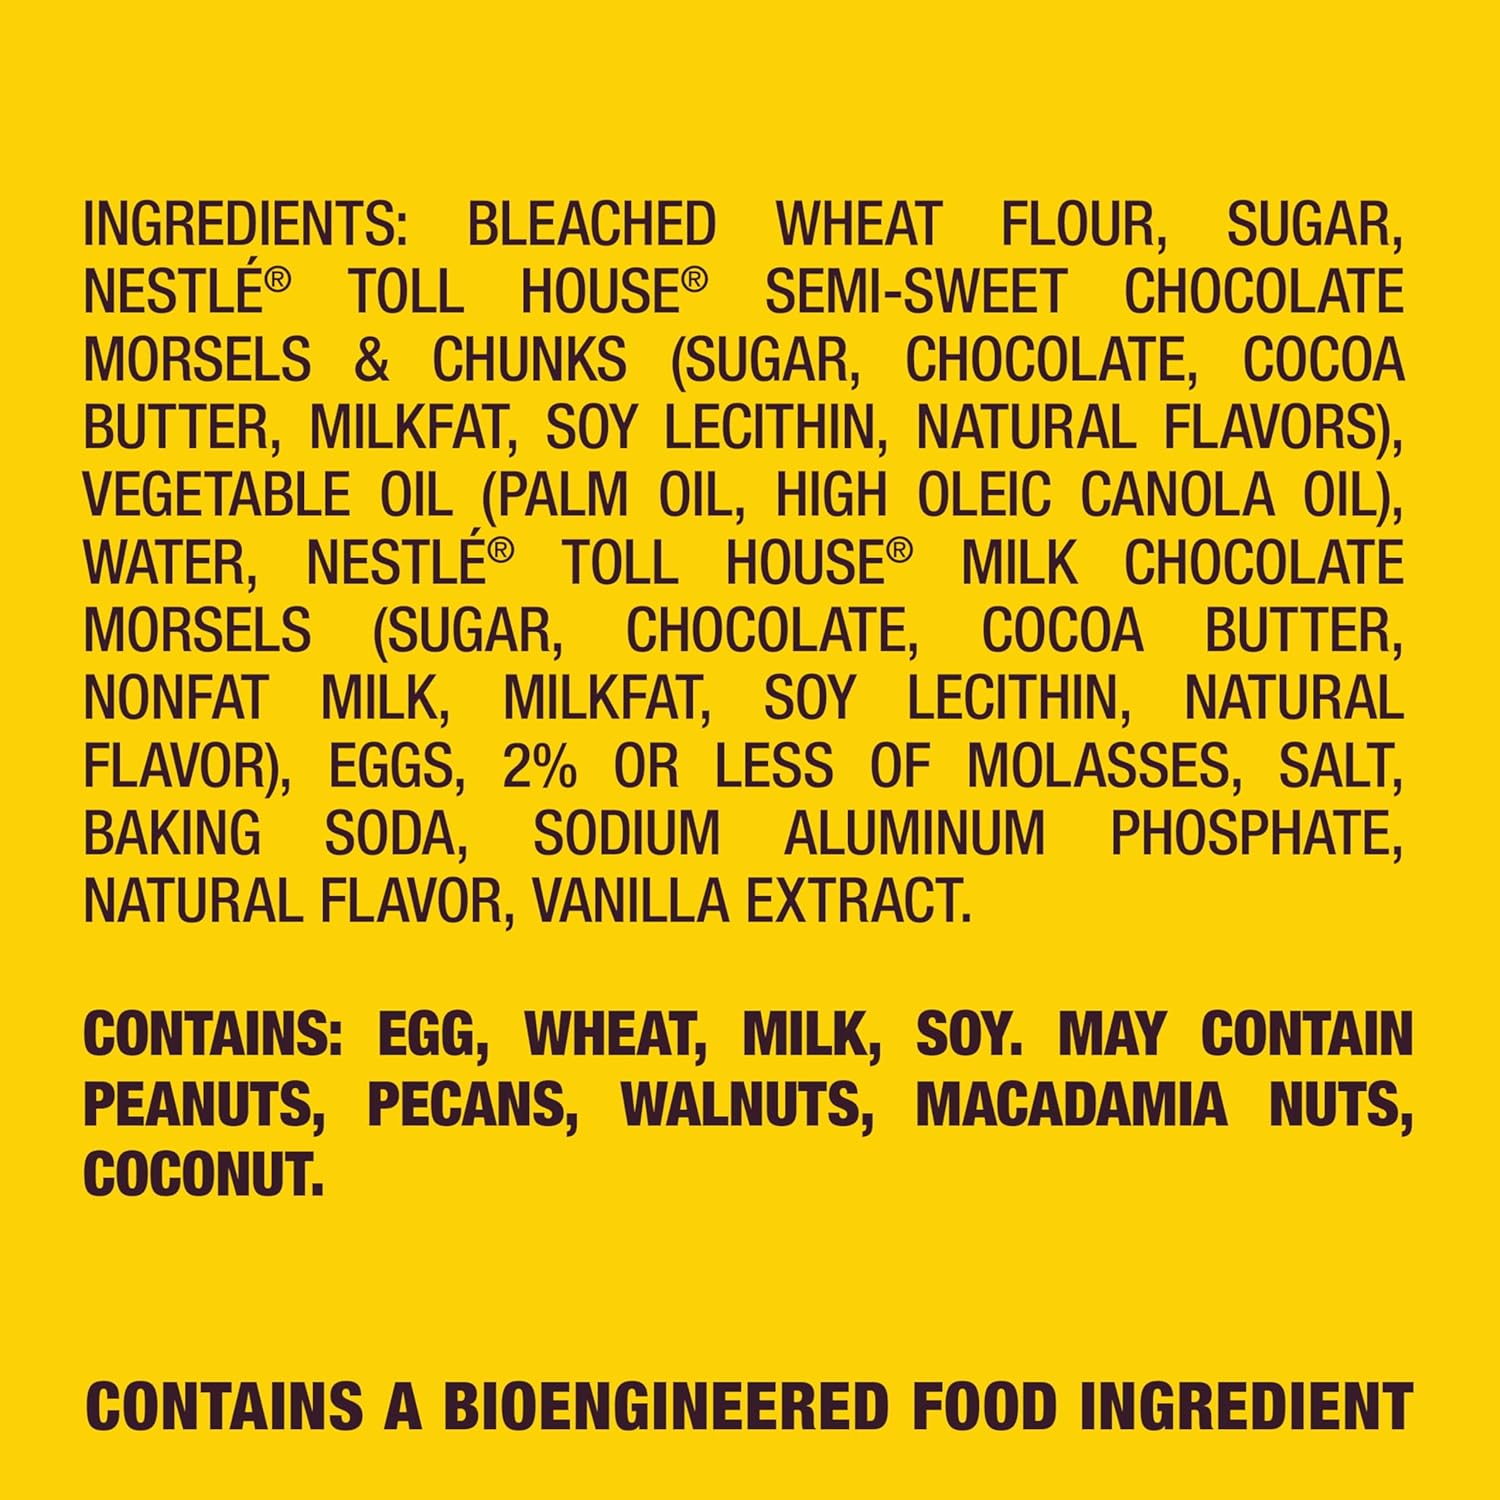
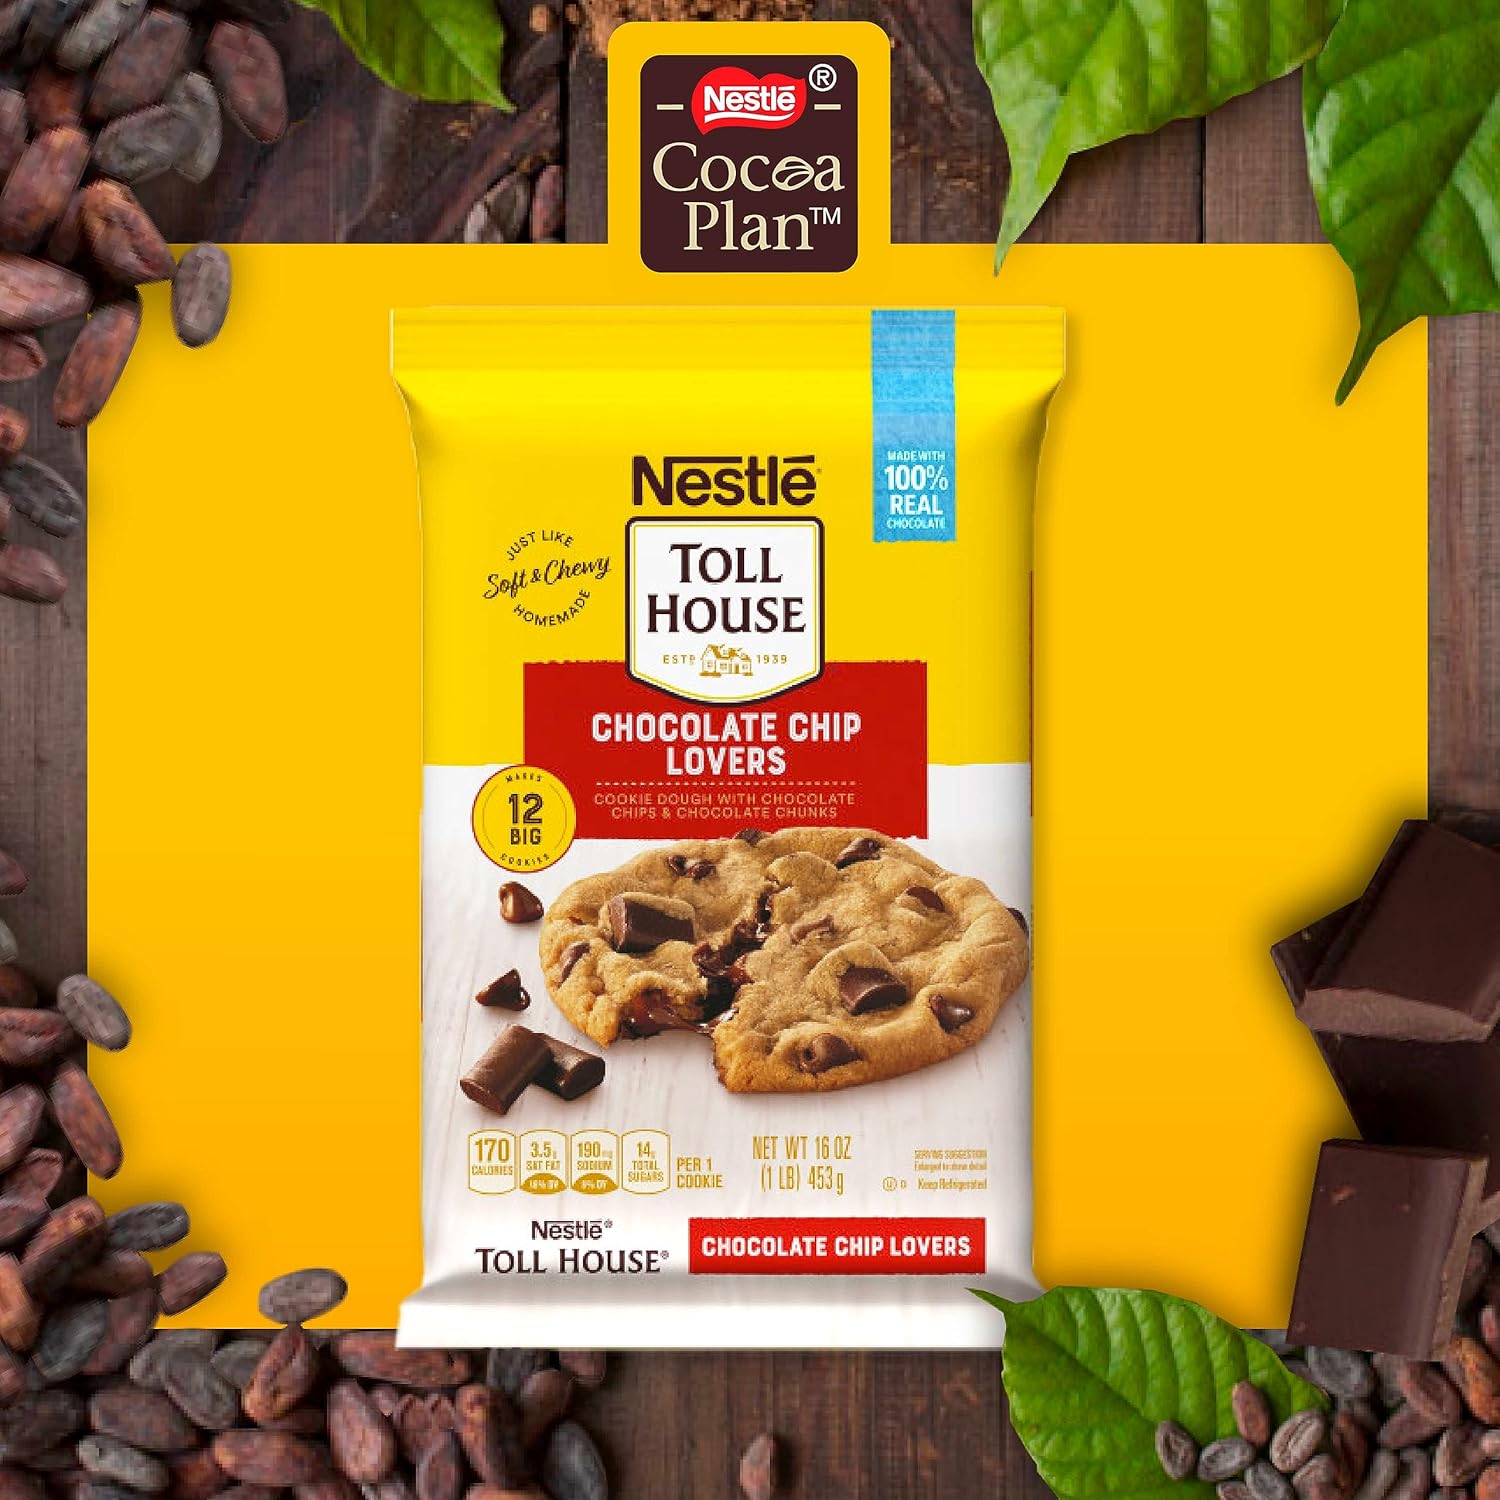
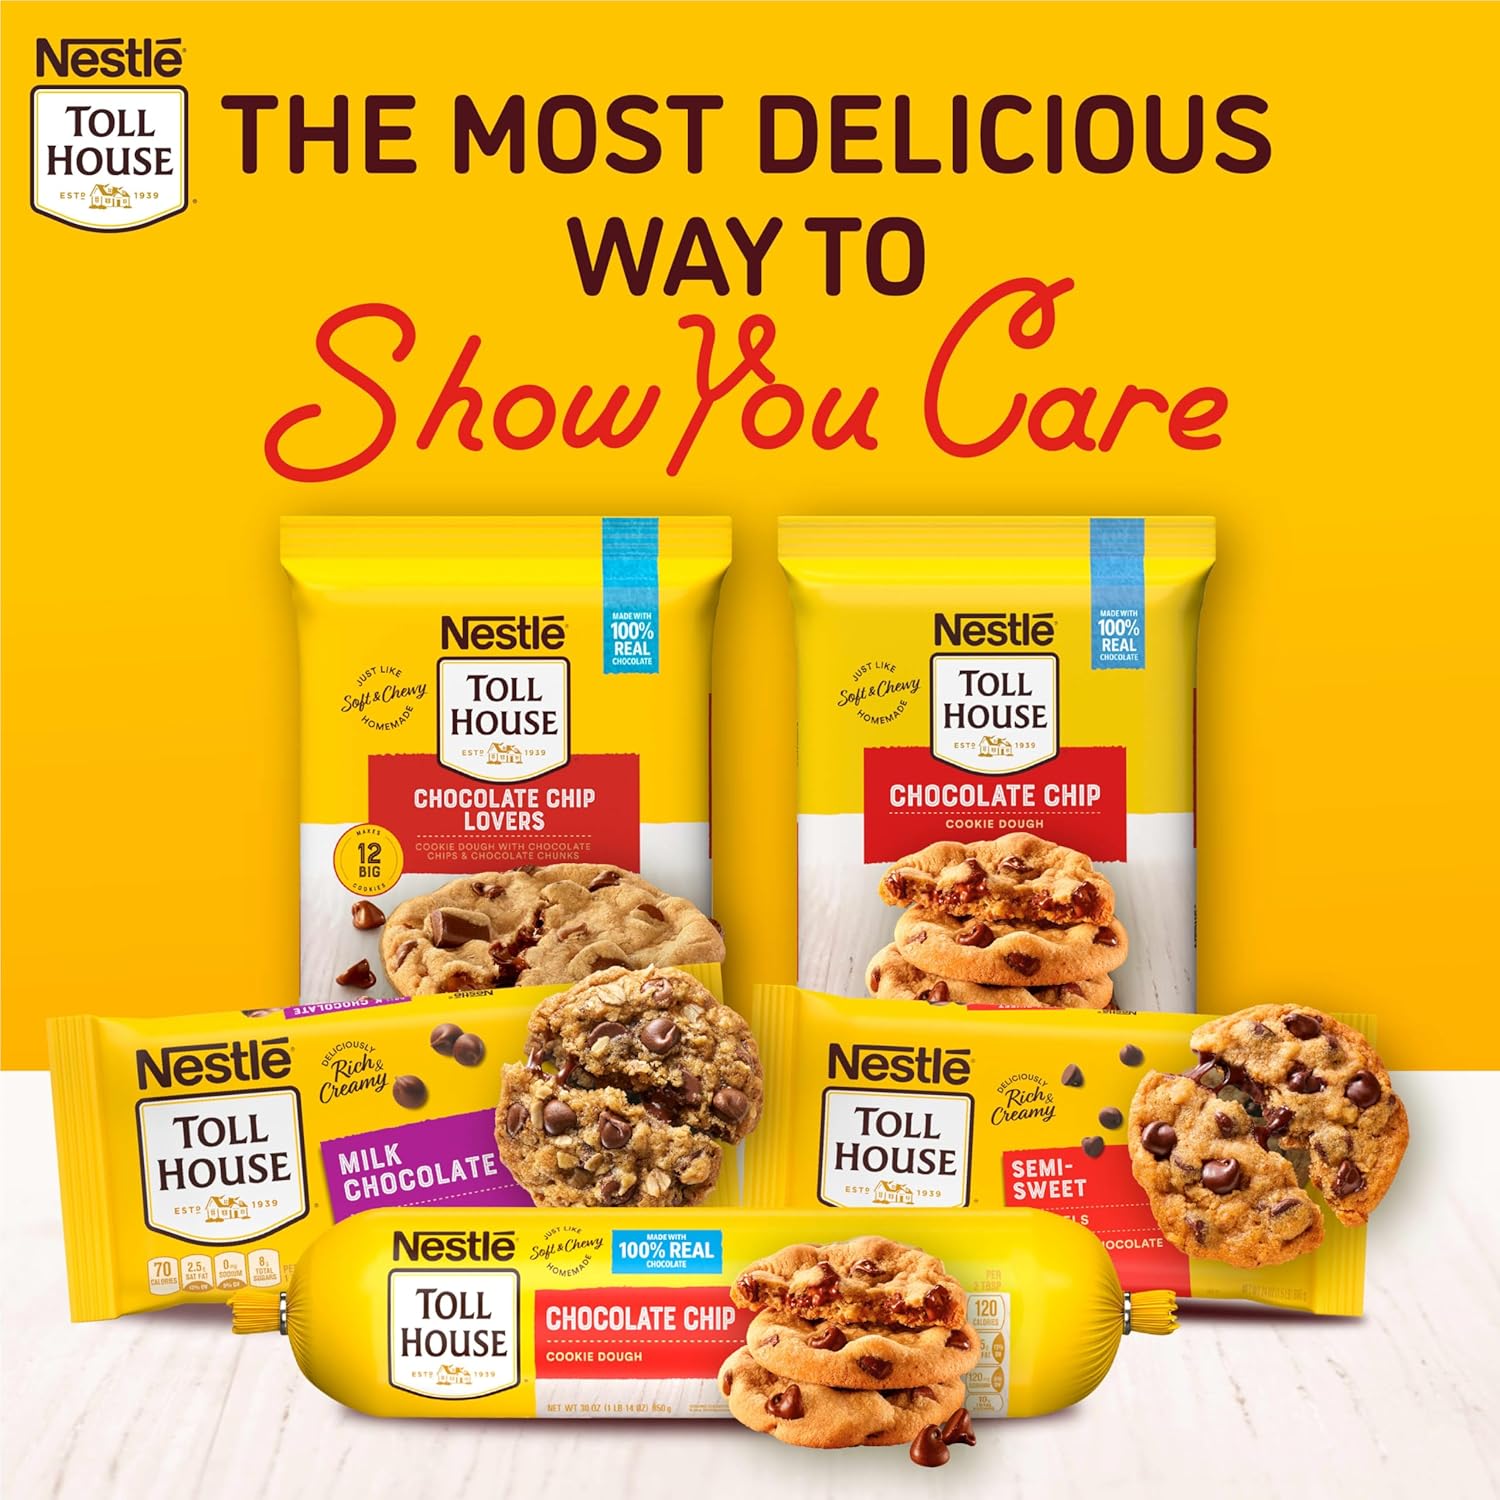
Can I use different types of chocolate in Nestle Toll House cookies?
Absolutely! One of the great things about the Nestle Toll House chocolate chip cookie recipe is its versatility and adaptability. While the original recipe calls for semi-sweet chocolate chips, you can easily substitute or combine different types of chocolate to create unique and delicious flavor combinations. Using dark chocolate chips will result in a richer, more intense chocolate flavor. Dark chocolate typically has a higher cocoa content and less sugar than semi-sweet chocolate, so the cookies will be slightly less sweet. Milk chocolate chips will create a sweeter, creamier cookie with a more subtle chocolate flavor. Milk chocolate contains more sugar and milk solids than semi-sweet or dark chocolate, resulting in a milder taste. White chocolate chips will add a sweet, buttery flavor and a creamy texture to the cookies. White chocolate is technically not chocolate, as it doesn’t contain cocoa solids, but it’s a popular addition to many desserts. You can also combine different types of chocolate chips to create a more complex flavor profile. For example, you could use a combination of semi-sweet and dark chocolate chips for a balanced flavor that’s both sweet and rich. Or you could use a combination of milk chocolate and white chocolate chips for a creamy, sweet cookie with a hint of vanilla. In addition to chocolate chips, you can also use chopped chocolate bars in your Nestle Toll House cookies. Chopping a chocolate bar into small pieces will create a more irregular distribution of chocolate in the cookies, resulting in pockets of melted chocolate throughout. When using chopped chocolate, choose a high-quality chocolate bar for the best flavor. Experiment with different types of chocolate bars, such as milk chocolate, dark chocolate, bittersweet chocolate, or even flavored chocolate bars like salted caramel or mint chocolate. No matter what type of chocolate you choose, be sure to use good-quality chocolate for the best flavor and texture. Good-quality chocolate will melt smoothly and evenly, creating a delicious and satisfying cookie. The possibilities are endless when it comes to using different types of chocolate in Nestle Toll House cookies. Don’t be afraid to experiment and find your favorite flavor combinations.
What are some creative ways to package Halloween cookies as gifts?
Packaging Halloween cookies as gifts is a fun way to share your spooky creations with friends, family, and neighbors. The presentation of the cookies can add an extra touch of thoughtfulness and make the gift even more special. There are numerous creative ways to package Halloween cookies, depending on your style and budget. One simple and affordable option is to use cellophane bags. Place a few cookies in a cellophane bag, tie it with a festive ribbon or twine, and attach a handwritten tag with a Halloween greeting. You can also add some spooky embellishments, such as small plastic spiders, bats, or ghosts, to the ribbon for an extra touch of Halloween flair. Another popular option is to use decorative tins or boxes. Choose a tin or box with a Halloween theme or decorate a plain tin or box with Halloween-themed stickers, paint, or decoupage. Line the tin or box with parchment paper or tissue paper to protect the cookies and arrange them artfully inside. You can also add some Halloween-themed candies, such as candy corn, gummy worms, or chocolate eyeballs, to the tin or box. Mason jars are another great option for packaging Halloween cookies. Layer the cookies in a mason jar and tie a ribbon or twine around the lid. You can also add a label to the jar with the cookie recipe or a Halloween message. Decorate the jar with Halloween-themed stickers or paint for a festive touch. For a more upscale presentation, consider using small gift boxes with clear lids. These boxes allow the recipient to see the beautiful cookies inside while keeping them protected. Line the box with tissue paper and arrange the cookies carefully inside. Tie a ribbon around the box and attach a gift tag. You can also add some Halloween-themed confetti or glitter to the box for an extra sparkle. If you’re gifting a large number of cookies, consider creating a Halloween cookie platter. Arrange the cookies on a decorative platter or tray and wrap it tightly with cellophane wrap. Tie a ribbon around the platter and attach a gift tag. You can also add some Halloween-themed decorations, such as small pumpkins, gourds, or leaves, to the platter. No matter what packaging method you choose, be sure to include a handwritten note or gift tag to personalize the gift. A simple “Happy Halloween!” or “Enjoy these spooky treats!” can go a long way in making the recipient feel special.
How can I make my Halloween cookies more allergy-friendly?
Making Halloween cookies more allergy-friendly allows everyone to enjoy the spooky treats, regardless of dietary restrictions. Common allergens in cookies include wheat, dairy, eggs, and nuts, so it’s important to consider substitutions for these ingredients. For wheat-free cookies, use gluten-free flour blends that are specifically designed for baking. These blends typically contain a combination of rice flour, tapioca starch, and potato starch, and they can be substituted one-to-one for wheat flour in most cookie recipes. Be sure to check the label to ensure that the gluten-free flour blend is certified gluten-free. For dairy-free cookies, substitute the butter with a dairy-free alternative, such as coconut oil, vegan butter sticks, or applesauce. Coconut oil will add a slightly coconutty flavor to the cookies, while vegan butter sticks will provide a more buttery flavor. Applesauce will make the cookies softer and chewier. You can also substitute the milk with a dairy-free milk alternative, such as almond milk, soy milk, or coconut milk. For egg-free cookies, substitute the eggs with applesauce, mashed banana, or flaxseed meal. Applesauce and mashed banana will add moisture and sweetness to the cookies, while flaxseed meal will act as a binder. To make flaxseed meal, combine one tablespoon of ground flaxseed with three tablespoons of water and let it sit for five minutes to thicken. For nut-free cookies, avoid using any nuts or nut butters in the recipe. Be sure to check the labels of all ingredients to ensure that they are manufactured in a nut-free facility. You can substitute the nuts with seeds, such as sunflower seeds or pumpkin seeds, or with dried fruit, such as raisins or cranberries. When making allergy-friendly cookies, it’s important to be extra careful about cross-contamination. Use clean baking equipment and utensils and wash your hands thoroughly before starting to bake. If you’re baking for someone with a severe allergy, it’s best to bake in a separate kitchen or at a different time to avoid any potential contamination. Label the allergy-friendly cookies clearly to avoid any confusion. You can use a label that says “Gluten-Free,” “Dairy-Free,” “Egg-Free,” or “Nut-Free,” depending on the specific allergy. With a little planning and attention to detail, you can create delicious and allergy-friendly Halloween cookies that everyone can enjoy.
What are some tips for baking cookies with kids?
Baking cookies with kids can be a fun and rewarding experience, creating lasting memories and fostering a love for baking. However, it’s important to plan ahead and set realistic expectations to ensure a smooth and enjoyable process. First and foremost, choose a simple recipe that’s appropriate for your child’s age and skill level. Nestle Toll House chocolate chip cookies are a great option, as they’re easy to make and require minimal supervision. Gather all the ingredients and equipment before you start baking. This will prevent frustration and ensure that you have everything you need within reach. Pre-measure the ingredients into separate bowls or containers. This will make it easier for kids to add the ingredients to the mixing bowl and reduce the risk of spills. Assign age-appropriate tasks to each child. Younger children can help with simple tasks, such as stirring ingredients, sprinkling decorations, or placing cookies on the baking sheet. Older children can help with more complex tasks, such as measuring ingredients, creaming butter and sugar, or decorating the cookies. Supervise children closely, especially when using sharp tools or hot appliances. Teach them about safety and hygiene, such as washing their hands before baking and avoiding touching their face or hair. Be patient and understanding. Baking with kids can be messy and time-consuming, so it’s important to be patient and understanding. Don’t expect perfection and be prepared to clean up spills and messes. Encourage creativity and let kids personalize their cookies. Provide a variety of decorating options, such as sprinkles, candies, and colored icing, and let kids decorate their cookies in their own unique way. Make it fun and enjoyable. Baking with kids should be a fun and enjoyable experience for everyone involved. Play some music, tell some jokes, and laugh together. Most importantly, celebrate the finished product. Let kids admire their creations and enjoy eating the cookies they helped to make. Baking cookies with kids is a wonderful way to spend quality time together, teach valuable life skills, and create delicious treats that everyone can enjoy. Even if it turns into more of a flour-covered frenzy than a culinary masterpiece, the memories are worth it.


Price: $3.99
(as of Sep 11, 2025 07:53:11 UTC – Details)


