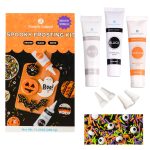
Best Halloween Frosting Kit with Sprinkles & Idea Halloween Sugar Cookies Review – Oemiu
Best Halloween Frosting Kit with Sprinkles & Idea Halloween Sugar Cookies Review
Halloween is a time for spooky fun, creative costumes, and, of course, delicious treats! Baking and decorating Halloween sugar cookies is a cherished tradition for many families. But let’s face it: the right frosting and sprinkles can make or break the entire cookie experience. That’s why choosing the best Halloween frosting kit with sprinkles is crucial for achieving truly boo-tiful and delectable cookies. This article dives deep into selecting the perfect kit and offers some creative Halloween sugar cookies ideas to elevate your spooky season baking.
Finding the Perfect Halloween Frosting Kit: What to Look For
The quest for the ultimate Halloween frosting kit can feel overwhelming with so many options available. However, focusing on key aspects will streamline your search and guarantee a delightful decorating experience. Consider these factors when making your choice:
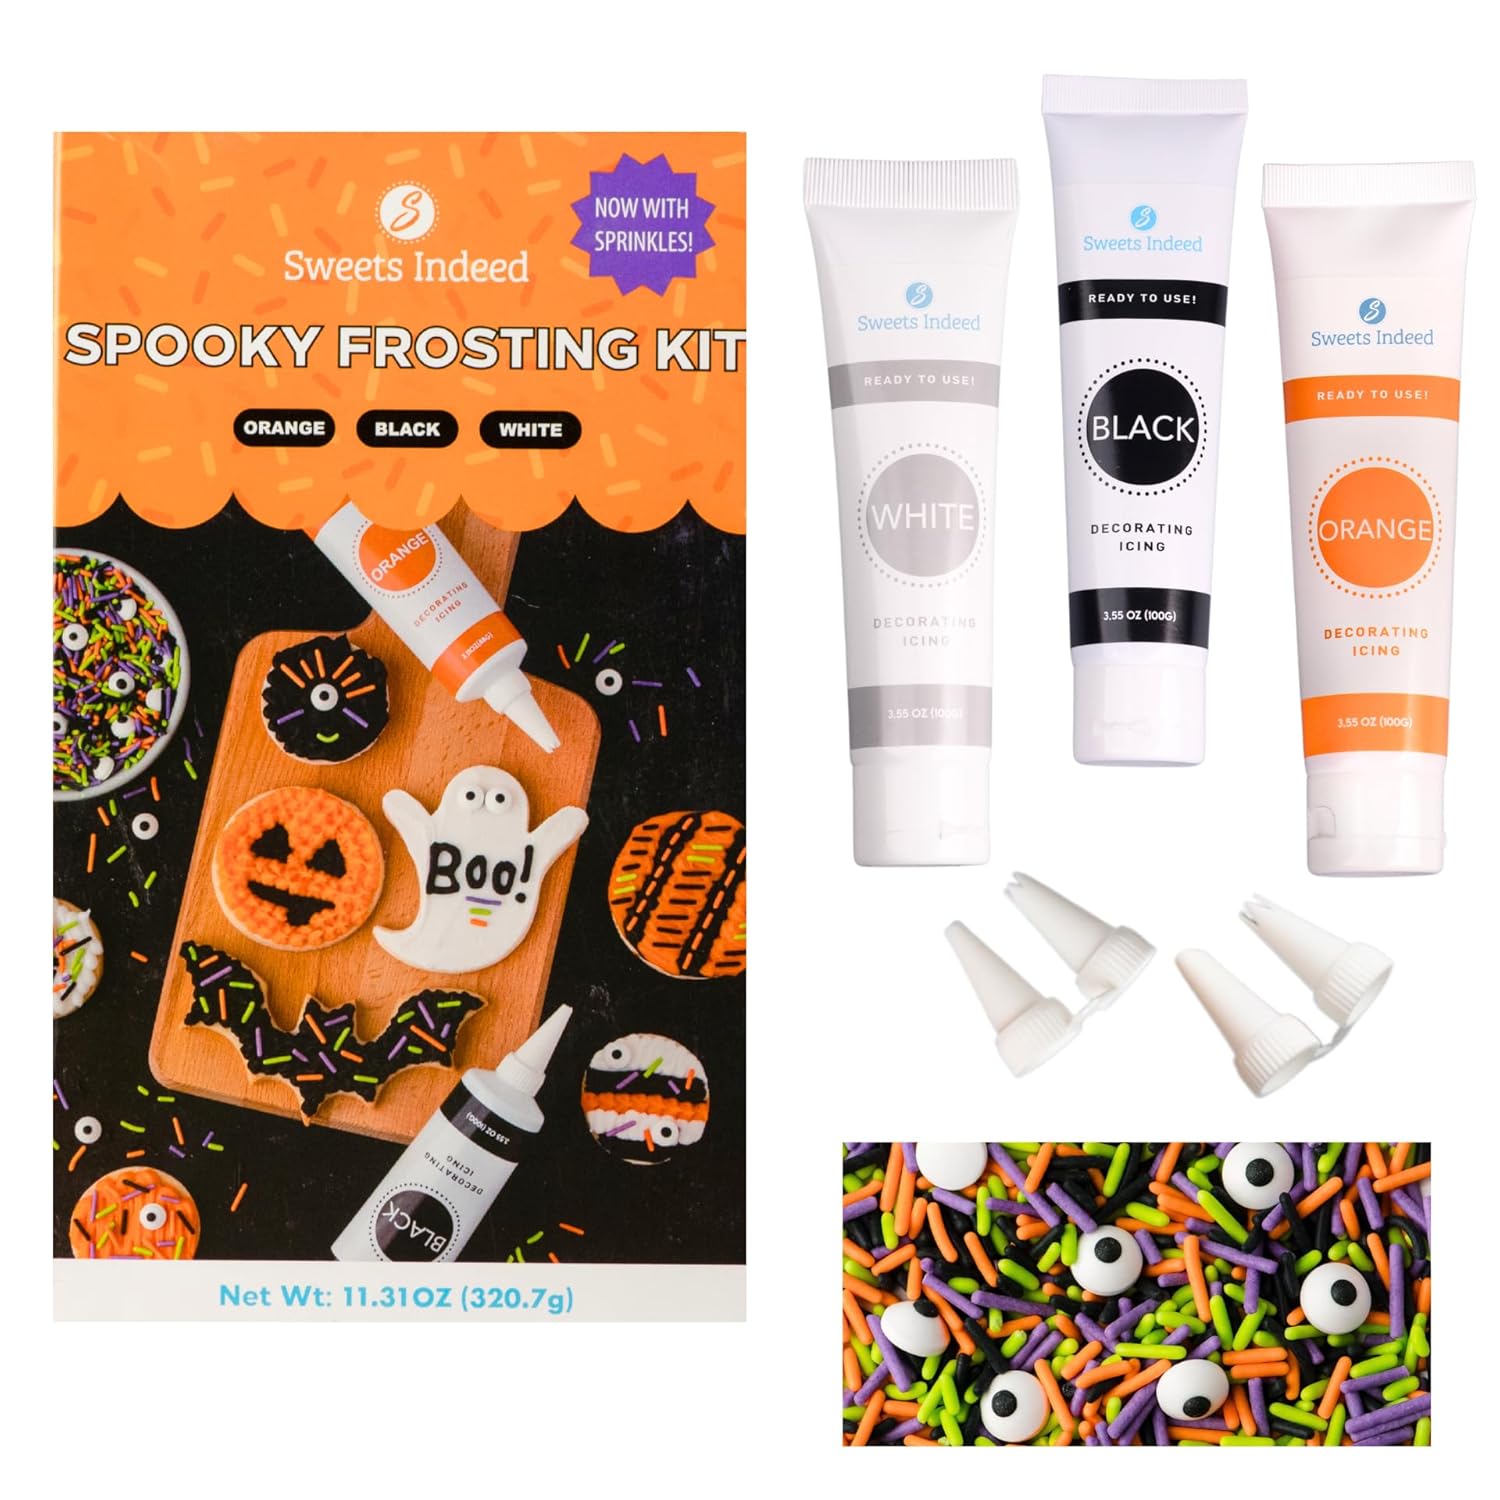
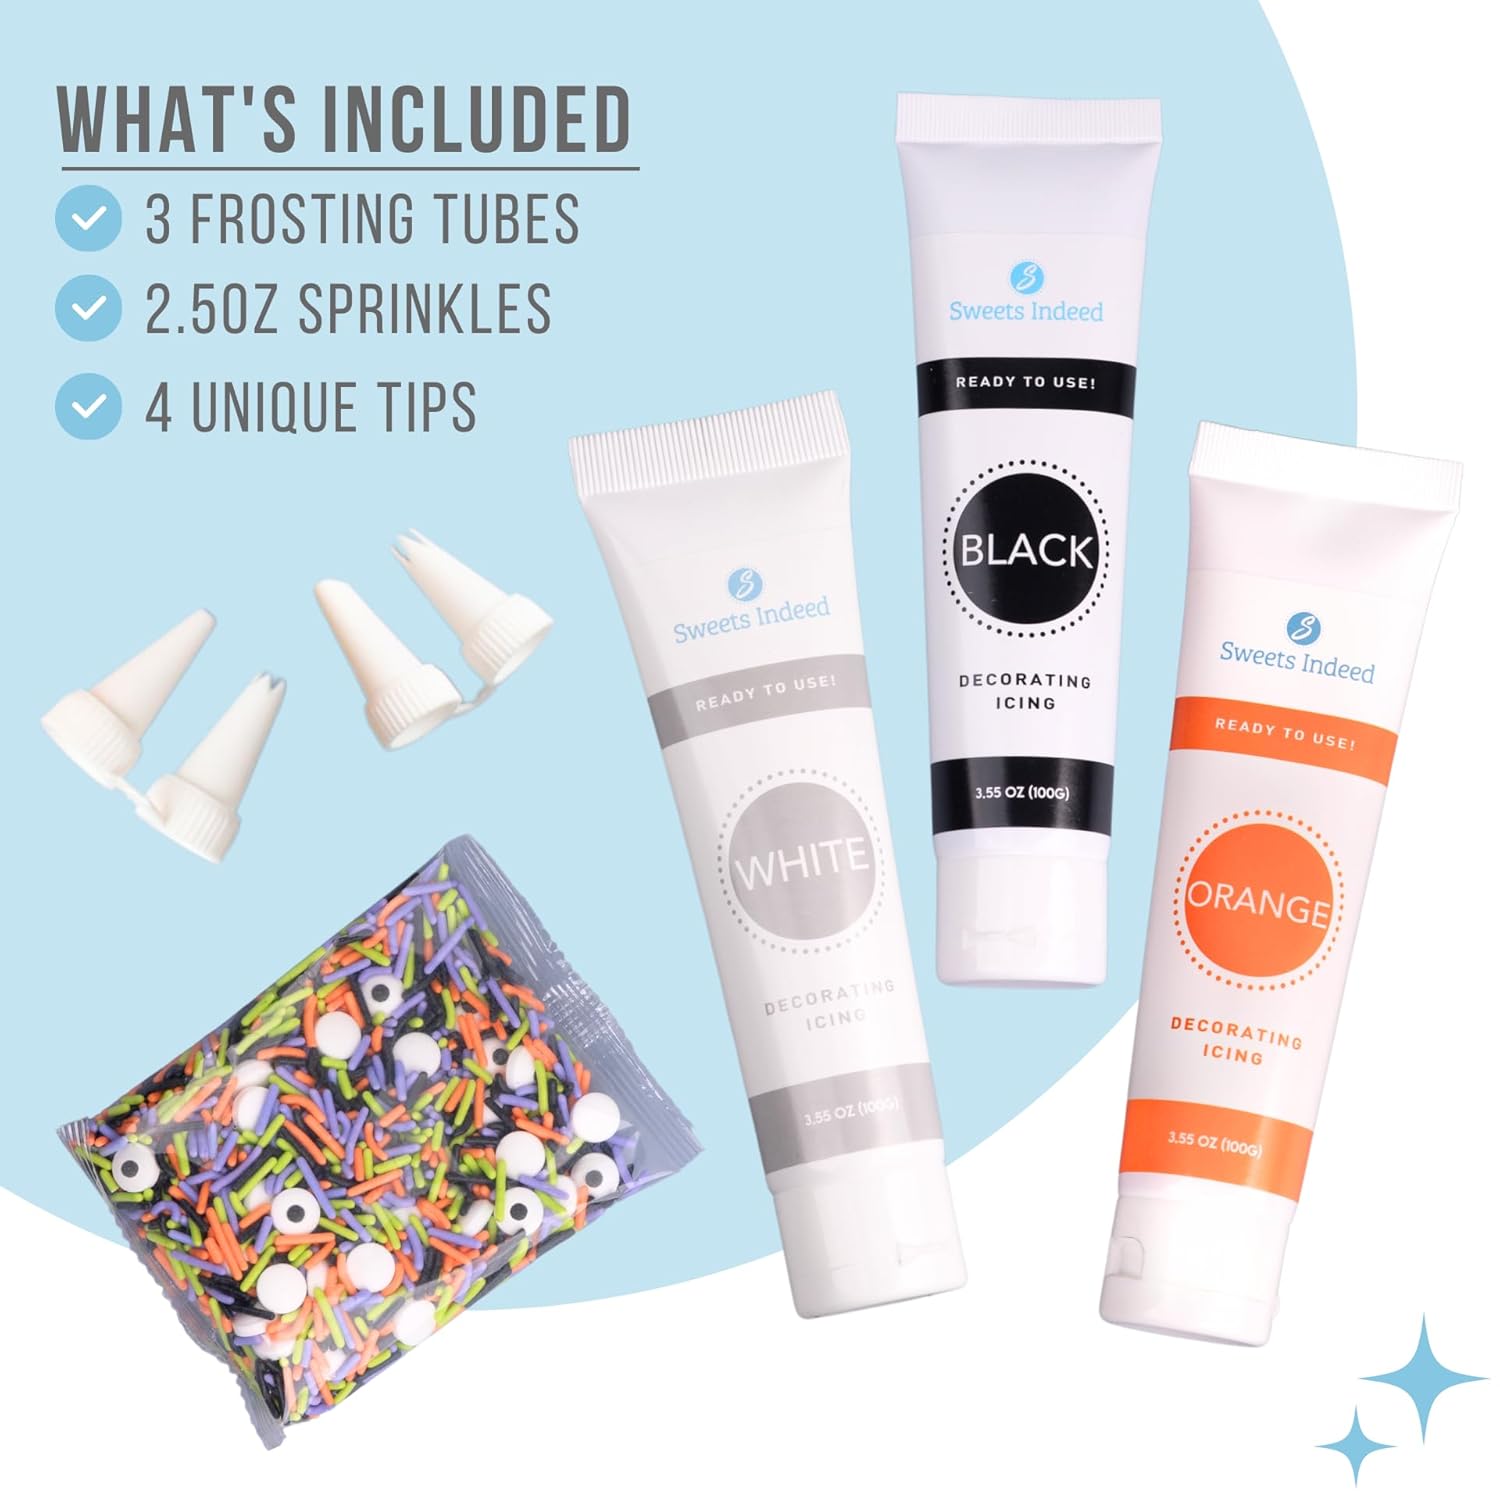
- Variety of Colors: A great kit should offer a spectrum of Halloween-themed colors like vibrant orange, deep black, ghostly white, wicked green, and perhaps even a shimmering purple. This allows for intricate designs and creative expression. Imagine conjuring up a cauldron of bubbling green frosting, a mischievous black cat silhouette, or a friendly ghost with a pristine white coat. The more colors, the more possibilities.
- Frosting Consistency: The consistency of the frosting is paramount. It needs to be smooth enough for easy spreading but thick enough to hold its shape when piping. Avoid frostings that are too runny, as they will bleed and ruin your designs. A frosting that’s too stiff will be difficult to work with and may crack. Look for descriptions like “smooth,” “easy to spread,” or “piping-friendly.”
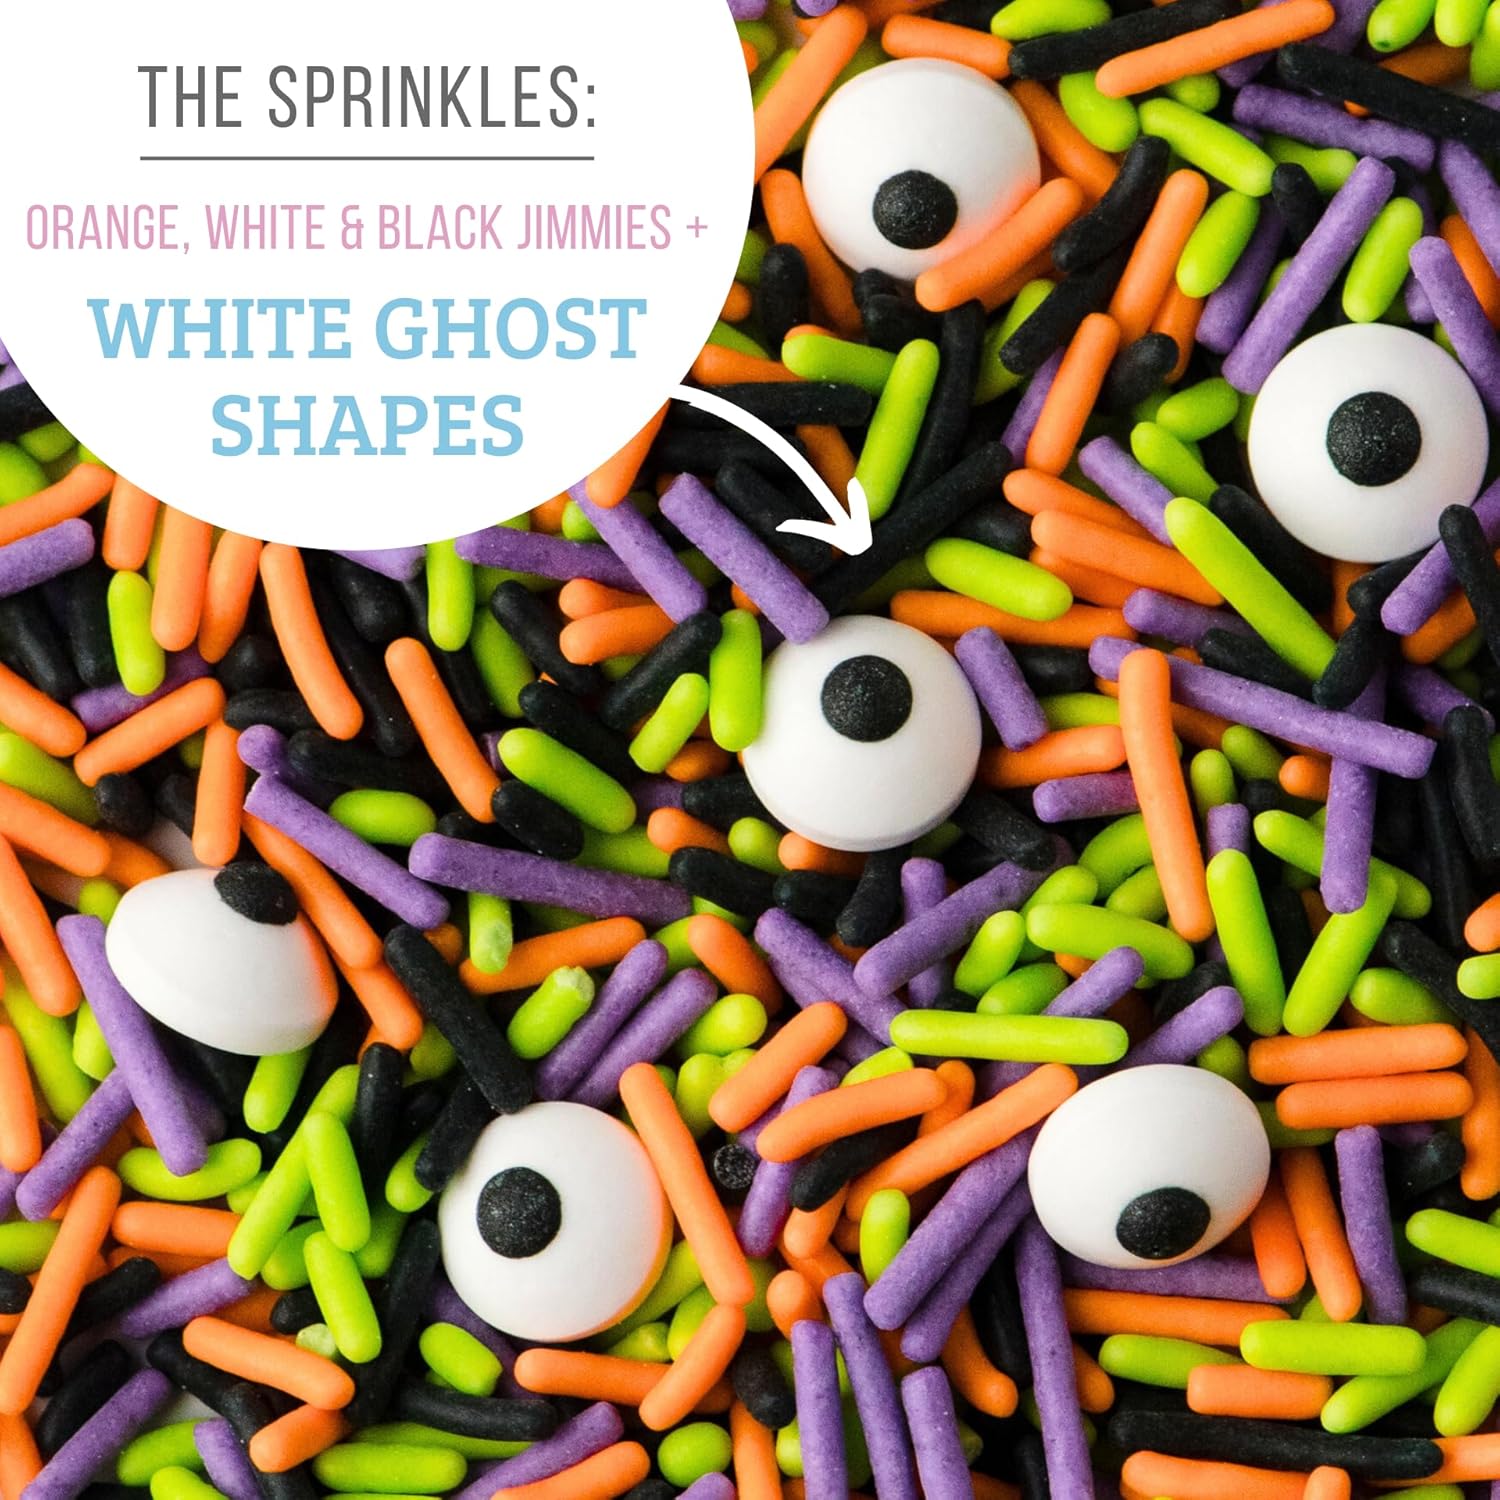
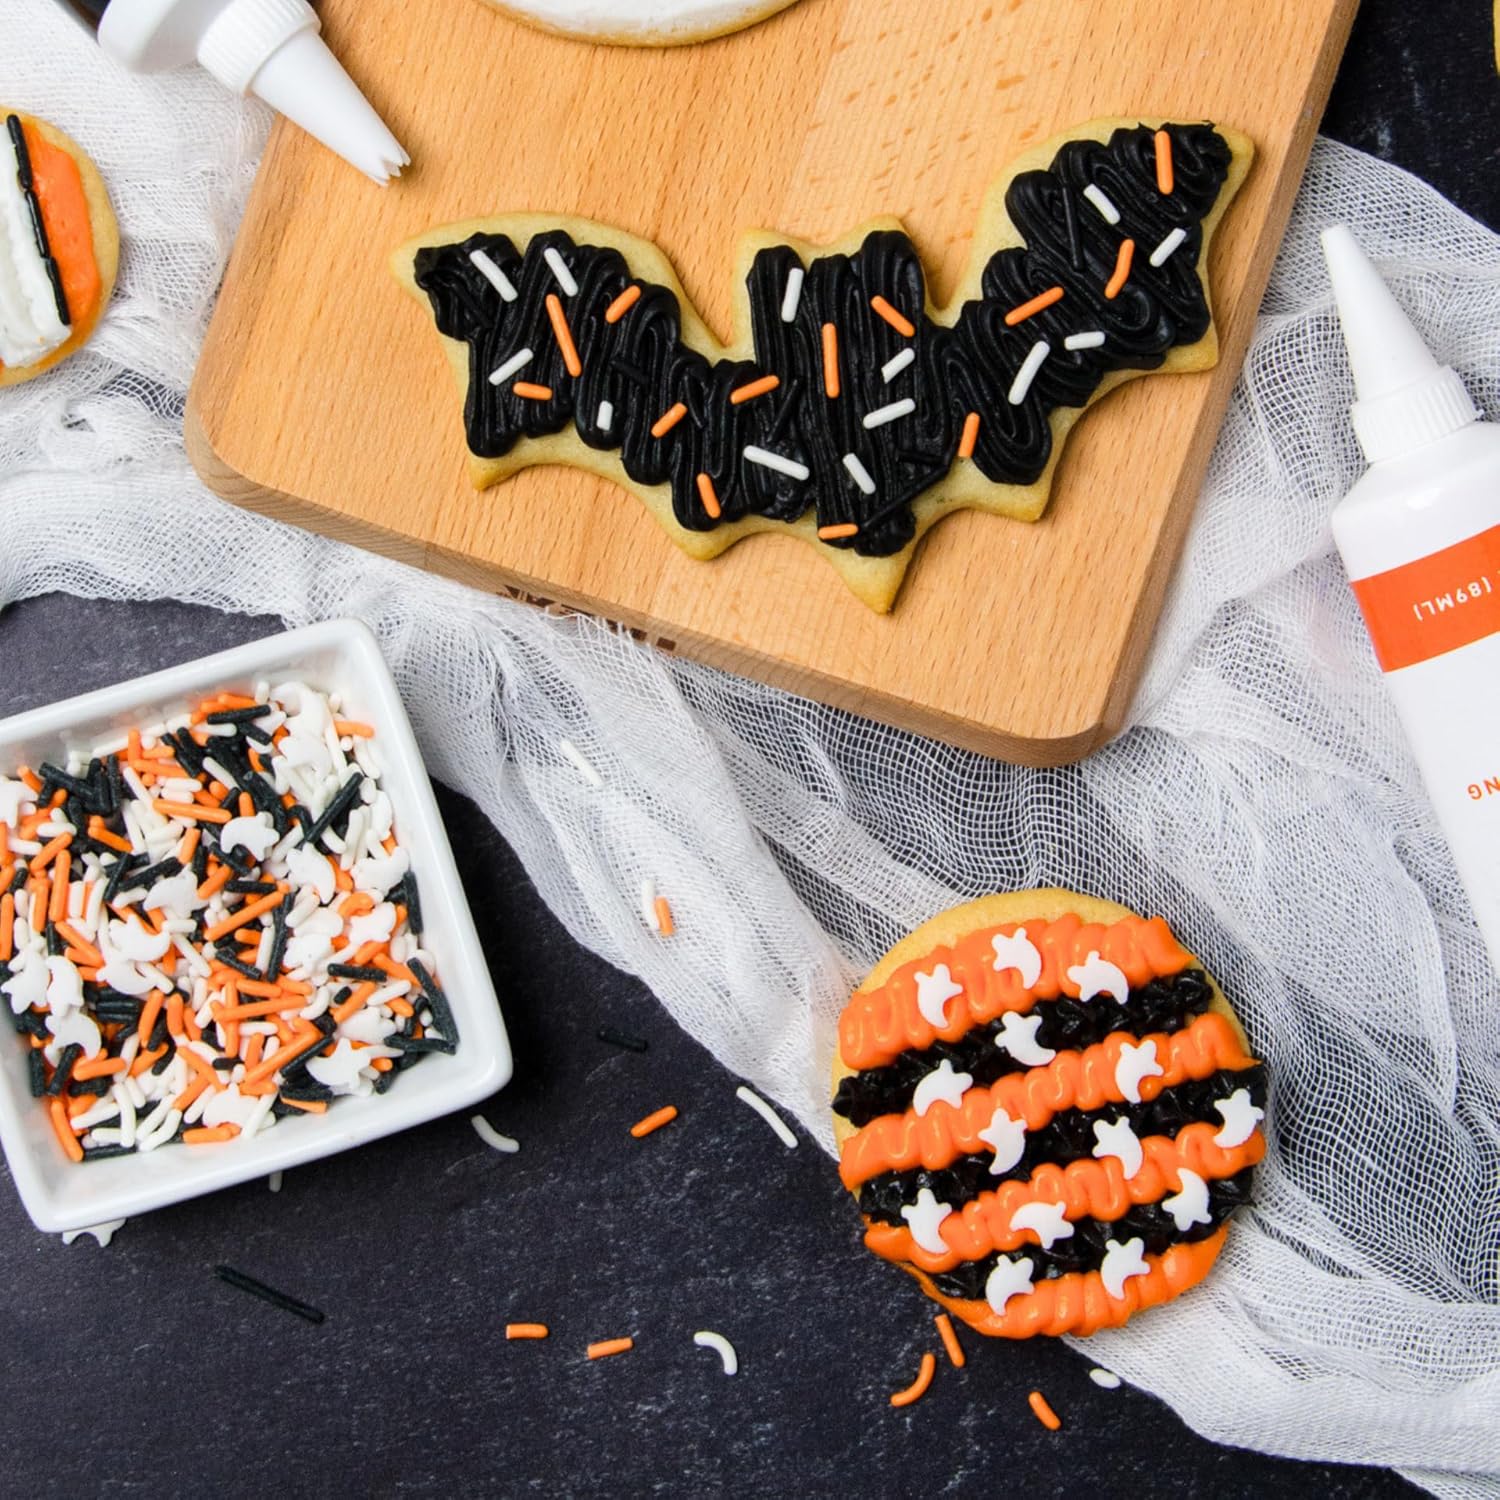
- Sprinkle Selection: Sprinkles add texture, sparkle, and an extra layer of fun to your cookies. A good kit will include a diverse range of sprinkles, such as classic jimmies (the long, thin sprinkles), nonpareils (the tiny, round sprinkles), sugar crystals, and shaped sprinkles like bats, ghosts, pumpkins, or even edible glitter. Consider the sprinkle colors and shapes when planning your cookie designs.
- Ease of Use: Especially if you’re baking with children, ease of use is essential. Kits that include piping bags, decorating tips, and clear instructions will make the process smoother and more enjoyable. Squeeze bottles filled with frosting can also be a great option for younger decorators. Look for kits that are designed for beginners or that specifically mention their user-friendliness.
- Taste and Ingredients: While aesthetics are important, taste should never be compromised. Read reviews and ingredient lists to ensure the frosting is palatable and made with quality ingredients. Avoid frostings that are overly sweet or have an artificial taste. Natural flavors and colors are always a plus. Consider allergies and dietary restrictions when selecting a kit.
- Quantity: Think about how many cookies you plan to decorate and choose a kit that provides an adequate amount of frosting and sprinkles. Running out of frosting mid-decoration can be frustrating. It’s often better to have a little extra than not enough.
By carefully evaluating these factors, you can confidently select a Halloween frosting kit that will transform your sugar cookies into spooky masterpieces. Remember to read customer reviews and compare prices to make the best decision for your needs and budget.
Comparing Popular Halloween Frosting Kits
Let’s take a look at a few hypothetical Halloween frosting kits and compare their features:
| Kit Name | Colors | Sprinkles | Ease of Use | Taste | Price |
|---|---|---|---|---|---|
| Spooky Delights Frosting Kit | Orange, Black, White, Green | Jimmies, Nonpareils, Bat Shapes | Easy (Piping Bags Included) | Good (Vanilla Flavor) | $19.99 |
| Wicked Wonders Frosting Set | Purple, Black, Green | Sugar Crystals, Ghost Shapes, Edible Glitter | Moderate (Requires Some Piping Experience) | Excellent (Cream Cheese Flavor) | $24.99 |
| Monster Mash Frosting Fun Kit | Orange, White | Jimmies, Pumpkin Shapes | Very Easy (Squeeze Bottles) | Average (Artificial Vanilla Flavor) | $14.99 |
| Haunted House Frosting Bonanza | Orange, Black, White, Red, Brown, Green | Jimmies, Nonpareils, Sugar Crystals, Bat Shapes, Ghost Shapes, Pumpkin Shapes | Easy (Piping Bags and Tips Included) | Excellent (Vanilla and Chocolate Flavors) | $29.99 |
This table provides a simplified comparison. Reading detailed product descriptions and customer reviews is crucial for making an informed decision. Consider your baking skills, desired level of intricacy, and budget when choosing a kit. The ‘Haunted House Frosting Bonanza’, while the most expensive, offers the greatest variety and potentially the best taste based on the description.
Creative Halloween Sugar Cookies Ideas to Spark Your Imagination
Once you’ve secured the perfect frosting kit, it’s time to unleash your creativity and design some spooky-licious Halloween sugar cookies. The possibilities are endless, but here are a few ideas to get you started:
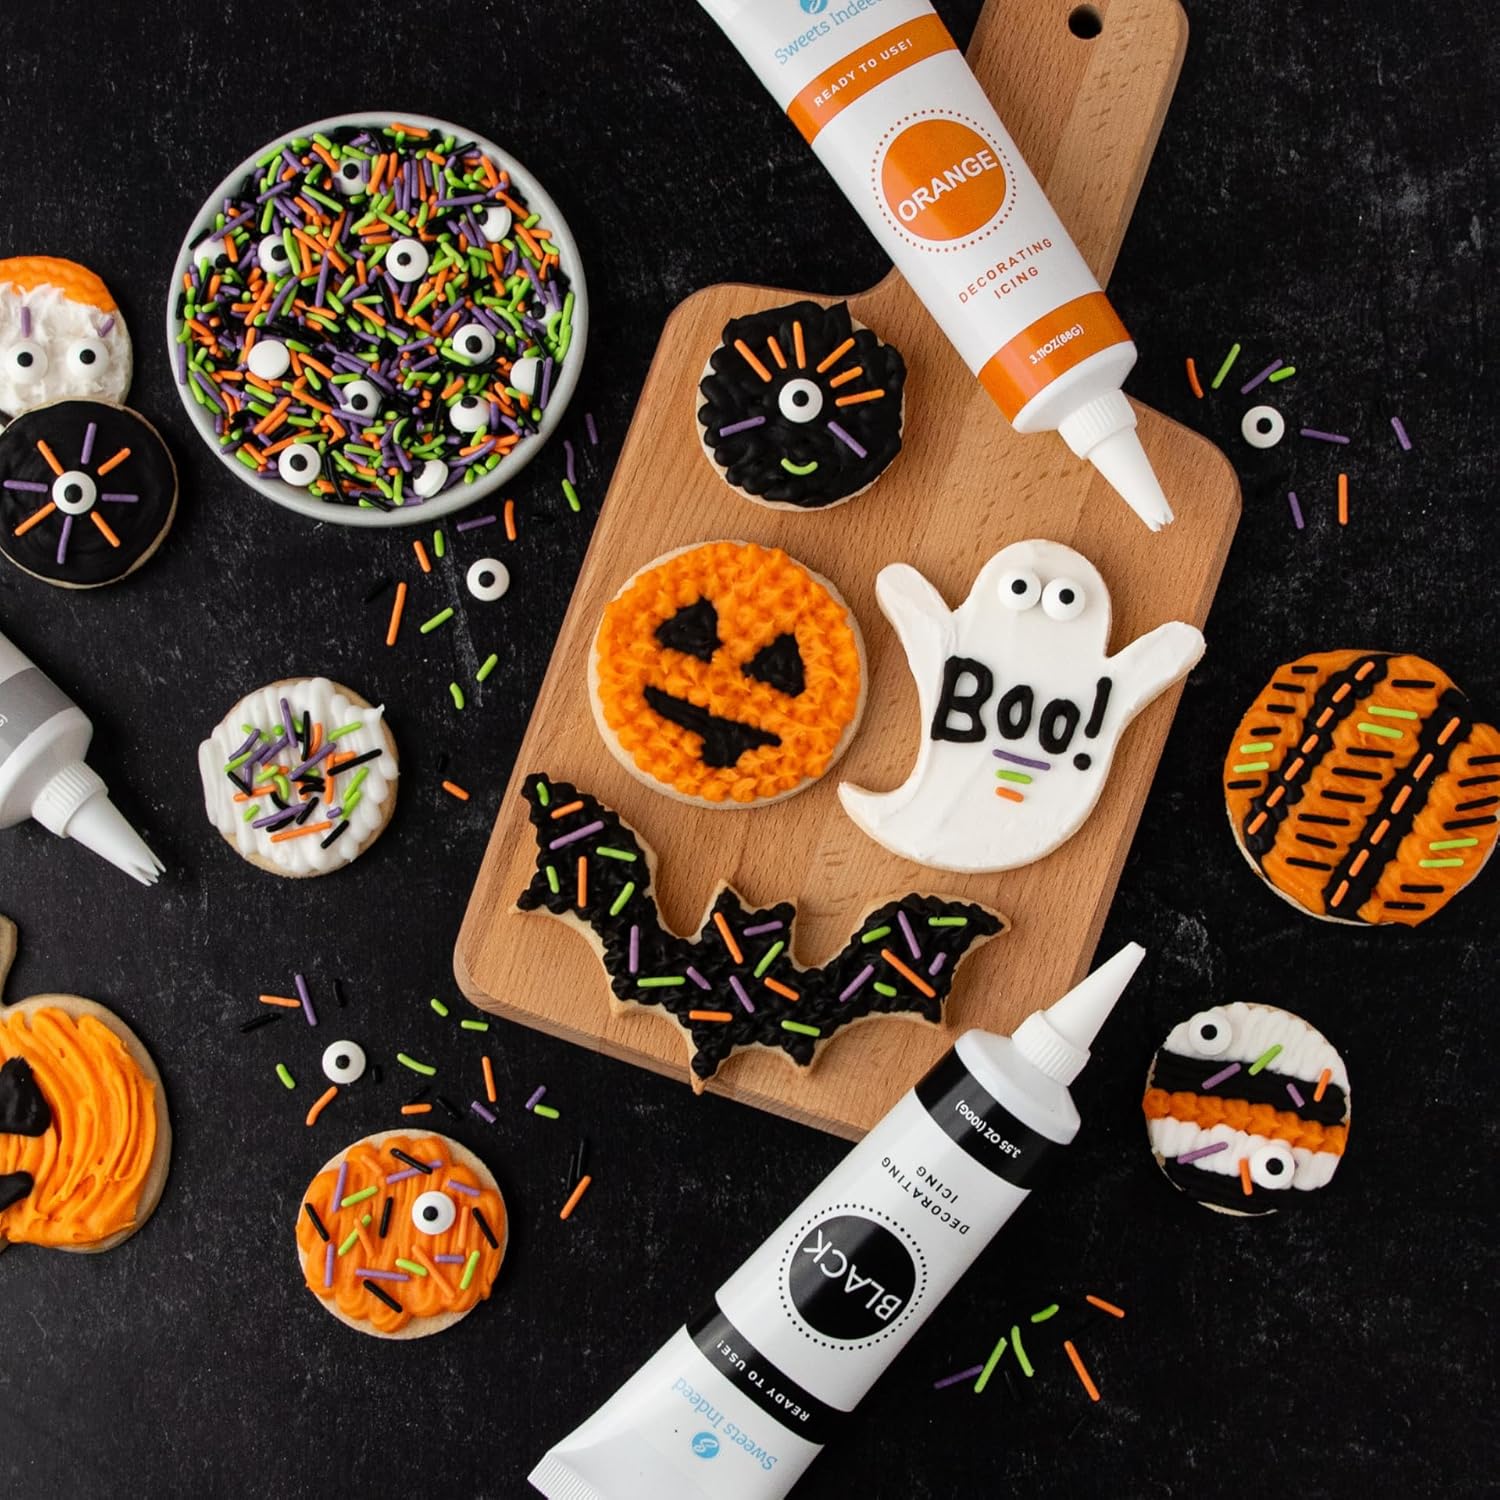
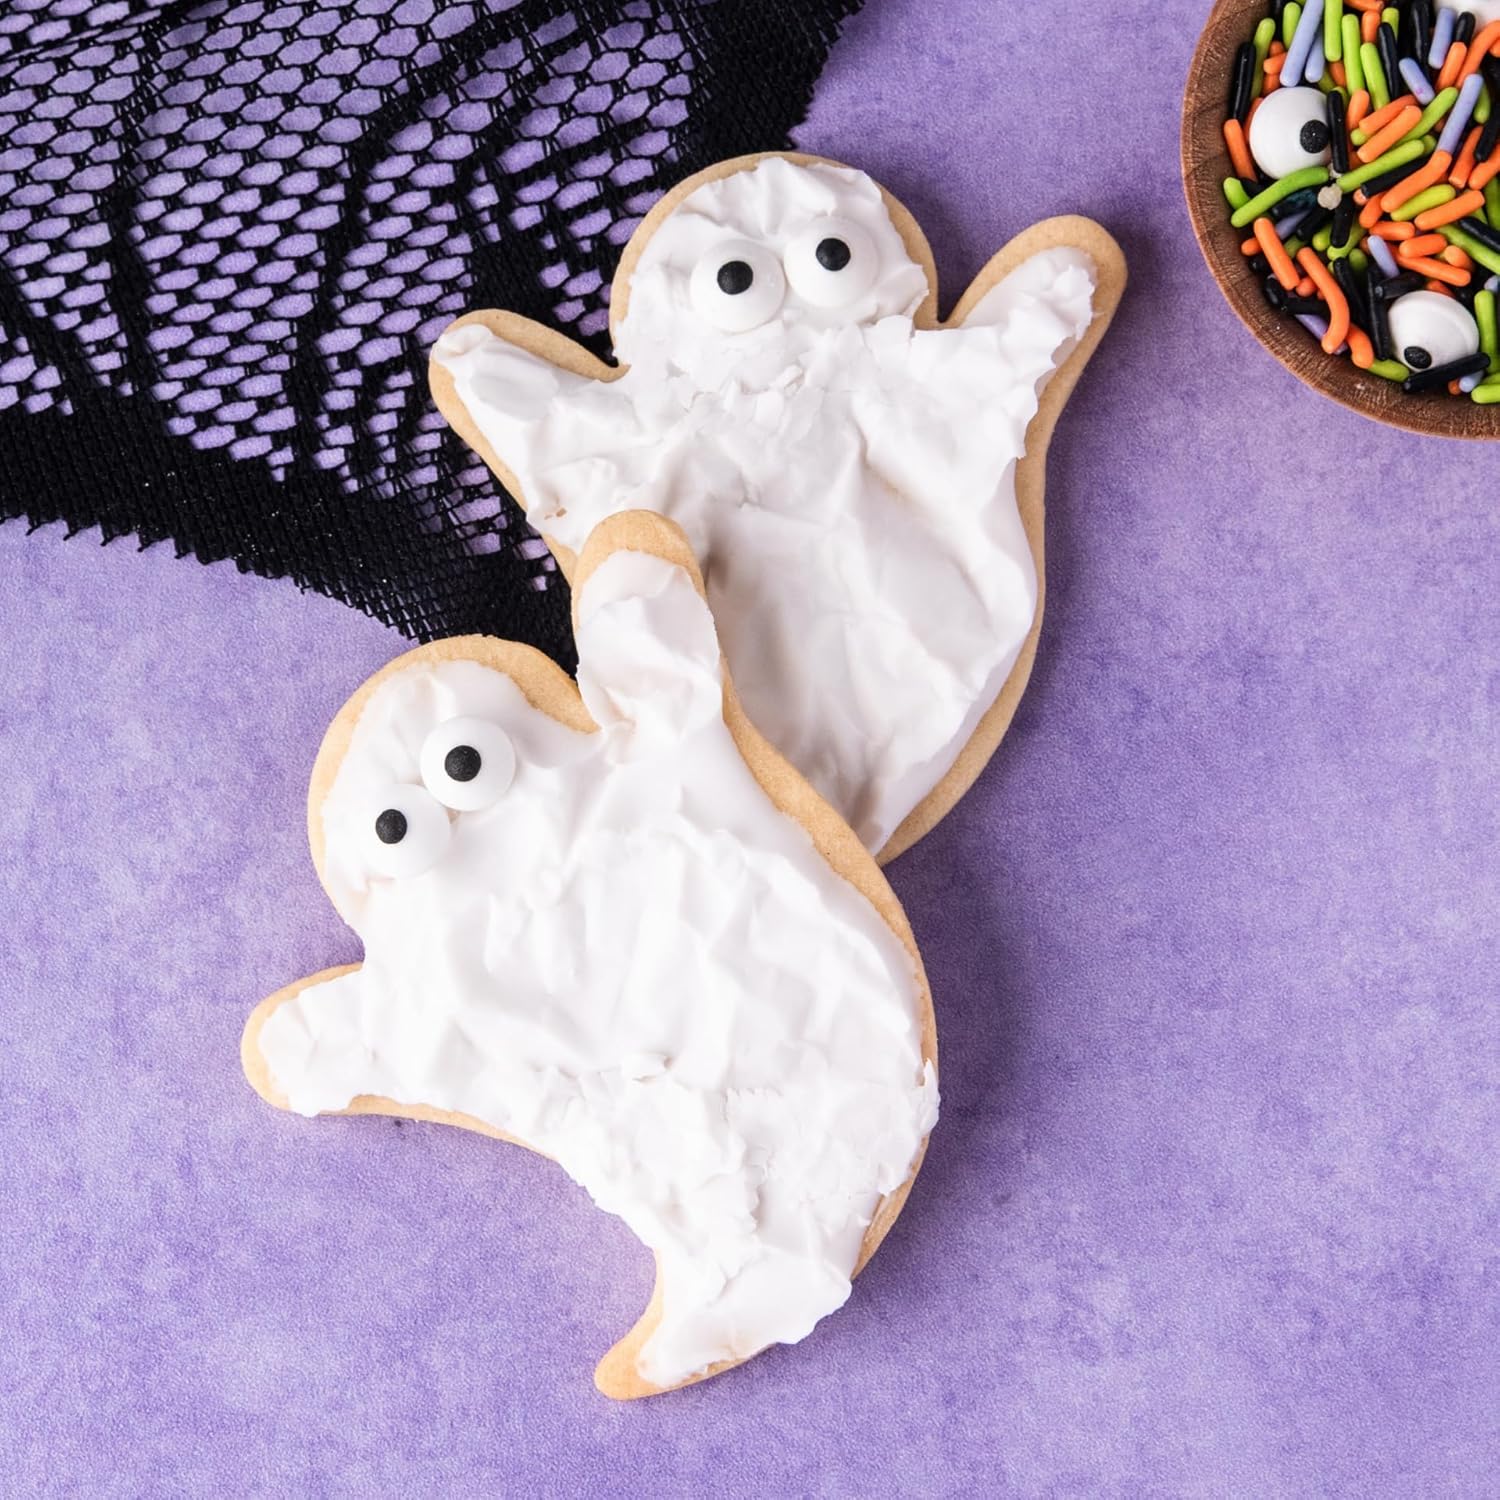
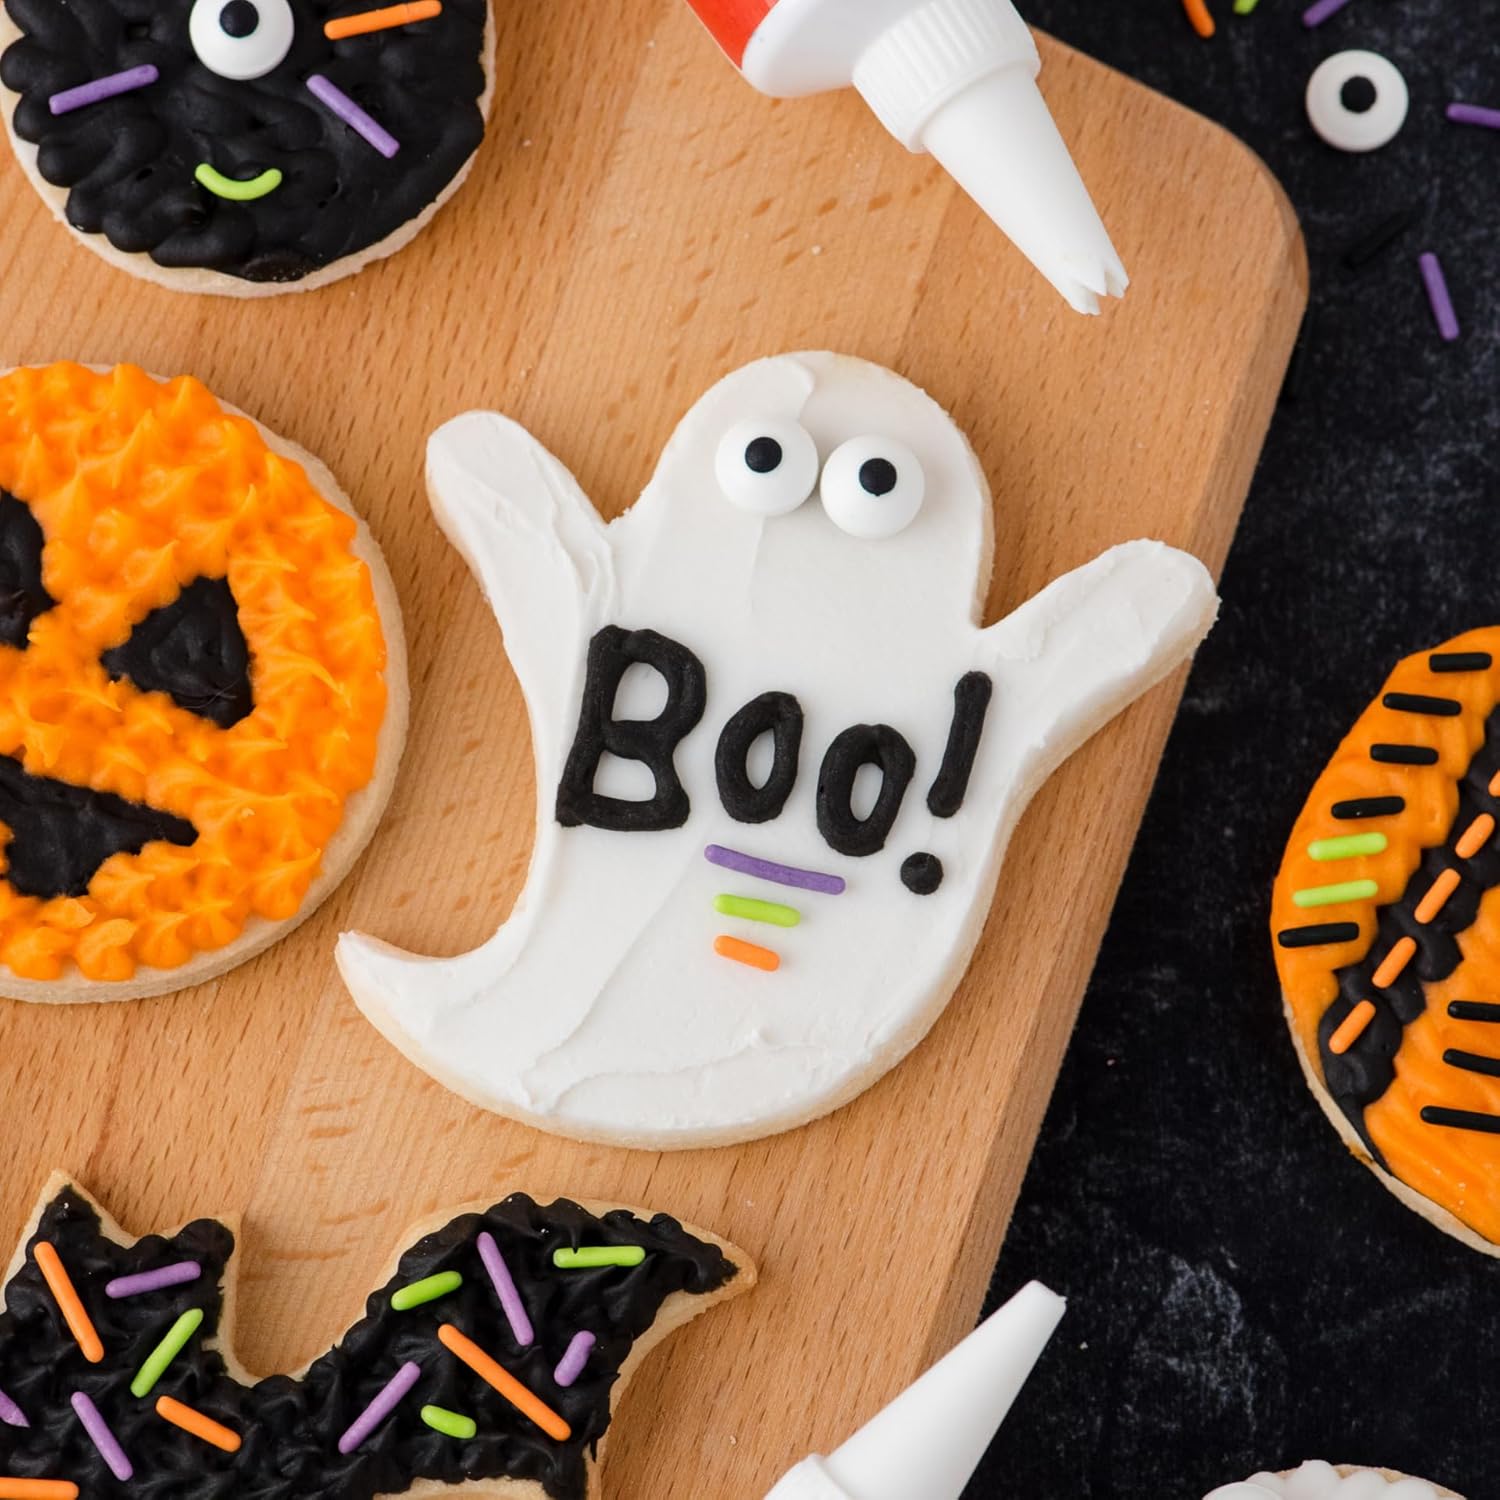
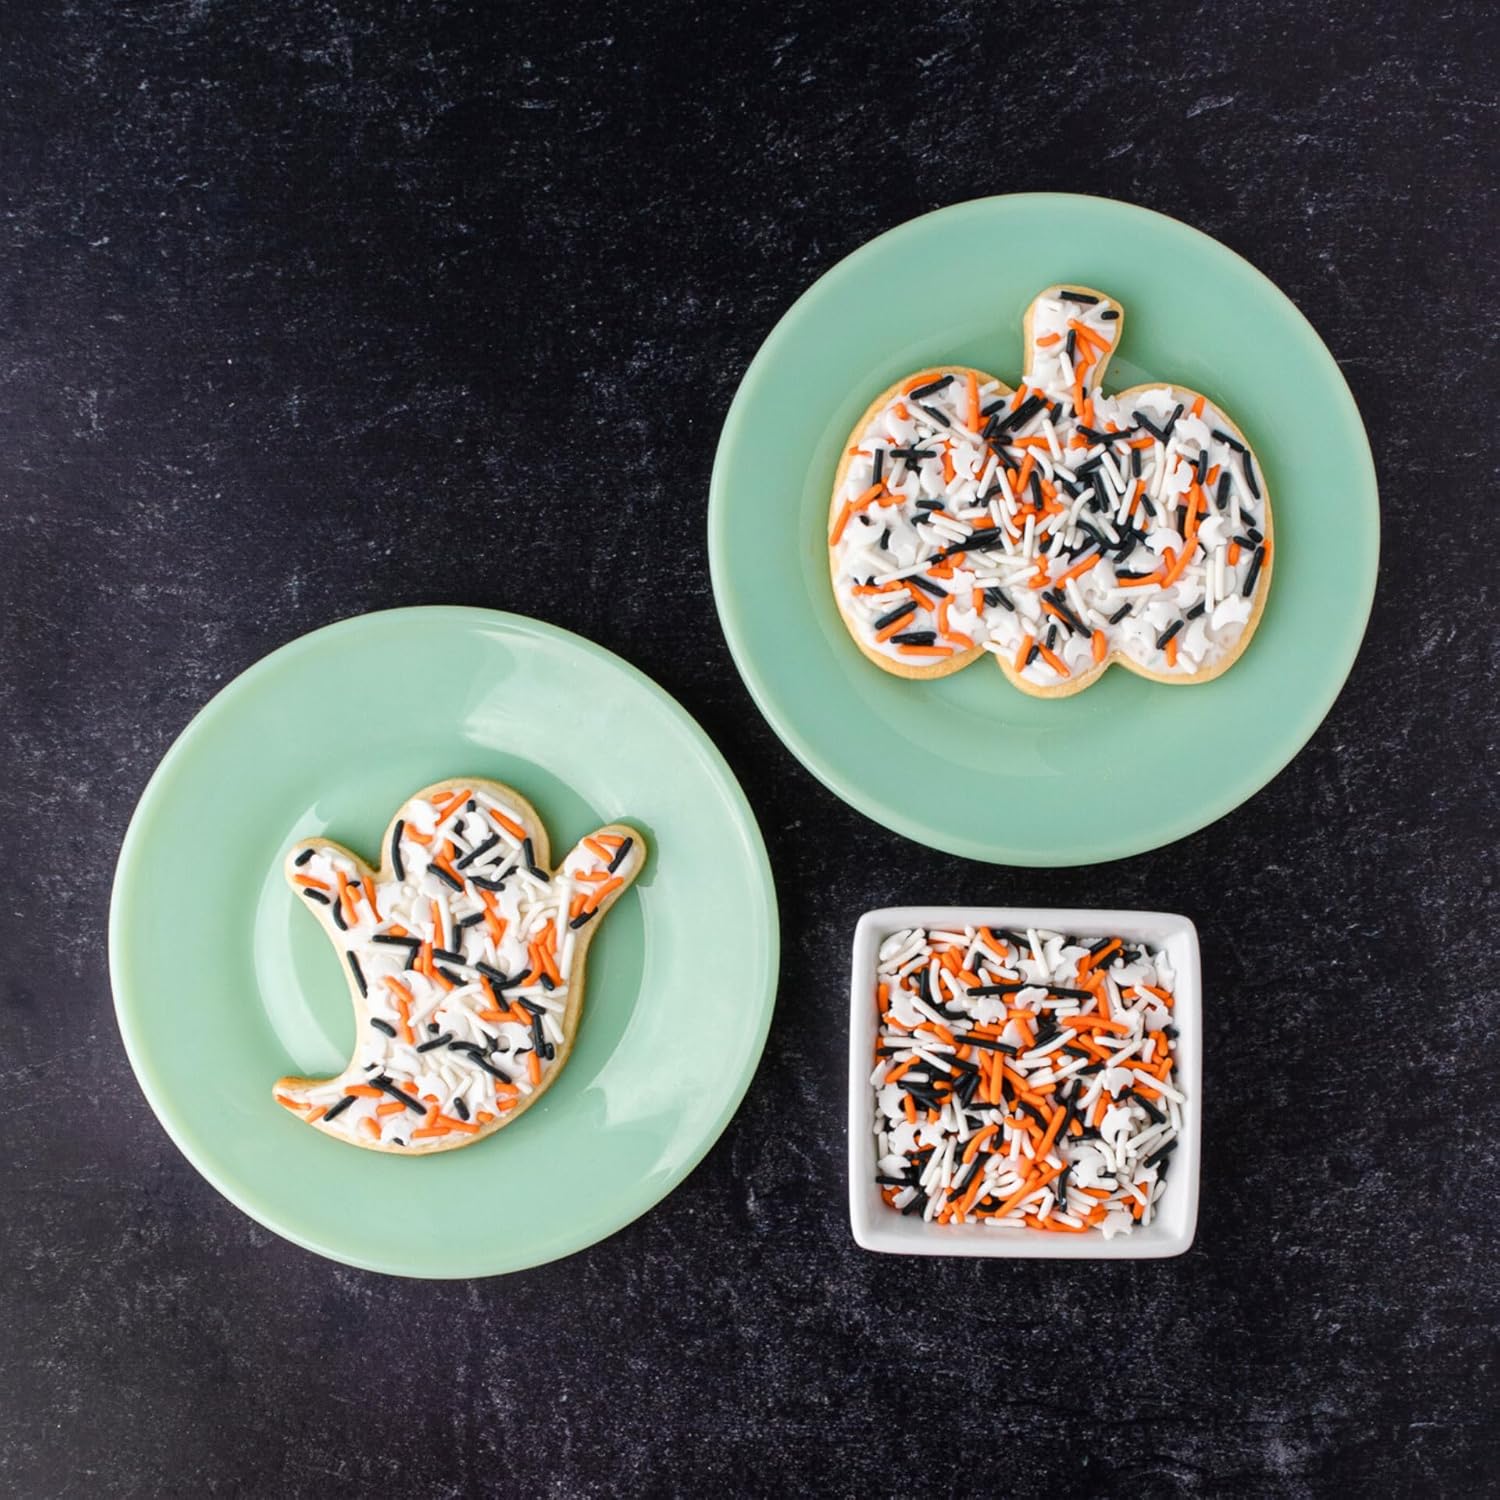
- Classic Halloween Shapes: Embrace the traditional Halloween shapes like pumpkins, ghosts, bats, cats, witches, and spiders. Use cookie cutters to create these shapes and then decorate them with your favorite frosting colors and sprinkles. For pumpkins, consider using orange frosting with green stems and sprinkle accents. Ghosts can be decorated with white frosting and black eyes, or you can add a touch of ghostly shimmer with edible glitter. Bats can be frosted in black and adorned with sugar crystal wings.
- Spooky Scenes: Create miniature Halloween scenes on your cookies. Frost a large, round cookie with blue frosting to represent the night sky. Then, use black frosting to create a silhouette of a haunted house, a spooky tree, or a flying witch. Add sugar crystal stars to complete the scene. You can also create a graveyard scene with tombstone-shaped cookies frosted in gray and adorned with edible skeleton decorations.
- Monster Mash-Ups: Combine different monster features to create unique and whimsical creatures. For example, create a Frankenstein-inspired cookie with green frosting, black stitches, and edible bolts. Or, design a vampire cookie with pale skin, red fangs, and a black cape made of frosting. Let your imagination run wild and create your own original monster characters.
- Personalized Tombstones: Bake tombstone-shaped cookies and frost them in gray. Then, use black frosting to write funny or spooky epitaphs on each tombstone. You can personalize them with the names of your family members or friends. This is a fun and interactive activity that everyone can enjoy.
- Spiderweb Cookies: Frost round cookies with a base color like white or orange. Then, use a piping bag filled with black frosting to create a spiderweb design. Start by piping concentric circles on the cookie. Then, use a toothpick or skewer to drag lines from the center to the edge of the cookie, creating the web effect. Add a small spider made of frosting or a candy spider to complete the design. The intricate designs of spiderweb Halloween sugar cookies are always a crowd-pleaser.
- Jack-o’-Lantern Faces: Decorate pumpkin-shaped cookies with orange frosting and then use black frosting to create classic jack-o’-lantern faces. Experiment with different expressions, from silly and goofy to scary and menacing. You can also use different decorating tips to create unique textures and patterns on the pumpkin face.
These are just a few ideas to get you started. Don’t be afraid to experiment with different colors, sprinkles, and techniques to create your own unique Halloween sugar cookies. Remember to have fun and let your creativity shine!
Tips for Perfect Frosting and Decorating
Achieving professional-looking Halloween sugar cookies requires more than just a good kit and creative ideas. Here are some essential tips to ensure your cookies turn out perfectly:
- Start with a Good Cookie Recipe: The foundation of any great decorated cookie is a solid sugar cookie recipe. Use a recipe that is specifically designed for decorating, as these recipes typically produce cookies that hold their shape well and have a smooth surface for frosting.
- Cool Cookies Completely: Before frosting, ensure your cookies are completely cool. Warm cookies will melt the frosting and cause it to run. Place the cookies on a wire rack to cool completely after baking.
- Prepare Your Frosting Properly: If your frosting requires mixing, follow the instructions carefully. Overmixing can incorporate too much air, making the frosting difficult to work with. Undermixing can result in a lumpy texture. Aim for a smooth, creamy consistency.
- Use Piping Bags and Tips: Piping bags and tips are essential for creating intricate designs and adding details to your cookies. Experiment with different tip shapes and sizes to achieve different effects. Practice piping on a piece of parchment paper before decorating your cookies.
- Outline and Flood Technique: For a smooth and professional finish, use the outline and flood technique. First, use a thicker frosting to outline the cookie. Then, use a thinner frosting to flood the inside of the outline. This creates a raised border that prevents the frosting from running off the edges of the cookie.
- Work in Stages: If you’re creating complex designs, work in stages. Allow the base layer of frosting to dry completely before adding additional details. This will prevent the colors from bleeding together and ensure a clean, professional look.
- Use a Toothpick or Skewer: A toothpick or skewer can be a valuable tool for smoothing out frosting, popping air bubbles, and creating intricate details.
- Don’t Overcrowd Your Cookies: While it’s tempting to add lots of decorations, avoid overcrowding your cookies. A clean and simple design can be just as effective as a complex one.
- Practice Makes Perfect: Don’t be discouraged if your first attempt isn’t perfect. Decorating sugar cookies takes practice. The more you do it, the better you’ll become.
- Have Fun! Baking and decorating Halloween sugar cookies should be a fun and enjoyable experience. Relax, be creative, and don’t take yourself too seriously.
By following these tips, you can create stunning and delicious Halloween sugar cookies that will impress your friends and family. Remember that the goal is to have fun and create memories together. Especially when making unique Halloween sugar cookies, it is about having fun with family or friends.
Beyond the Basics: Advanced Halloween Sugar Cookie Decorating Techniques
For those seeking to elevate their Halloween sugar cookie decorating game, several advanced techniques can help achieve truly stunning results. These techniques require more practice and precision but offer a rewarding level of creative control:
- Wet-on-Wet Technique: This technique involves applying different colors of frosting while they are still wet, allowing them to blend and create intricate patterns. For example, you could create a marbleized effect by swirling different colors of frosting together with a toothpick. This technique is excellent for creating abstract designs or adding depth to your cookies.
- Stenciling: Stencils can be used to create intricate designs on your cookies using powdered sugar, cocoa powder, or edible food coloring. Simply place the stencil on the frosted cookie and dust with the desired medium. Carefully remove the stencil to reveal the design. This technique is ideal for creating repeating patterns or adding fine details to your cookies.
- Airbrushing: Airbrushing allows you to apply thin layers of color to your cookies, creating subtle gradients and shading effects. This technique requires an airbrush machine and edible airbrush colors. Airbrushing is perfect for creating realistic details, adding depth to your designs, or creating a smooth, even finish.
- Edible Markers: Edible markers are a great way to add fine details and lettering to your cookies. Use them to draw faces, write messages, or create intricate patterns. Edible markers come in a variety of colors and tip sizes.
- Royal Icing Transfers: Royal icing transfers are small, detailed decorations that are made separately and then attached to the cookie. To create a royal icing transfer, pipe the design onto a piece of parchment paper and allow it to dry completely. Then, carefully peel the transfer off the parchment paper and attach it to the cookie with a dab of frosting. This technique is ideal for creating delicate details like flowers, leaves, or intricate patterns.
- 3D Cookie Designs: Create 3D effects by layering different shapes of cookies on top of each other. For example, you could create a haunted house cookie by stacking different sized and shaped cookies on top of each other and then decorating them with frosting and sprinkles. This technique requires careful planning and precise cutting, but the results are truly impressive.
Mastering these advanced techniques will allow you to create truly spectacular Halloween sugar cookies that will impress even the most discerning cookie connoisseur. Remember to be patient and persistent, and don’t be afraid to experiment with different techniques to find what works best for you. When creating gourmet Halloween sugar cookies, it is important to explore advanced techniques.
Storing Your Decorated Halloween Sugar Cookies
After all your hard work decorating your Halloween sugar cookies, it’s important to store them properly to maintain their freshness and appearance. Here are some tips for storing your decorated cookies:
- Allow Frosting to Dry Completely: Before storing your cookies, make sure the frosting is completely dry. This will prevent the cookies from sticking together and smudging the frosting. Depending on the frosting recipe and the humidity, this can take several hours or even overnight.
- Store in an Airtight Container: Once the frosting is dry, store the cookies in an airtight container. This will help to prevent them from drying out and becoming stale. You can use a plastic container, a metal tin, or a glass jar with a tight-fitting lid.
- Layer with Parchment Paper: If you’re stacking the cookies in the container, layer them with parchment paper. This will prevent the cookies from sticking together and protect the frosting.
- Store at Room Temperature: Store your decorated sugar cookies at room temperature. Avoid storing them in the refrigerator, as this can cause the frosting to become sticky and the cookies to become soggy.
- Avoid Direct Sunlight: Keep your stored cookies away from direct sunlight, as this can cause the colors to fade.
- Shelf Life: Decorated sugar cookies can typically be stored for up to a week at room temperature without significant loss of quality. However, for the best taste and texture, it’s best to consume them within a few days.
By following these storage tips, you can ensure that your decorated Halloween sugar cookies stay fresh and delicious for as long as possible. Consider using decorative tins or cellophane bags to package your cookies for gifting. They’re perfect for parties or for sharing with loved ones!
FAQ
What are the essential tools I need for decorating Halloween sugar cookies?
Decorating Halloween sugar cookies doesn’t require a massive investment in specialized tools, but having a few key items on hand will make the process much smoother and more enjoyable. First, you’ll need a good set of cookie cutters in Halloween-themed shapes like pumpkins, ghosts, bats, and cats. Next, invest in some piping bags and decorating tips in various sizes and shapes to create different effects. A good frosting spatula is essential for spreading frosting evenly. A set of gel food colors will allow you to create vibrant and festive colors. A toothpick or skewer can be used for smoothing out frosting and creating fine details. Finally, don’t forget a good selection of sprinkles in Halloween colors and shapes. With these essential tools, you’ll be well-equipped to create spooky-licious Halloween sugar cookies.
How do I prevent my frosting from bleeding when decorating Halloween sugar cookies?
Frosting bleed, when colors run together and blur the design, can be a frustrating problem when decorating Halloween sugar cookies. Several factors can contribute to this issue, but thankfully, there are steps you can take to prevent it. Firstly, ensure that your frosting is the correct consistency. If it’s too thin, it will be more prone to bleeding. Secondly, allow each layer of frosting to dry completely before adding additional details. This will create a barrier that prevents the colors from mixing. Thirdly, use gel food coloring instead of liquid food coloring, as gel colors are more concentrated and contain less water. Fourthly, avoid over-saturating the frosting with color, as this can also increase the risk of bleeding. Finally, try using a “crusting” buttercream recipe, which forms a thin crust on the surface that helps to prevent bleeding.
Can I freeze decorated Halloween sugar cookies?
Yes, you can freeze decorated Halloween sugar cookies, but there are a few things to keep in mind to ensure they retain their quality. The key is to freeze them properly to prevent freezer burn and maintain the integrity of the frosting. First, make sure the frosting is completely dry before freezing. Then, individually wrap each cookie in plastic wrap and place them in an airtight container or freezer bag. This will help to protect them from freezer burn. You can store decorated sugar cookies in the freezer for up to 2-3 months. When you’re ready to eat them, thaw them in the refrigerator overnight or at room temperature for a few hours. Keep in mind that the frosting may become slightly softer after thawing, but the cookies should still be delicious. If you’re planning on gifting the cookies, consider freezing them undecorated and decorating them after thawing for the freshest appearance.
What are some allergy-friendly alternatives for frosting and sprinkles?
Catering to allergies is crucial, especially when sharing Halloween treats. Fortunately, there are many allergy-friendly alternatives available for frosting and sprinkles. For dairy-free frosting, consider using a vegan buttercream recipe made with plant-based butter or shortening. You can also use a coconut cream-based frosting or a cashew-based frosting. For gluten-free frosting, ensure that all ingredients are certified gluten-free. Most buttercream recipes are naturally gluten-free. For nut-free frosting, avoid any recipes that contain nuts or nut extracts. Always double-check the ingredient labels of all products to ensure they are free from the specific allergens you’re avoiding. For allergy-friendly sprinkles, look for brands that are specifically labeled as free from common allergens like gluten, dairy, and nuts. You can also make your own allergy-friendly sprinkles using sugar and food coloring.
How do I make my Halloween sugar cookies look more professional?
Achieving a professional look for your Halloween sugar cookies requires attention to detail and a few key techniques. Start with a well-defined cookie shape by using sharp cookie cutters and chilling the dough before baking to prevent spreading. Use a smooth, consistent frosting, either royal icing or buttercream, depending on your preference. Master the outline and flood technique to create a clean border and a smooth, even surface. Use gel food colors for vibrant and precise coloring. Invest in high-quality piping bags and tips for creating intricate details. Don’t overcrowd your cookies with decorations; a simple, well-executed design is often more effective. Practice makes perfect, so don’t be discouraged if your first attempts aren’t flawless. Watch tutorials and experiment with different techniques to refine your skills.
What is the best type of frosting to use for Halloween sugar cookies?
The best type of frosting for Halloween sugar cookies depends on your personal preference and the desired look and texture. Royal icing is a classic choice for decorated sugar cookies due to its smooth, hard finish and its ability to create intricate details. It’s also ideal for layering and creating dimensional designs. However, royal icing can be tricky to work with and requires practice to achieve the correct consistency. Buttercream frosting is another popular option, known for its creamy texture and delicious flavor. It’s easier to work with than royal icing and can be used for spreading, piping, and creating textured designs. However, buttercream doesn’t dry as hard as royal icing and may be more prone to smudging. Ultimately, the best type of frosting is the one that you feel most comfortable working with and that produces the results you desire.
How do I make my Halloween sugar cookies more kid-friendly?
Making Halloween sugar cookies more kid-friendly involves several strategies to cater to their tastes and abilities. Firstly, choose simple and recognizable shapes like pumpkins, ghosts, and bats, which are easy for kids to identify and decorate. Secondly, use bright and vibrant colors in your frosting and sprinkles to capture their attention. Thirdly, provide a variety of sprinkles in different shapes and sizes to encourage creativity. Fourthly, opt for a milder frosting flavor like vanilla or cream cheese, which are generally preferred by children. Fifthly, simplify the decorating process by using squeeze bottles filled with frosting instead of piping bags, which can be challenging for small hands. Sixthly, focus on fun and playful designs rather than intricate details. Finally, embrace the mess and let kids express their creativity without worrying about perfection. The goal is to create a fun and memorable experience that kids will enjoy.
Price: $9.99
(as of Sep 10, 2025 06:47:50 UTC – Details)


