
Best XONOR 16” Posable Halloween Skeleton- Review Halloween Charcuterie Board – Oemiu
XONOR 16” Posable Halloween Skeleton Review & Halloween Charcuterie Board Guide
Halloween is more than just a date on the calendar; it’s an experience. It’s a time for spooky decorations, creative costumes, and of course, delicious treats. Two elements that can significantly elevate your Halloween experience are the XONOR 16” Posable Halloween Skeleton and a thoughtfully curated Halloween charcuterie board. Let’s dive into what makes these two a perfect pairing for a hauntingly good time.
The XONOR 16” Posable Halloween Skeleton: A Detailed Look
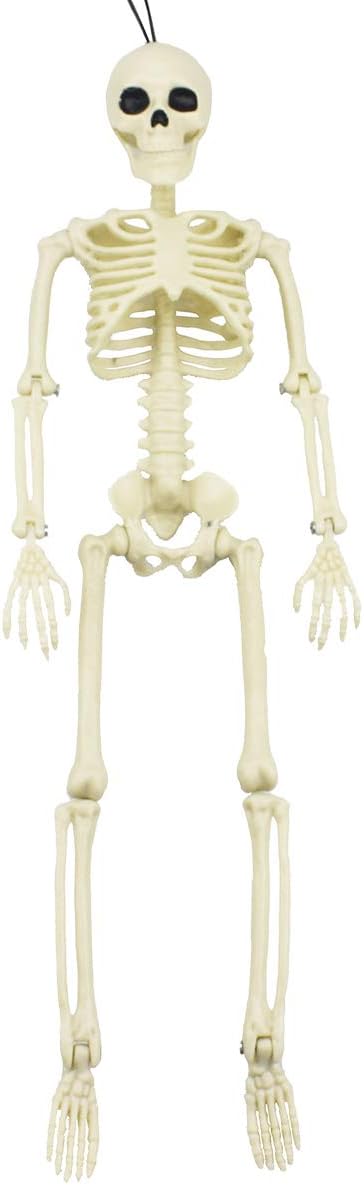
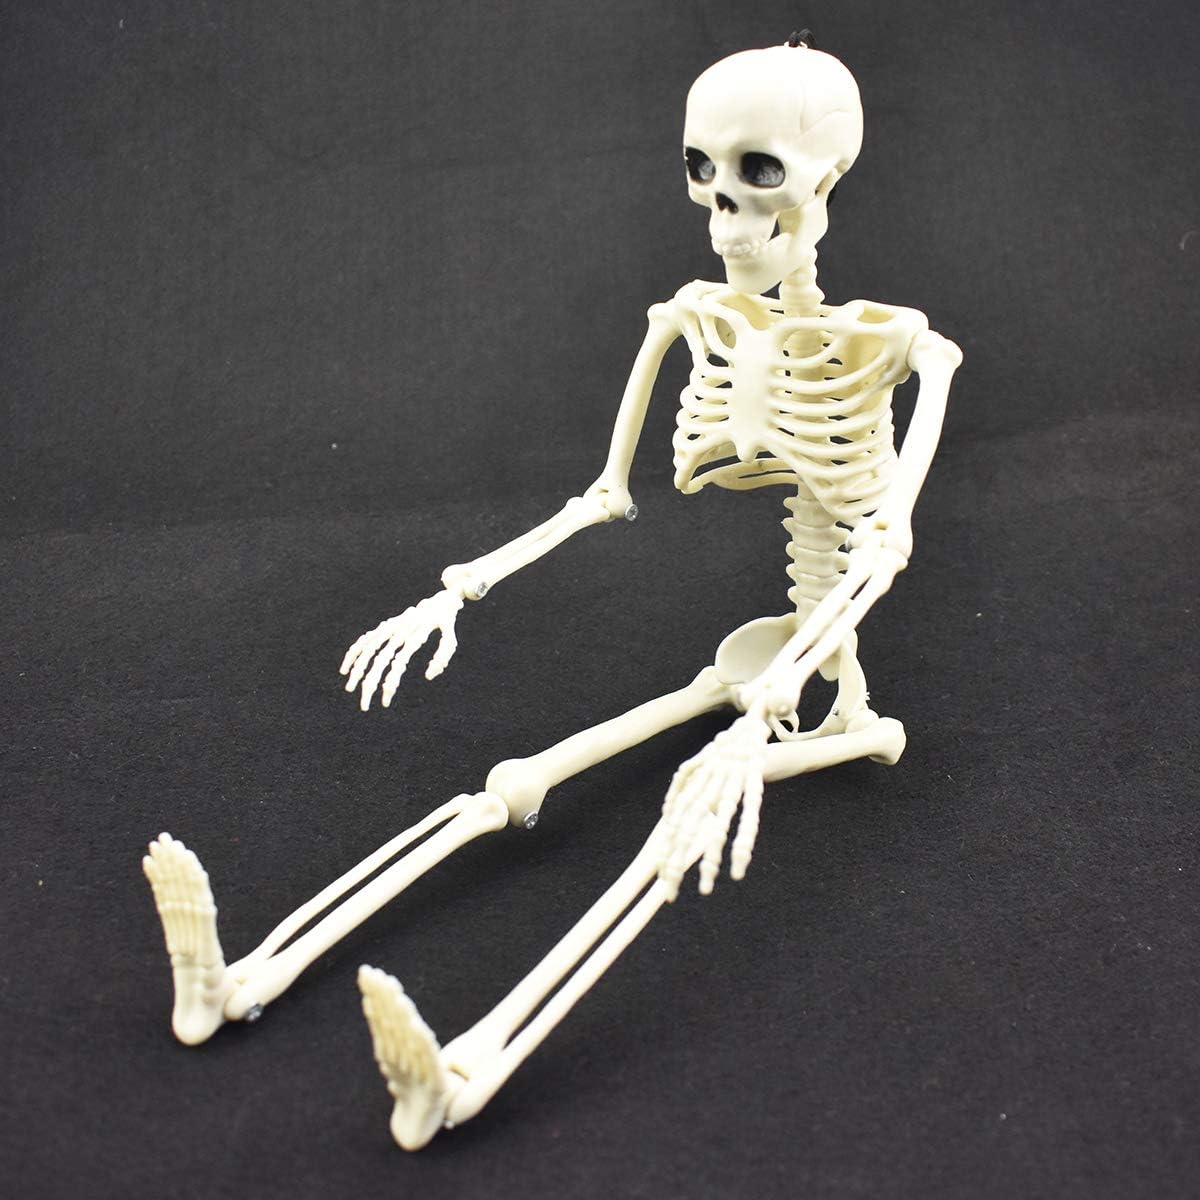
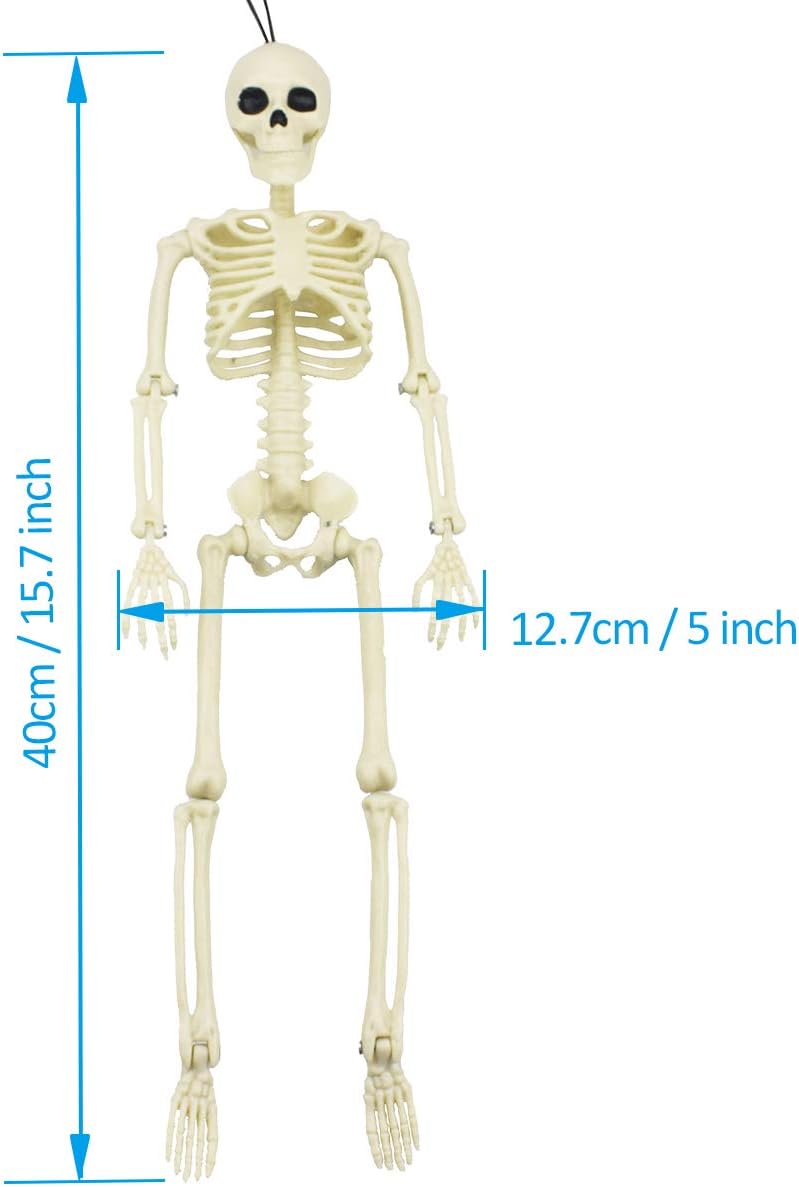
When it comes to Halloween decorations, posable skeletons have become a staple. They offer versatility and the ability to add a touch of playful spookiness to any setting. The XONOR 16” Posable Halloween Skeleton aims to deliver just that. This isn’t just another plastic bone figure; it’s designed with attention to detail and functionality that sets it apart from many of its competitors. The immediate appeal lies in its size. At 16 inches, it’s substantial enough to be noticeable without being overwhelming, making it suitable for both indoor and outdoor displays. Whether you’re looking to add a creepy touch to your porch, a whimsical accent to your living room, or a spooky companion for your Halloween party setup, this skeleton can adapt to your needs.
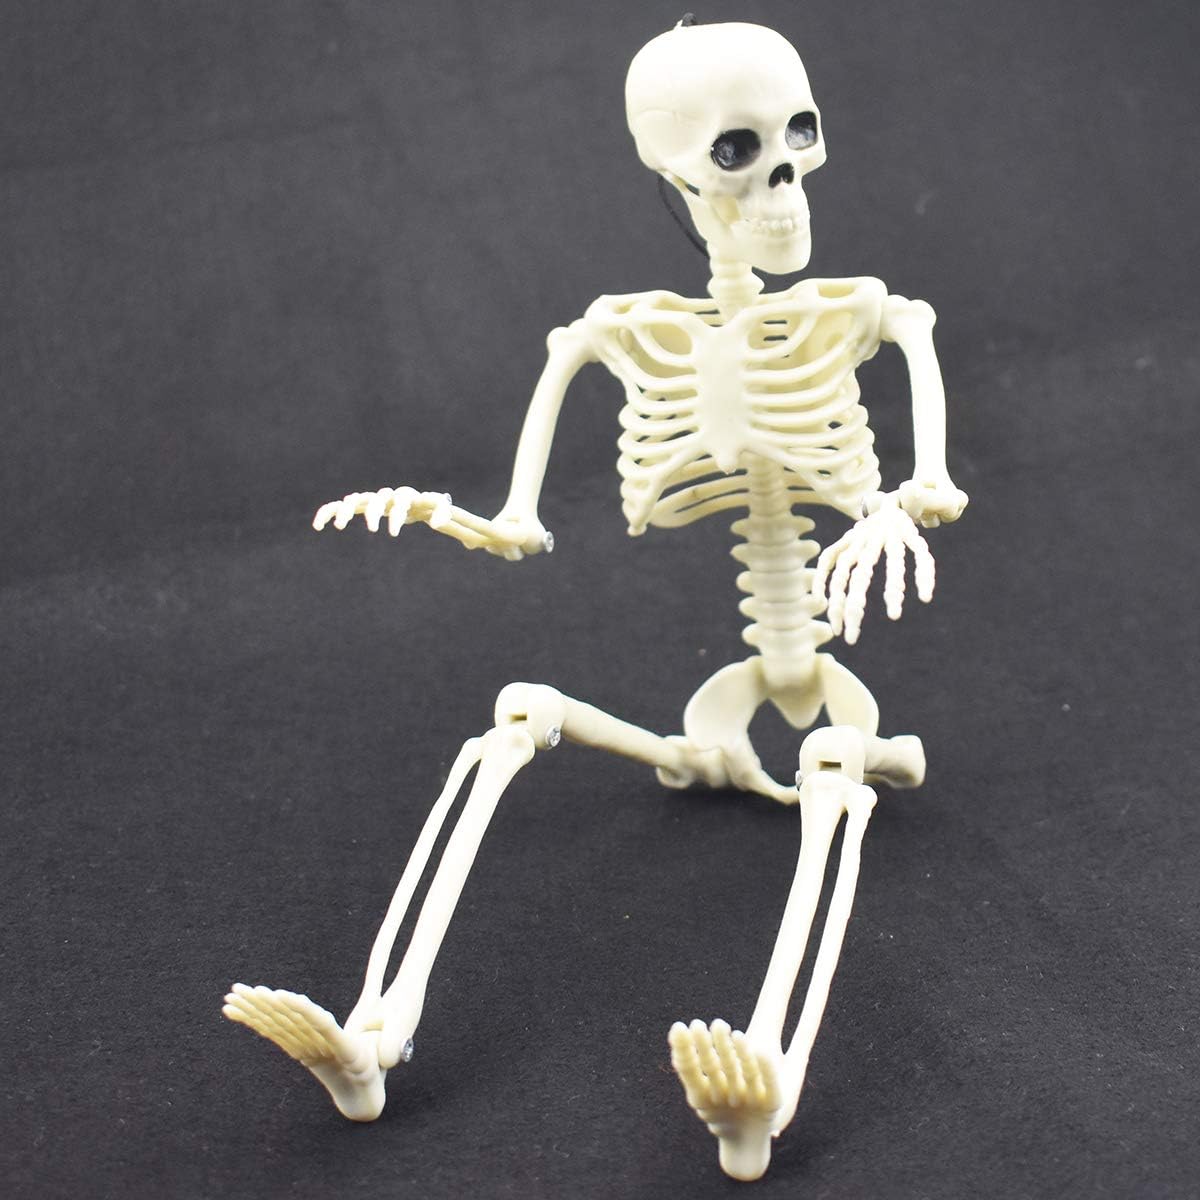
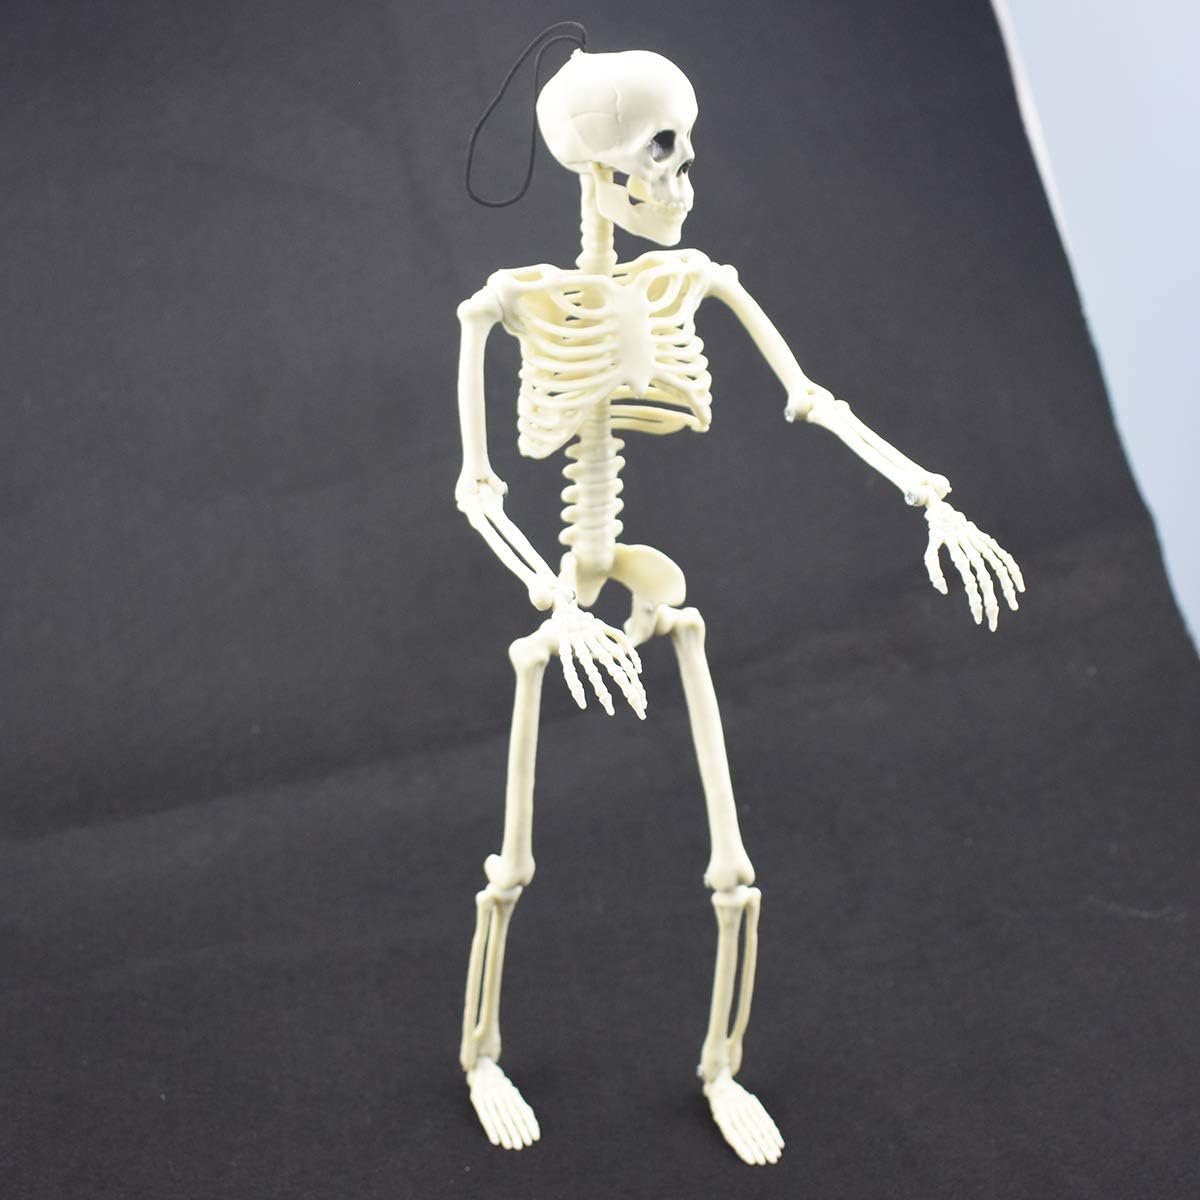
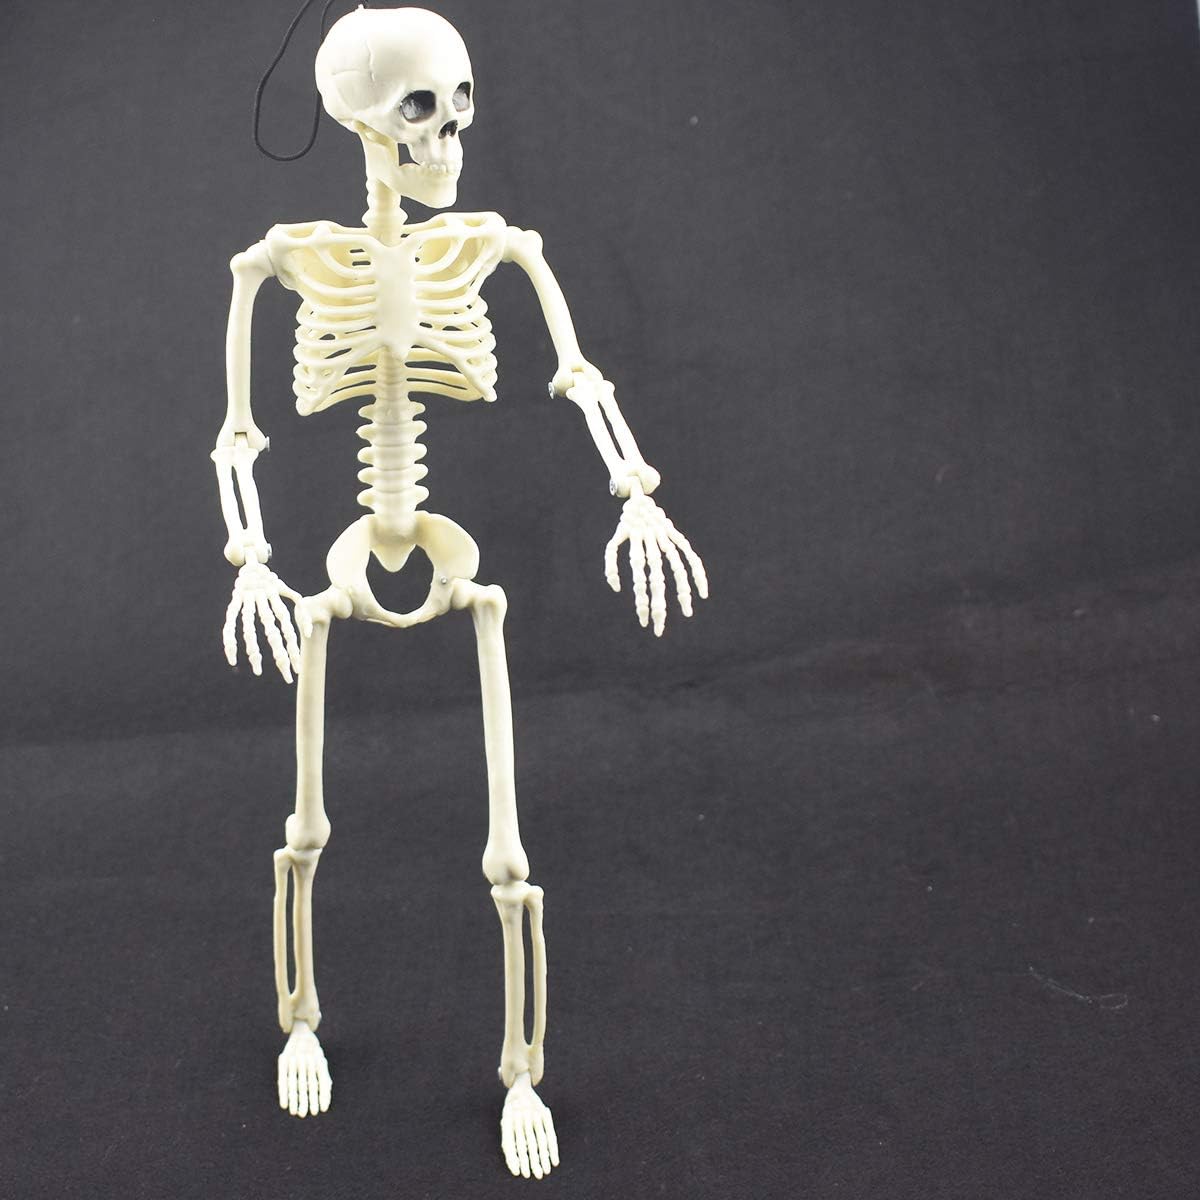
The key feature of this skeleton, as the name suggests, is its posability. The joints are designed to allow for a wide range of movements, enabling you to create dynamic and engaging scenes. You can pose it sitting, standing, waving, or even “dancing” – the possibilities are only limited by your imagination. This posability is achieved through a combination of articulated joints and durable construction. The skeleton is made from a lightweight yet sturdy plastic material that can withstand repeated posing without easily breaking or wearing down. The joints themselves are designed to hold their position securely, so you don’t have to constantly readjust the skeleton’s pose.
Beyond its posability, the XONOR skeleton also boasts a realistic design. The bones are sculpted with a level of detail that mimics the appearance of a real human skeleton. While it’s obviously not intended to be anatomically perfect, the attention to detail adds to its overall appeal and makes it a more convincing prop. The bone color is also carefully chosen to resemble aged bone, further enhancing its realism. This attention to detail is particularly important if you’re aiming for a more sophisticated or realistic Halloween display. It’s not just a cheap plastic toy; it’s a decorative piece that can contribute to a more immersive and believable spooky atmosphere. Furthermore, its relatively compact size allows for easy storage after the Halloween season. You won’t need a huge storage container to keep it safe until next year.
Think about how you could incorporate this skeleton into your Halloween décor. Imagine it perched on a bookshelf, reaching for a Halloween-themed book. Picture it greeting guests at your front door, holding a sign with a spooky message. Consider using it as a centerpiece for your Halloween party table, surrounded by ghoulish treats. The versatility of the XONOR 16” Posable Halloween Skeleton allows you to experiment with different placements and poses, creating unique and memorable Halloween displays. Its presence alongside a well-crafted Halloween charcuterie board will definitely elevate the spooky ambiance.
Pros and Cons of the XONOR Skeleton
Like any product, the XONOR 16” Posable Halloween Skeleton has its strengths and weaknesses. Understanding these can help you make an informed decision about whether it’s the right choice for your needs.
- Pros:
- Excellent posability allows for versatile displays.
- Realistic design with attention to detail.
- Durable construction ensures longevity.
- Compact size for easy storage.
- Affordable price point.
- Cons:
- The plastic material may feel slightly cheap to some.
- The joints may loosen over time with frequent posing.
- It might be too small for large outdoor displays.
Comparing the XONOR Skeleton to Other Options
The market for Halloween decorations is saturated with posable skeletons of varying sizes, quality, and price points. To understand the value proposition of the XONOR skeleton, it’s helpful to compare it to some of its competitors.
| Feature | XONOR 16″ Skeleton | Generic 12″ Skeleton | Deluxe 24″ Skeleton |
|---|---|---|---|
| Size | 16 inches | 12 inches | 24 inches |
| Posability | High | Medium | High |
| Material | Plastic | Plastic | Plastic/Metal |
| Realism | Good | Fair | Excellent |
| Price (Approx.) | $15 | $10 | $30 |
As the table shows, the XONOR skeleton strikes a balance between size, posability, realism, and price. It offers a significant improvement over smaller, less posable skeletons without costing as much as larger, deluxe models. This makes it a great option for those looking for a good value for their money. While a deluxe skeleton might offer superior realism and a more imposing presence, the XONOR skeleton provides a comparable level of posability at a much more affordable price. On the other hand, while a generic skeleton might be cheaper, it often lacks the attention to detail and durability of the XONOR model.
Creating the Perfect Halloween Charcuterie Board: A Step-by-Step Guide
Now, let’s move on to the culinary side of Halloween. A Halloween charcuterie board is a fantastic way to offer a variety of treats and snacks in a visually appealing and engaging way. It’s more than just a plate of food; it’s an edible work of art that can complement your Halloween décor and impress your guests. The beauty of a Halloween charcuterie board lies in its versatility. You can customize it to suit your preferences, dietary needs, and the overall theme of your Halloween party. Whether you’re hosting a spooky movie night, a costume party, or a simple gathering with friends and family, a well-crafted charcuterie board will be a welcome addition. Creating the perfect spooky Halloween charcuterie board is an art that combines flavors, textures, and visual appeal.
The first step in creating your Halloween charcuterie board is selecting the right board. The size and shape of the board will depend on the number of people you’re serving and the amount of variety you want to offer. A large wooden board is a classic choice, providing ample space for arranging your treats. Slate boards can also add a sophisticated touch, while smaller, themed boards (such as coffin-shaped or pumpkin-shaped boards) can enhance the Halloween aesthetic. Once you’ve chosen your board, it’s time to start gathering your ingredients. The key to a successful charcuterie board is to offer a variety of flavors and textures, ensuring that there’s something for everyone to enjoy.
When it comes to savory elements, consider including a selection of cheeses, cured meats, and crackers. Cheeses like cheddar, brie, and goat cheese offer a range of flavors and textures, while cured meats like prosciutto, salami, and chorizo add a salty and savory element. Choose crackers in different shapes and sizes to provide a variety of textures and visual appeal. For a Halloween twist, consider using black pepper crackers or crackers shaped like bats or ghosts. Then add some contrasting colors to your Halloween meat and cheese board like olives, grapes, and pickles can add a burst of freshness and acidity, balancing out the richness of the cheeses and meats. You can also include some nuts, such as almonds, walnuts, or pecans, for added crunch and flavor.
No Halloween charcuterie board is complete without some spooky sweets. Candy corn, chocolate bars, gummy worms, and Halloween-themed cookies are all great options. Consider adding some homemade treats, such as pumpkin spice brownies or ghost-shaped sugar cookies, for a personal touch. You can also include some healthier options, such as apple slices, orange segments, or dried cranberries, to provide a balance to the sugary treats. For a truly Halloween-themed experience, consider incorporating edible decorations, such as candy eyeballs, skeleton sprinkles, or spiderweb icing. These small details can make a big difference in the overall appearance of your charcuterie board, adding to the spooky and festive atmosphere.
Arranging your charcuterie board is an art in itself. Start by placing the larger items, such as cheeses and bowls of dips, around the board. Then, fill in the spaces with smaller items, such as crackers, meats, and candies. Aim for a visually balanced arrangement, with a variety of colors, shapes, and textures. Don’t be afraid to experiment with different layouts until you find one that you like. Remember, the goal is to create a board that is both visually appealing and easy to access. Consider using small bowls or ramekins to contain dips, sauces, or smaller candies. This will prevent them from spreading and making a mess. You can also use skewers to create small bites, such as cheese cubes and grapes, or prosciutto-wrapped melon balls. These bite-sized treats are easy to grab and eat, making them perfect for a party setting.
Creative Halloween Charcuterie Board Ideas
Looking for some inspiration? Here are a few creative Halloween charcuterie board ideas to get you started:
- The Spooky Graveyard Board: Arrange your charcuterie board to resemble a graveyard, using crackers as tombstones, pretzels as fences, and gummy worms as creepy crawlies.
- The Monster Mash Board: Create a monster-themed board with cheeses and meats shaped like monsters, using olives as eyes and pretzel sticks as horns.
- The Pumpkin Patch Board: Use a pumpkin-shaped board as your base and fill it with orange and yellow cheeses, crackers, and candies.
- The Witch’s Brew Board: Create a “witch’s brew” dip using spinach, artichoke, and cheese, and serve it with crackers and vegetables.
Tips for a Budget-Friendly Halloween Charcuterie Board
Creating a Halloween charcuterie board doesn’t have to break the bank. Here are a few tips for creating a budget-friendly board:
- Shop your pantry first: You might already have many of the ingredients you need, such as crackers, nuts, and candies.
- Buy in bulk: Purchasing cheeses, meats, and candies in bulk can often save you money.
- Use seasonal produce: Apples, oranges, and pumpkins are all in season during Halloween and are relatively inexpensive.
- Make your own dips and spreads: Homemade dips and spreads are often cheaper than store-bought versions.
- Get creative with presentation: Use inexpensive materials, such as paper plates and plastic cups, to create a festive presentation.
Themed Halloween charcuterie boards are a fun and creative way to celebrate the holiday. They’re perfect for parties, family gatherings, or even a spooky movie night at home. They’re also a fantastic way to showcase your culinary creativity and impress your guests. With a little planning and imagination, you can create a stunning and delicious charcuterie board that will be the highlight of your Halloween celebration. The perfect Halloween cheese and meat board requires creativity and an understanding of your audience.
Pairing the XONOR Skeleton with Your Halloween Charcuterie Board
Now that you have a grasp on both the XONOR 16” Posable Halloween Skeleton and the art of crafting a Halloween charcuterie board, let’s explore how these two elements can be paired together to create a truly immersive Halloween experience. The key is to think about how the skeleton can complement the charcuterie board, adding a touch of spookiness and whimsy to your presentation. Imagine placing the skeleton next to your charcuterie board, posed as if it’s reaching for a piece of cheese or a candy eyeball. This creates a playful and engaging scene that will surely capture the attention of your guests. You can also use the skeleton to hold small bowls of dips or sauces, adding a functional element to its decorative role. The skeleton becomes an interactive part of the food display, inviting guests to engage with both the decoration and the treats.
Another idea is to incorporate the skeleton into the overall theme of your charcuterie board. For example, if you’re creating a graveyard-themed board, you can place the skeleton in the center, surrounded by cracker “tombstones” and gummy worm “creepy crawlies.” This creates a cohesive and immersive experience that ties together the decoration and the food. You can even pose the skeleton in a way that tells a story, such as having it “rise” from the graveyard or “guard” the treats. The possibilities are endless, and the only limit is your imagination. Consider using the skeleton to highlight specific elements of your charcuterie board. For example, you can pose it pointing towards a particular cheese or candy, drawing attention to that specific item. This can be a fun way to guide your guests through the board and encourage them to try different treats. You can also use the skeleton to create a sense of anticipation, such as having it “peek” out from behind a bowl of dip, hinting at the deliciousness that awaits. In summary, creating a Halloween themed cheese and charcuterie board coupled with a posable skeleton provides a great visual and interactive experience.
FAQ
What are some easy Halloween charcuterie board ideas for beginners?
For beginners, start with a simple spooky Halloween charcuterie board that requires minimal effort. Focus on visually appealing arrangements using readily available ingredients. Consider a “monster mash” theme with cheeses cut into monster shapes using cookie cutters. Add some crackers, grapes (green for a monster effect), and maybe some gummy worms or candy eyeballs. Use a smaller board to avoid feeling overwhelmed and arrange items in clusters, leaving space between them. Don’t worry about perfection; the goal is to have fun and create something spooky and tasty! You can also use store-bought dips like spinach artichoke and label them “swamp slime.” Remember to prioritize familiar tastes and avoid overly adventurous ingredients when first starting out.
How can I make my Halloween charcuterie board more visually appealing?
To boost the visual appeal, focus on color contrast and varied textures. Use a dark-colored board (slate or black wood) as a base to make bright cheeses and candies pop. Cut cheeses into different shapes using cookie cutters (bats, ghosts, pumpkins). Incorporate edible decorations like candy eyeballs, spiderweb sprinkles, and skeleton candies. Arrange items in a non-symmetrical way to create visual interest. Use height by stacking crackers or cheeses. Place larger items strategically to anchor the board and fill in the gaps with smaller elements. Consider adding greenery like rosemary sprigs or kale leaves for a natural, spooky touch. Remember that negative space is also important, avoid overcrowding the board.
What are some good cheese and meat pairings for a Halloween themed charcuterie board?
For a spooky Halloween charcuterie board, think about cheese and meat pairings that offer contrasting flavors and textures. Pair a creamy brie with prosciutto for a sweet and salty combination. Offer a sharp cheddar with salami for a classic pairing with a bit of bite. Include a tangy goat cheese with dried cranberries and pecans for a festive flavor profile. For a bolder option, try a smoked gouda with chorizo. Present the cheeses and meats in visually appealing ways, like rolling the prosciutto into roses or cutting the cheddar into pumpkin shapes. Don’t be afraid to try something new, a little experimentation can lead to the discovery of new favorite pairings.
How do I keep my Halloween charcuterie board fresh during a party?
To maintain freshness during a party, avoid assembling the board too far in advance. Cut cheeses and meats right before guests arrive to prevent drying out. Wrap the board in plastic wrap and refrigerate it until serving time. Use chilled serving platters to help keep items cool. Offer dips and spreads in small bowls and replenish them as needed. Avoid placing the board in direct sunlight or near a heat source. Consider using toothpicks or skewers to prevent guests from directly touching the food. Have extra ingredients on hand to refresh the board throughout the party. For cheese, consider using a cheese dome or covering it with damp cheesecloth in the refrigerator until serving. Try to avoid the temptation to use all the ingredients at once.
Can I make a vegan Halloween charcuterie board?
Absolutely! A vegan Halloween charcuterie board can be just as spooky and delicious. Use plant-based cheeses made from cashews, almonds, or soy. Offer vegan charcuterie like marinated artichoke hearts, roasted red peppers, and sun-dried tomatoes. Include a variety of vegan crackers, pretzels, and breadsticks. Add plant-based dips like hummus, guacamole, or vegan spinach artichoke dip. Offer seasonal fruits and vegetables like apple slices, orange segments, and pumpkin chunks. Don’t forget the spooky sweets – vegan gummy worms, dark chocolate, and homemade vegan cookies. You can even add some savory elements like roasted pumpkin seeds or spiced nuts for added texture and flavor. The possibilities are vast and incredibly tasty!
What are some unique and spooky Halloween charcuterie board themes?
Beyond the graveyard or monster mash, try a “witch’s apothecary” theme with cheeses and meats arranged to resemble potions and ingredients. Label each item with a spooky name, like “dragon scales” for prosciutto or “bat wings” for crackers. A “spiderweb” theme can be achieved by drizzling melted chocolate over the board to create a web, then placing spiders made from olives or candy around it. A “haunted forest” theme can incorporate edible moss (made from crushed pretzels and green food coloring) and mushrooms (made from cheese and crackers). A “vampire’s feast” theme can focus on dark colors and bloody-looking dips, like beet hummus or raspberry jam, paired with black olives and dark chocolate.
How can I adapt a Halloween charcuterie board for different dietary needs (gluten-free, dairy-free, nut-free)?
Adapting a Halloween charcuterie board for different dietary needs requires careful planning. For gluten-free guests, use gluten-free crackers, breadsticks, and pretzels. Ensure that any dips or spreads are also gluten-free. For dairy-free guests, use plant-based cheeses and avoid any dairy-based dips or spreads. For nut-free guests, carefully check the labels of all ingredients to ensure they are nut-free. Avoid using any nuts as decorations or garnishes. Clearly label all items on the board to indicate which ones are gluten-free, dairy-free, or nut-free. Consider creating separate smaller boards for guests with specific allergies or dietary restrictions to avoid cross-contamination. Most importantly, communicate with your guests beforehand to understand their specific needs and preferences.

Price: $6.99 - $5.99
(as of Sep 10, 2025 04:04:53 UTC – Details)


